|
It's here! Well… it's almost here… but close enough to have a little pre-launch celebration for my NEW Craftsy Class: Introduction to Crochet Cables
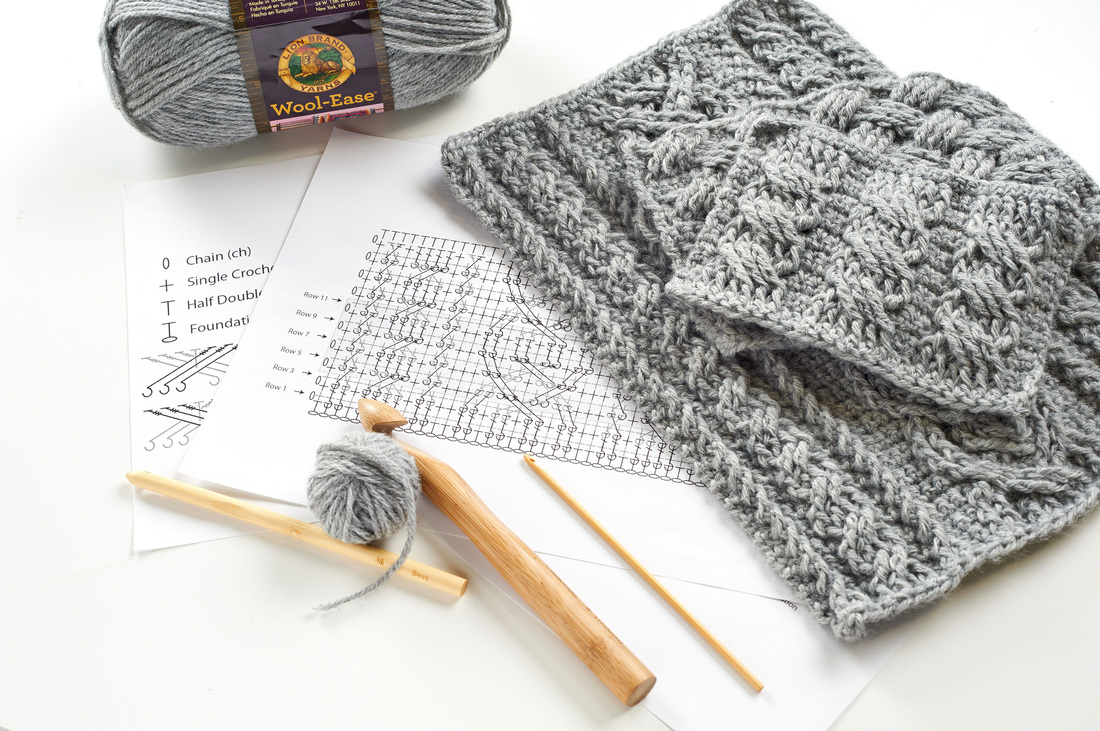
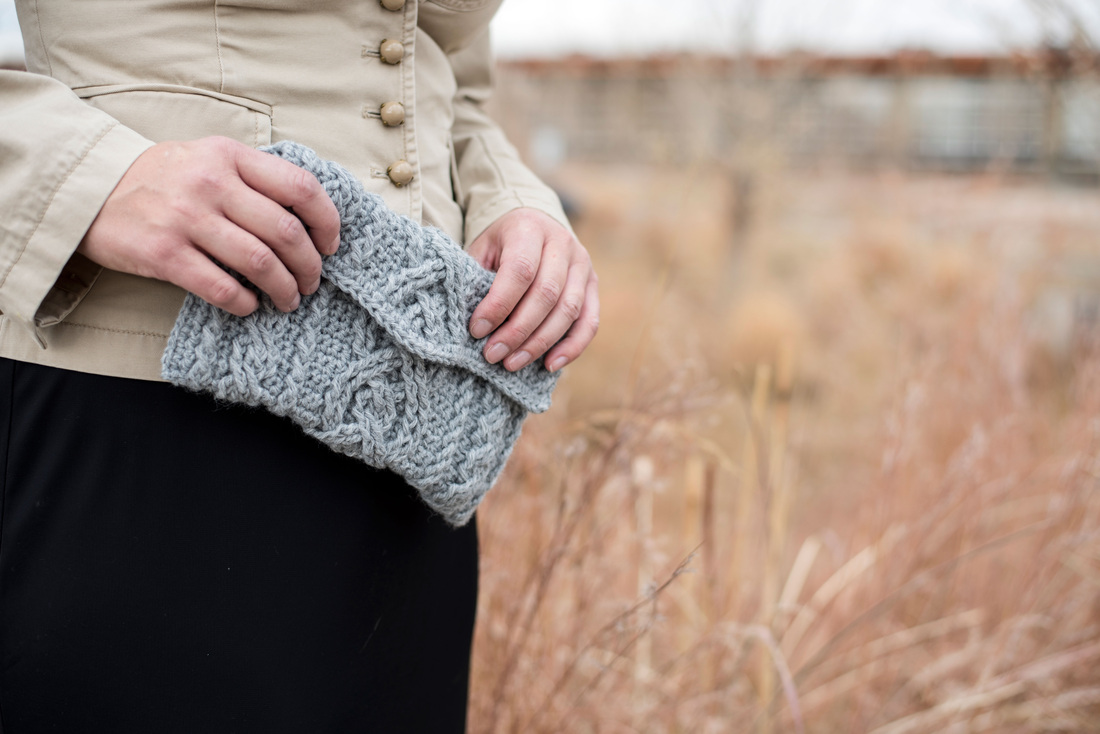
So some of you probably had a little clue that we had a class in the works with the folks at Craftsy but now we can let the proverbial cat out of the bag. WOOHOO!! As you can see, this class is a FAB fav topic of ours: Crochet Cables. We LOVE crochet cables and in this class I take you step-by-step through the process of how to make basic crossed stitches all the way through those glorious sweeping, turning, dramatic cables we all love. Along the way, I share all of my tips and tricks to make crochet cables fun and easy! The exciting part is I teach you all of this using a FAB project! You get to apply what you are learning right away without wondering how you are going to use these stitches in real life. 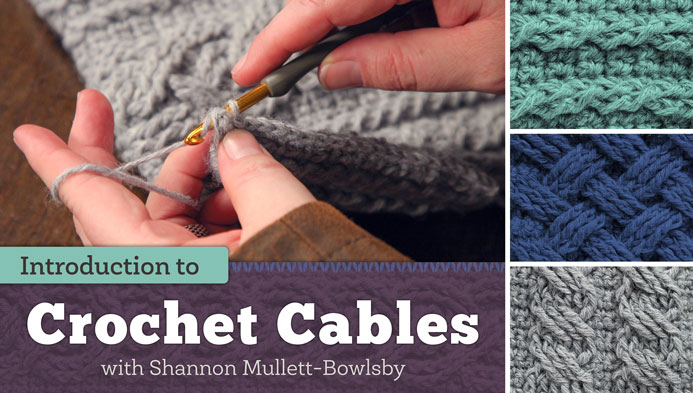
Oh yeah… if you've been around here very much, you've probably noticed one of the small photos is of our WILDLY popular Woven Cables crochet pattern stitch. Yes, there's even a segment of this class where we walk you through the Woven Cables pattern stitch step-by-step! We designed this class with so much FAB information… when you are finished, you'll be shocked by how nimble your crochet hook is around cables!
My class Introduction to Crochet Cables is coming out REALLY soon! WOOHOO!! To celebrate, the folks at Craftsy are letting us give away FREE access to my class to one of our fans. That's YOU! All you have to do is follow this link to enter: Update 01/27/15: This giveaway has ended! Congratulations to Peta P for winning! Didn't win? That's okay! Our Craftsy Crochet Class is now LIVE and you can join us in class by going to: www.craftsy.com/ext/ShannonMullett-Bowlsby_4975_F Can't wait to work with all of you to make you masters of crochet cables!! Stitch On!! S&J  This is no GAME! Don't let your spring be STARK because you were DRAGON and didn't start your crochet and knitting project early enough!
Click the "Read More" link below to read the full story.
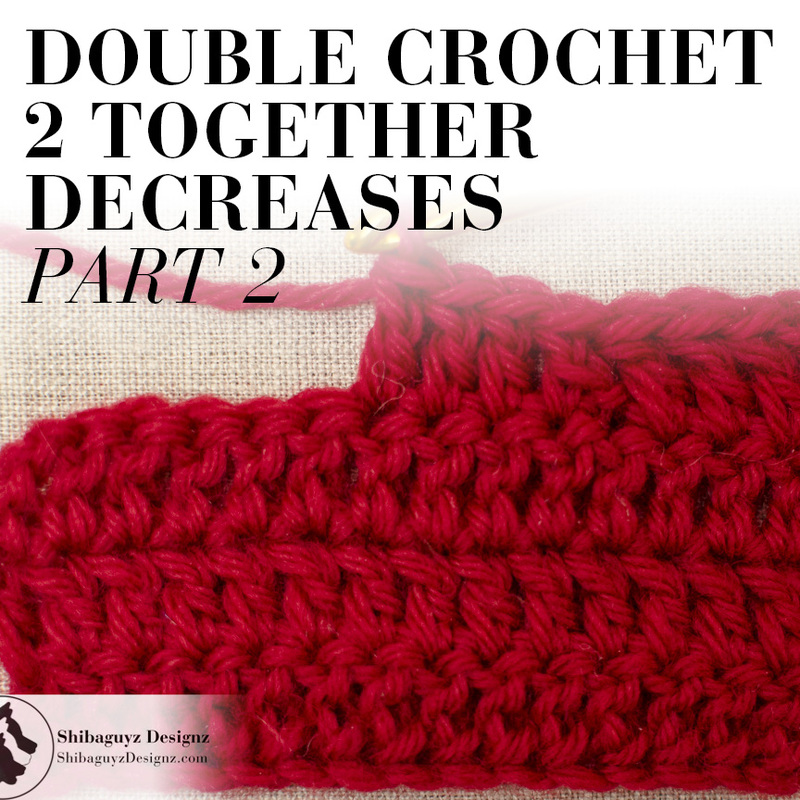
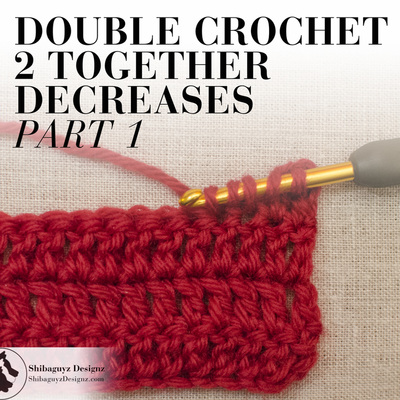
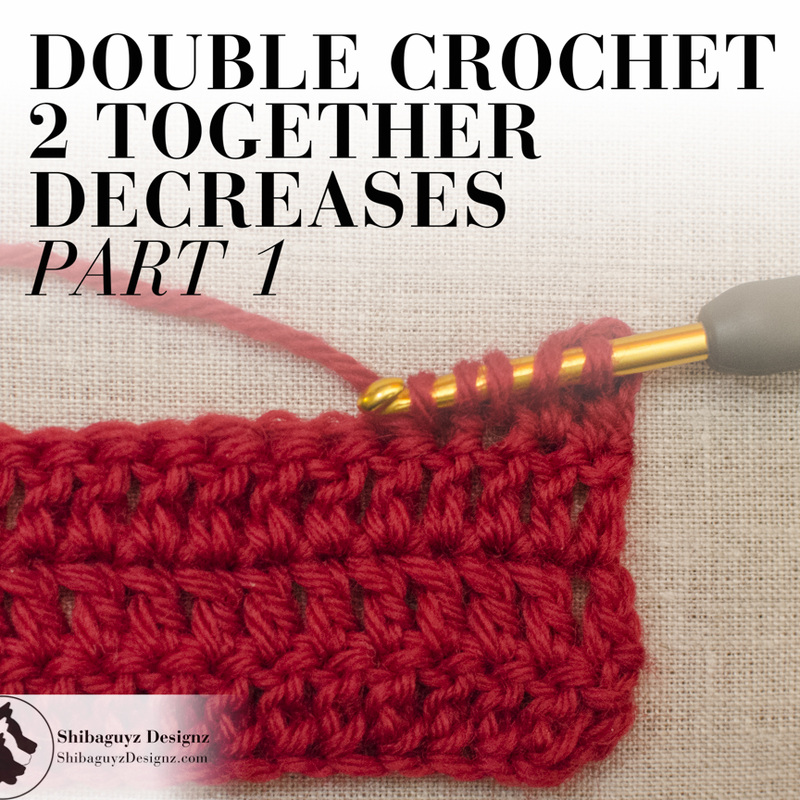
 Six Ways To Make the Double Crochet 2 Together Decrease – Part 2: Three MORE Compound Stitch TechniquesTechnique Double Crochet 2 Together Decreases
More accurately, one Compound Double Crochet Stitch is made in place of two Double Crochet stitches. Compound Crochet Stitches are those stitches that are made up of two or more elements of other crochet stitches. When making a Compound Crochet Stitch, we combine the elements of two or more crochet stitches to make one NEW crochet stitch. In this tutorial and in Part 1, we explore the use of these Compound Crochet Stitches to combine the elements of two Double Crochet stitches to create one Double Crochet 2 Together (dc2tog) stitch. As we said in the title of this tutorial, this is the second of a two part tutorial and contains techniques 4–6 of the SIX techniques we use for making the Double Crochet 2 Together (dc2tog) decrease. Yup… six… To catch up on the techniques 1–3, go to our post from a couple of weeks ago at the link below: Six Ways To Make the Double Crochet 2 Together Decrease – Part 1: The First Three Techniques Don't worry… we'll wait for you to go and come back… Oh good! You're back… Now on with today's tutorial! Click the "Read More" link for the full tutorial.
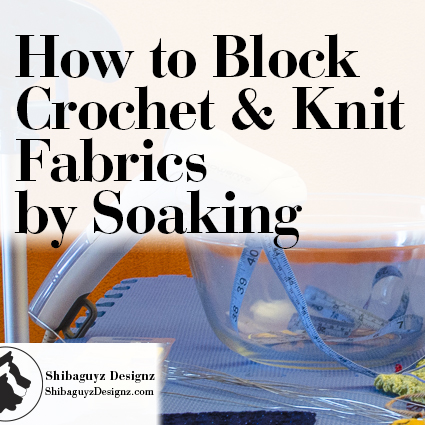
 Technique How to Wet Block Crochet and Knit Fabrics by Soaking
By that definition ALL blocking is wet blocking since all blocking involves the introduction of water into the fibers used to create the crochet or knit fabric. Attempting to block your fabrics without any type of moisture is only going to pull and stretch your stitches out of shape and will not result in an evenly blocked finished piece. Introducing water into your fabrics is the all-important first step of blocking.
Specifically, for today's tutorial, we are going to be covering the steps for soaking your fabrics for blocking. 
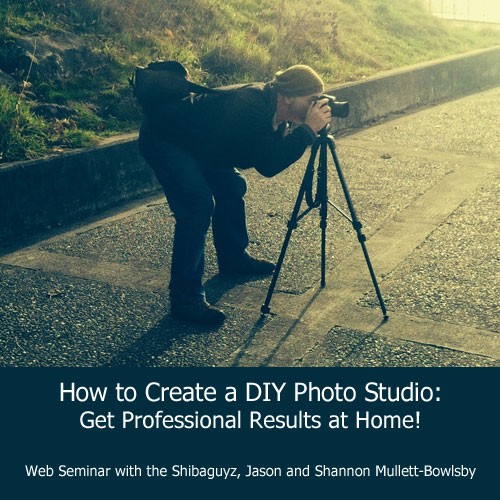
Live Web Seminar: The DIY Photography StudioWe are very excited to announce our LIVE web seminar: How To Create A DIY Photo Studio - Get Professional Results At Home. This webinar is presented by F&W Media, the folks who bring us publications like Interweave Crochet, Beadwork, Interweave Knits, Quilting Arts, Spin-Off, and MANY more! We hear from so many of you who want to take classes with us but just can't get to where we are teaching. This is the PERFECT solution! Now you can just turn on your computer and interact with us live and in person from the comfort of your own home or anywhere you can stream content on your devices. WOOHOO!!
But hey… you probably REALLY want to go get registered now so jump on over to the Interweave store at the link below and sign up!
How To Create A DIY Photo Studio - Get Professional Results At Home. Live web seminar with Shibaguyz Photography. See you in the virtual classroom!! S&J 
The Shibaguyz Take Manhattan!Once again this year, Jason will be working his photography skillz at the Westminster Kennel Club Dog Show in New York. Last year, he went by himself while I stayed home and worked on a book deadline but NOT THIS YEAR! This year, we are heading to the opposite coast a few days early to conduct a day of workshops with the FAB folks at the New York City Crochet Guild. We will be conducting two workshops on February 14th: The Joy of Ribbing & Crochet Cables: Put a little twist in your stitches! At the time of this post, seat are almost sold out! So… if you are a member of the NYC Crochet Guild (or know someone in the guild) hurry and sign up today! 
Want to book Shibaguyz Designz for your next guild meeting, fiber festival, or show? Check out our classes page at the link below and drop us a line! Crochet, Knitting, and Photography Classes by Shibaguyz Designz Stitch On! S&J  Six Ways To Make the Double Crochet 2 Together Decrease – Part 1: The First Three Techniques Technique Double Crochet 2 Together Decreases
More accurately, one Compound Double Crochet Stitch is made in place of two Double Crochet stitches. That is, the elements of two Double Crochet stitches are combined to create one compound stitch. Therefore, we are using Compound Crochet Stitches to decrease in Double Crochet stitches. As we said in the title of this tutorial, this is Part 1 of 2 and contains the first three of SIX techniques we use for making the Double Crochet 2 Together (dc2tog) decrease. Yup… six…  Technique Tuesday – How To Make the Foundation Double Crochet Stitch
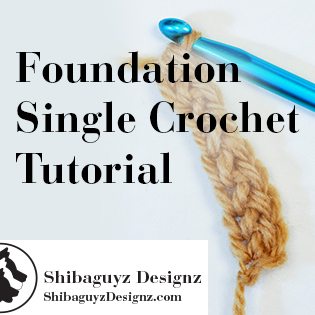
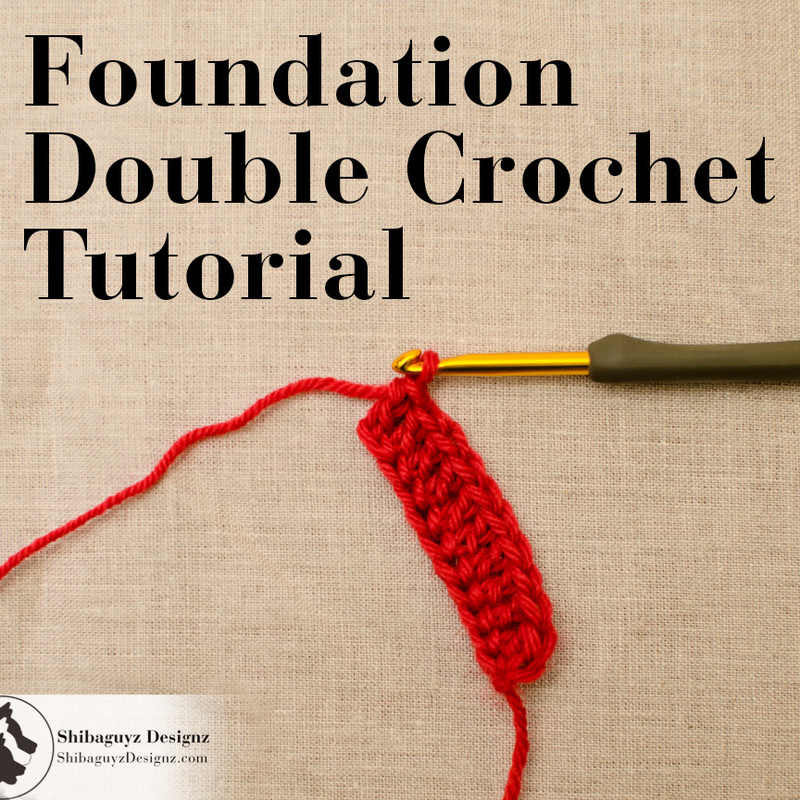
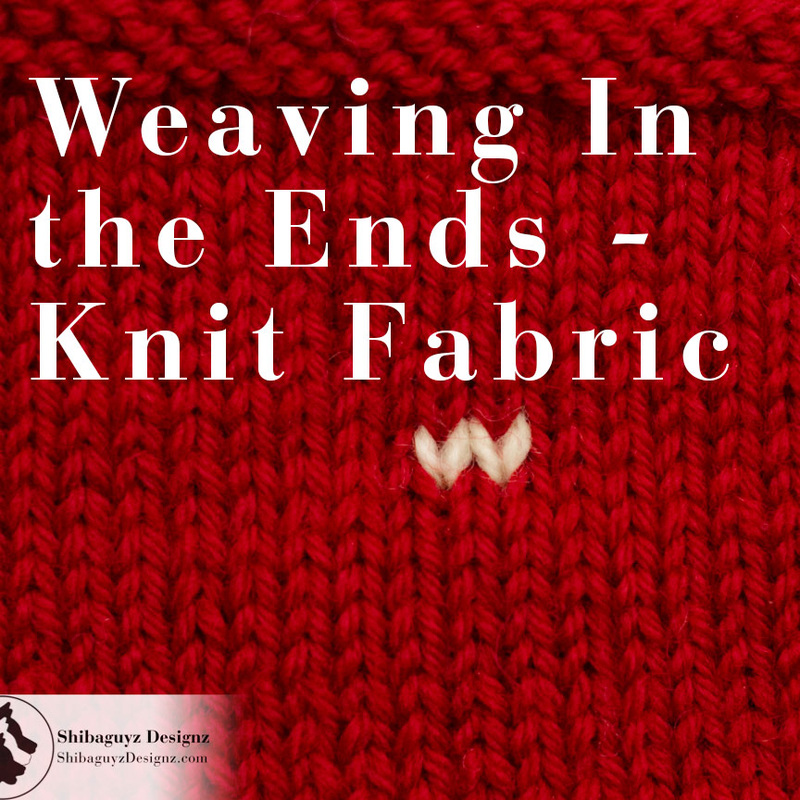
What is it? The Foundation Double Crochet stitch technique (abbreviated Fdc) is an alternative to the instructions at the beginning of a crochet pattern that tell you to chain a certain number of stitches. This technique simultaneously creates a row of "chain" stitches AND a row of Double Crochet stitches (abbreviated dc) without making two passes. Basically, it takes the place of two rows of stitches: the "chain" row that makes up the beginning base and the next row of Double Crochet stitches worked into that row of chains. As with our Foundation Single Crochet and Foundation Half Double Crochet tutorials, we are using " " around the word chain because this isn't REALLY a chain stitch but it LOOKS like a chain stitch when the stitch is completed. Be sure to go check out our other foundation stitch tutorials: How To Make the Foundation Single Crochet Stitch How To Make the Foundation Half Double Crochet Stitch Why Use It? The primary reason we use foundation stitches like the Foundation Double Crochet stitch in our work is the elasticity or, more accurately, the consistent stitch tension, it provides at a hem, cuff, neckline or any beginning section of crochet stitches. A crochet chain row tightens up significantly once the next row of stitches is worked into it because the loops of a crochet chain are made by pulling new loops through previously made loops. Since the chain loops are connected to one another this way, pulling on one of the loops by inserting a hook into the chain and making a stitch there tightens the neighboring loops. The result is a chain that is significantly shorter than we probably need and a fabric edge with little or no elasticity at all. And, unfortunately, even the almighty fix-all techniques in blocking will only get you so far… fibers only stretch so much before they are ruined or "killed" zapping them of all bounce and elasticity. This unfortunate tightening of stitches doesn't happen when using the Foundation Stitch technique since the "chains" we make are connected to the stitch (Single Crochet, Half Double Crochet, Double Crochet, etc…) we create simultaneously on top of the "chain". The next "chain" we make is created by coming through the side of the previous stitch and does not affect the tension of the preceding or following "chains."  How To Weave In the Ends Of Yarn Tails On Your Knitting ProjectsTechnique Weaving in the ends on your knitting projects.
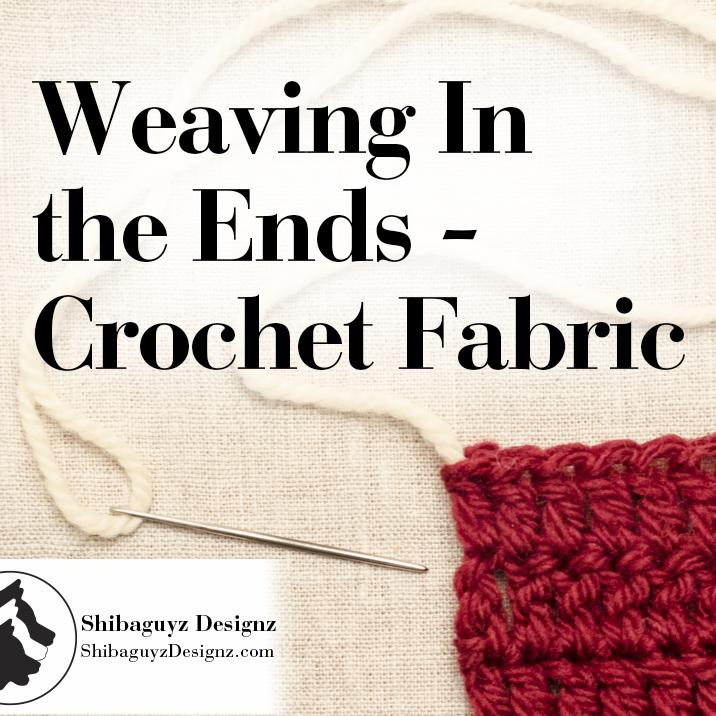
 How To Weave In the Ends Of Yarn Tails On Your Crochet Projects Technique Weaving In the Ends On Your Crochet Projects
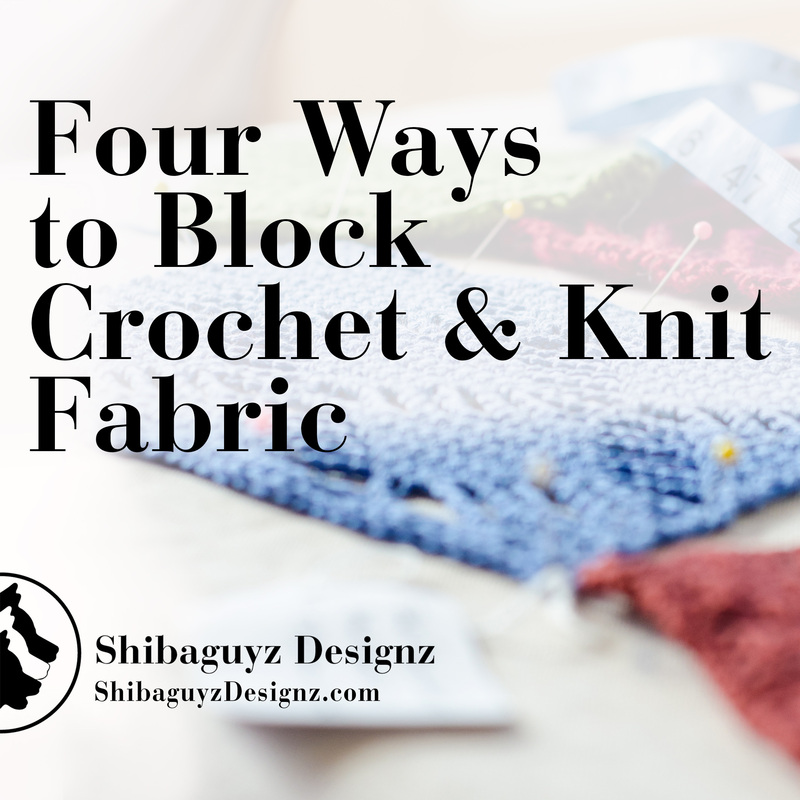
 Four Techniques for How To Block Your Crochet and Knit FabricsTechnique Four Ways to Block Crochet and Knit Fabrics
Introducing the first pattern in the Shibaguyz Designz Indie Maker pattern line.  Let the grand experiment begin! Ever since we have started creating crochet and knit patterns, folks have been asking us: "Can I sell the finished item from your patterns?"
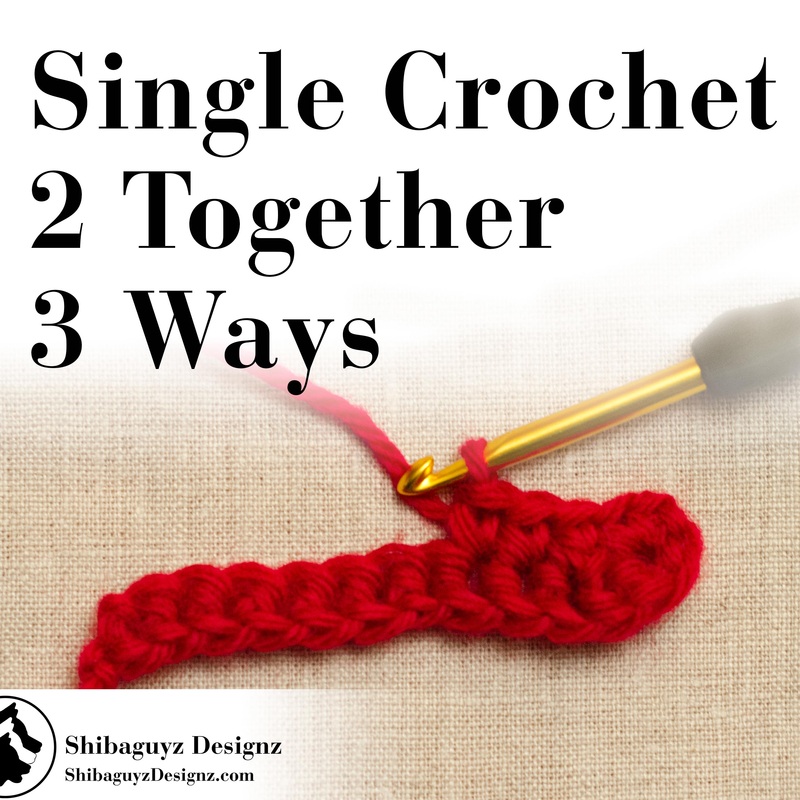
 Three Ways To Make the Single Crochet 2 Together Decrease (sc2tog) Technique Single Crochet 2 Together (sc2tog) Decrease
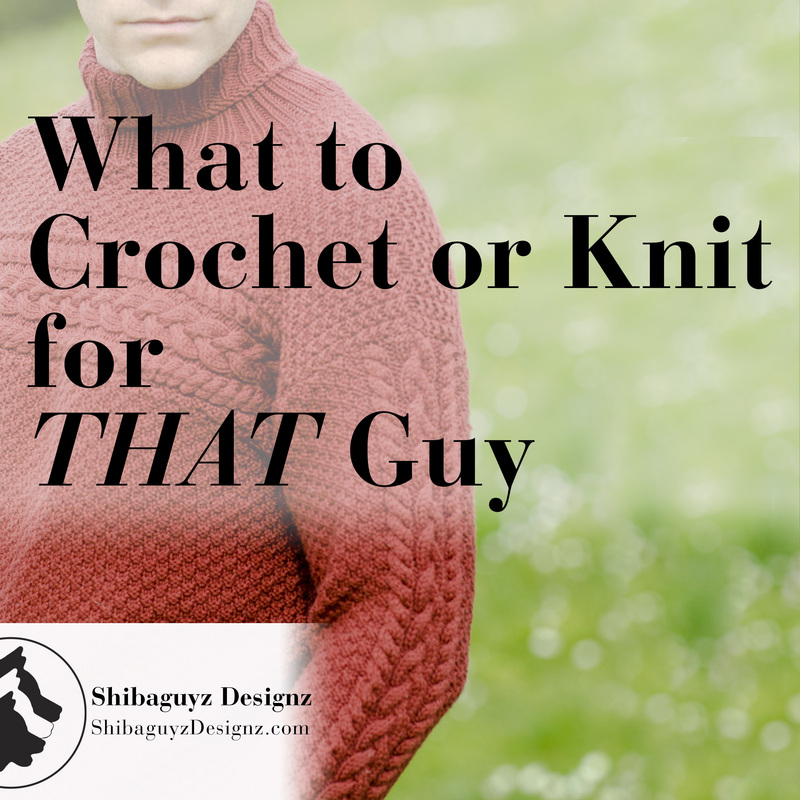
Trying to think of something special to make for THAT guy? We have a few suggestions for you.
"How to make the Foundation Single Crochet stitch" And…
 Answers To Your Top 3 Questions About the Technique Tuesday Crochet & Knitting Tutorials
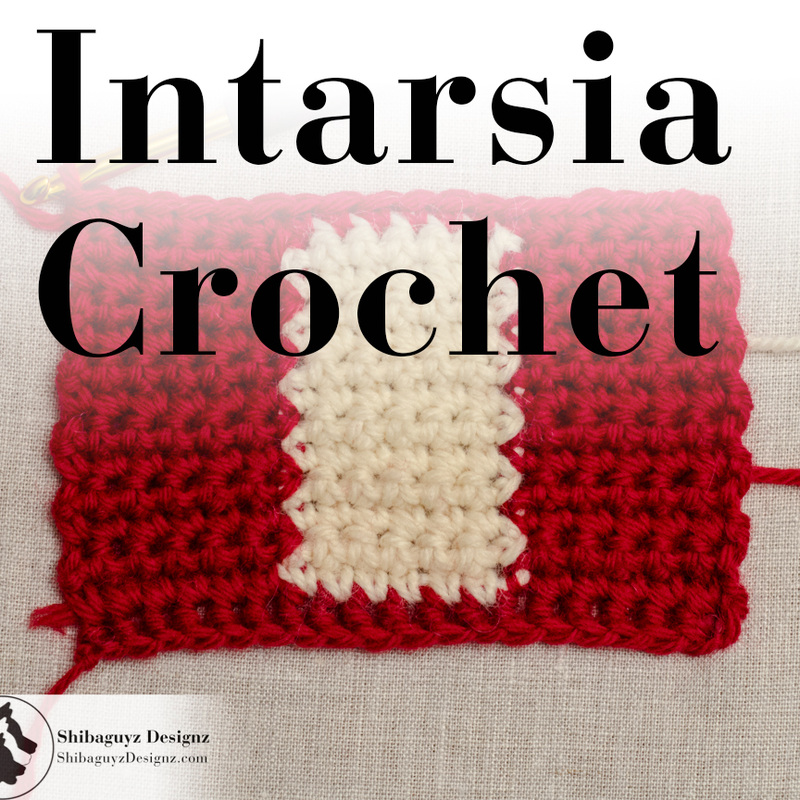
 An Introduction to How To Work the Intarsia Crochet Colorwork Technique Technique Intarsia Crochet
Click "Read More" link below for the full post.
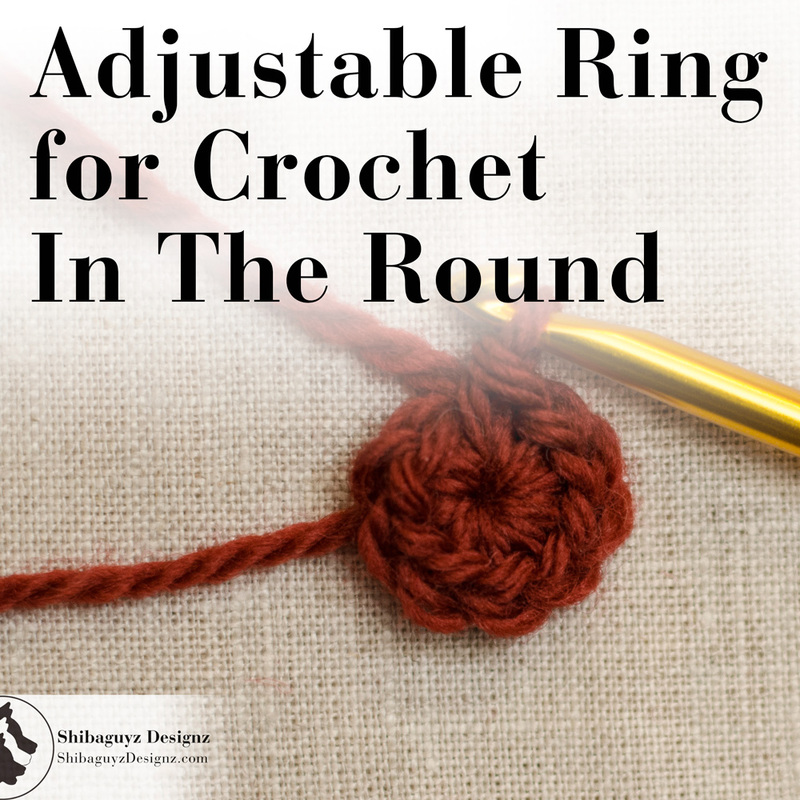
 How To Make the Adjustable Ring for Working Crochet In the Round Technique Adjustable Ring for Working Crochet In the Round
Click Read More below for the full tutorial.
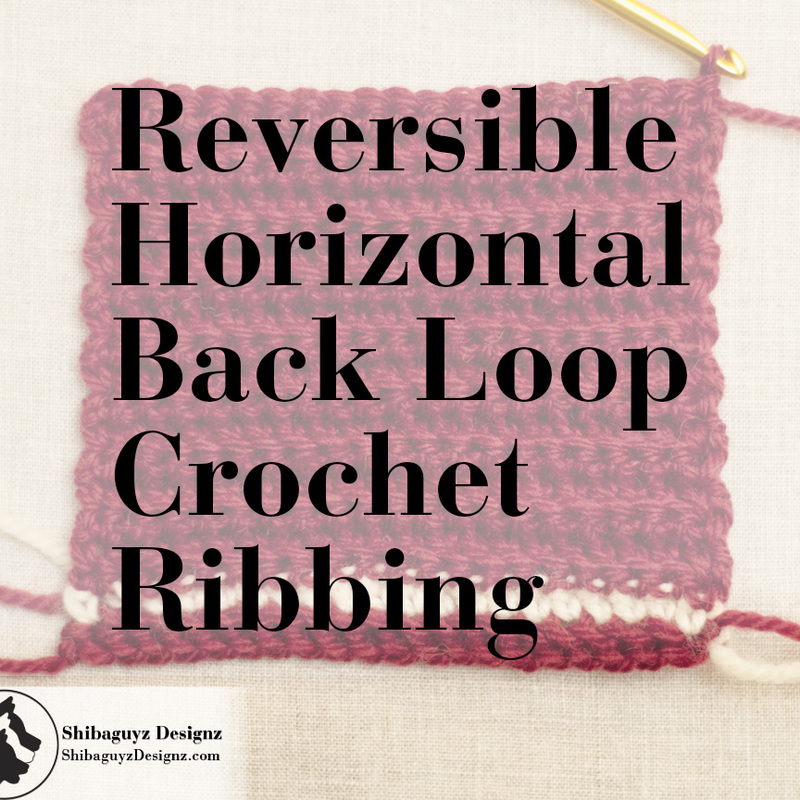
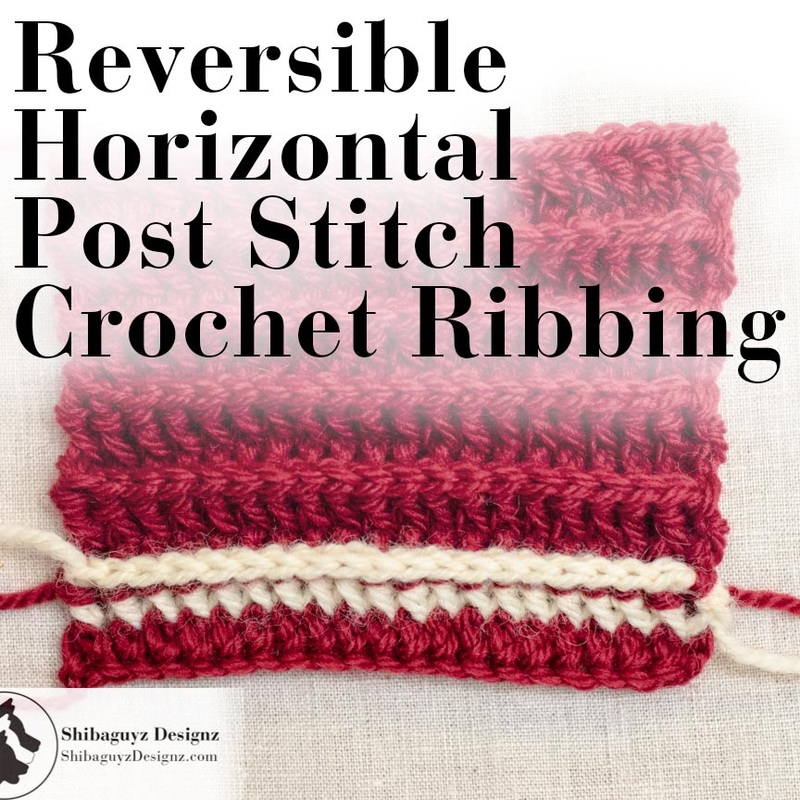
How To Make Reversible Horizontal Back Loop Crochet Ribbing
What is it? Reversible Horizontal Back Loop Crochet Ribbing is the only non-post stitch technique for making Crochet Ribbing. Reversible Horizontal Back Loop Crochet Ribbing looks the same from both sides and is constructed horizontally by working ONLY in the Back Loops of the crochet stitches of each row. As the name indicates, Reversible Horizontal Back Loop Crochet Ribbing is made horizontally which means the wales (the raised ridges) and the troughs (the contrasting lower lines) are created by working from side to side in relation to the way we normally see ribbing – in vertical lines. The Reversible Horizontal Back Loop Crochet Ribbing technique for making crochet ribbing is very different from the previous methods we have covered here for making crochet ribbing. Reversible Horizontal Back Loop Crochet Ribbing is made by working every row of stitches in the Back Loops ONLY of the previous row of crochet stitches. Working in the Back Loop only of the stitches leaves the front loops standing out against the surface of the crochet fabric with makes the lines of wales needed to create ribbing. While we have used Slip Stitch, Single Crochet, and Half Double Crochet stitches for making Reversible Horizontal Back Loop Crochet Ribbing, today we will be demonstrating with Single Crochet stitches. For your first attempts, Single Crochet Through the Back Loop (sc tbl) will give you the best results. That said… DEFINITELY try Half Double Crochet Through the Back Loop (hdc tbl) then try Slip Stitch Through the Back Loop (sl st tbl). You will love both results although, sl st tbl does take a little practice and some patience to master… maybe we'll cover that one in a post all by itself… later… Click "Read More" link below for the full post.
A Sneak Peek of Designer Crochet, the NEW Crochet Pattern Book from Shibaguyz Designz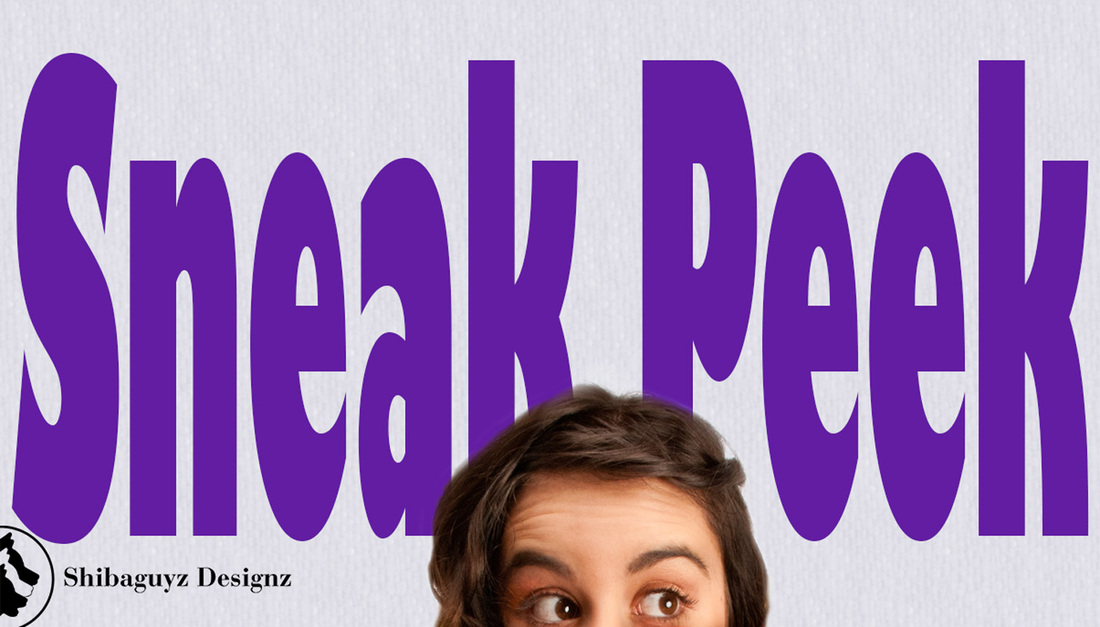 If you have been anywhere near our Twitter, Facebook, Ravelry, Google+, Tumblr, or Instagram feeds (I think that's all of 'em… yeah… I think…) anytime in the past year, you know we have been working enthusiastically on our new book of crochet patterns. While we are still working on final edits (in fact, we have a meeting with your editor later this afternoon), our publisher, Lark Publishing, has just posted a preview of our book on their blog. WOOHOO!! Penned by editor, Connie Santisteban, the preview includes a FAB description of the patterns in Designer Crochet: 32 Patterns to Elevate Your Style. While Designer Crochet will be officially published in April 2015, it is available for pre-order NOW via the link in the post. Oh… and, of course, there are FAB sneak peek photos to get your fingers and hooks all revved up and ready to go. Yes, the photography is by none other than our very own Jason Mullett-Bowlsby of Shibaguyz Photography. WOOHOO! Check out the post at the link below for some Designer Crochet eye candy: Spring Preview - Designer Crochet: 32 Patterns to Elevate Your Style by Shannon Mullett-Bowlsby Stitch On! S&J Come look us up on Facebook, Twitter, and Pinterest by clicking on one of these icons. Technique Tuesday Moved For This Week OnlyWe know… y'all came here today looking for our usual Technique Tuesday tutorial post. Well, we've had to move Technique Tuesday to Thursday this week. We got a little caught up in editing our NEW book of crochet patterns, Designer Crochet, and the time just got away from us. Fear not! We're only moving Technique Tuesday this one time this one week. We'll be back on Tuesday next week like usual and all will be right with the world. As a consolation prize, here is a sneak peak of Designer Crochet (that new book of crochet patterns we have been editing) from our publisher's website. Our editor, Connie Santisteban, gives you a brief description of the crochet patterns in Designer Crochet and shares exclusive sneak peek photos AND there is a preorder link with a FAB preorder price for y'all. WOOHOO!! Click the link below to be whisked away to the Lark Publishing blog and see this FAB sneak peek and preorder link. Sneak Peek of Designer Crochet by Shannon Mullett-Bowlsby of Shibaguyz Designz 
Oh yeah… you can still get your Technique Tuesday fix by clicking on the Tutorials category over there in the right-hand column of our page. To make it even easier, here's a direct link: Shibaguyz Designz Tutorials Category Thanks for stopping by! See y'all back here on Thursday for Technique Tuesday… ummm… Technique Thursday? How about Temporary Technique Thursday?? Anyway… see you on Thursday. And enjoy the exclusive sneak peek of Designer Crochet! Stitch On! S&J Come look us up on Facebook, Twitter, and Pinterest by clicking on one of these icons. How To Make Reversible Horizontal Post Stitch Crochet Ribbing 
Click "Read More" link below for the full post.
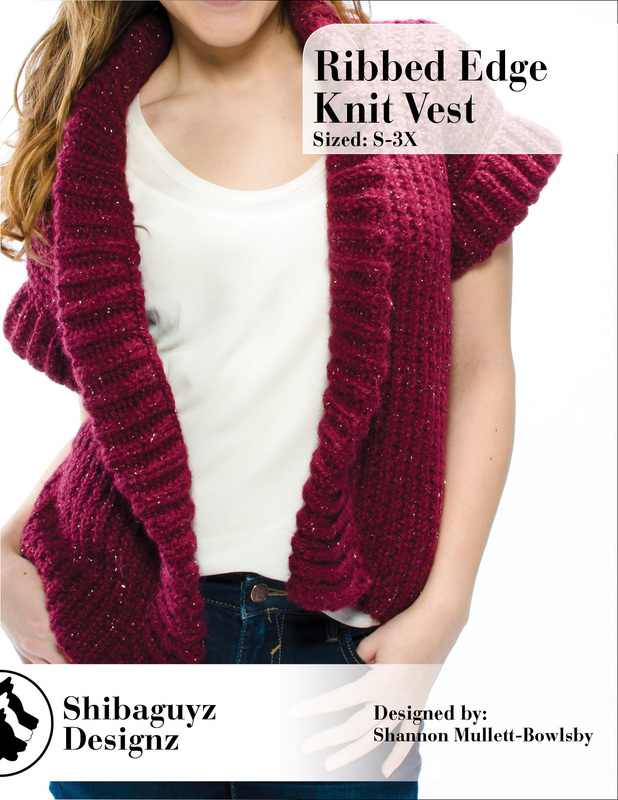
 Women's Ribbed Edge Knit Vest knitting pattern by Shibaguyz Designz
About the Yarn
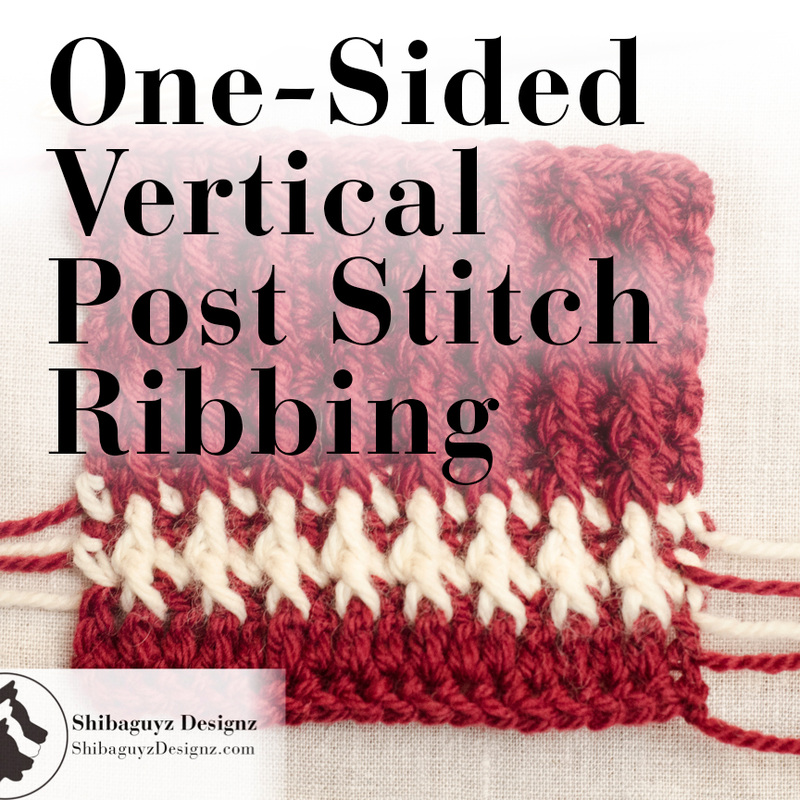
We originally designed this vest in Plymouth Yarn Grande Glow which has a subtle hint of Stelina in it… that means there's a little SPARKLE to it or, as the name implies, a little GLOW. Also as the name implies, Plymouth Yarn Grande Glow is a GRANDE yarn… meaning it is a bulky weight yarn weighing in at a healthy CYCA 5. And, yes, Plymouth Yarn Grande Glow is 97% Baby Alpaca. Folks… that means this yarn feels oh so soft next to your skin. Seriously… just get a case of it and dive into it. You're welcome. How To Make One-Sided Vertical Post Stitch Crochet Ribbing 
What is it? We started our discussion of crochet ribbing last week with a quick definition of ribbing. Simply put, Ribbing is a series of raised ridges – called wales – and contrasting low troughs. While there are a number of ways to create combinations of wales and troughs using crochet stitches, over the course of a few posts, we will be dealing with four main methods of creating crochet ribbing: Reversible Vertical Post Stitch Ribbing – the technique discussed in last week's post One-Sided Vertical Post Stitch Ribbing – our topic today! Horizontal Post Stitch Ribbing – future post Horizontal tbl Ribbing – future post… stay tuned! As you can see, we can create crochet ribbing by working post stitches either vertically or horizontally and by working horizontally using only the back loop of our stitches. While we will get to the back loop ribbing technique on a future post, today we are working on our post stitch ribbing. A quick reminder here that post stitches are worked around the post of a crochet stitch resulting in a stitch that is raised to the front or the back of our working row depending on whether we work a Front Post Crochet Stitch or a Back Post Crochet Stitch. Click "Read More" link below for the full post.
How Our Crochet Community Can Give Back one person at a time
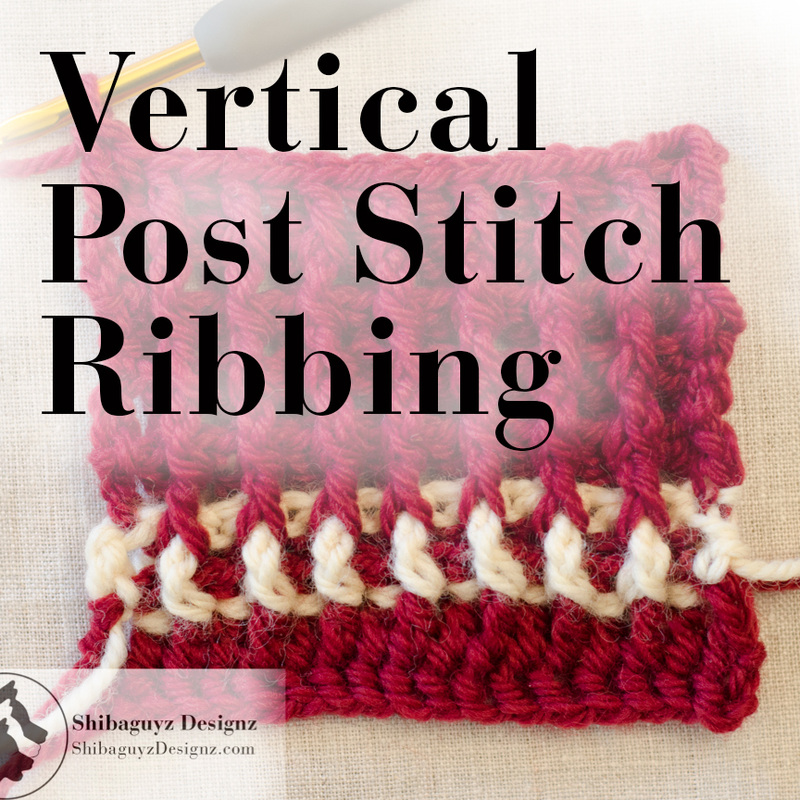
How to make Reversible Vertical Post Stitch Crochet Ribbing
What is it? First, let's give a quick definition of ribbing. Simply put, Ribbing is a series of raised ridges – called wales – and contrasting low troughs. That said, there are a number of ways to create combinations of wales and troughs using crochet stitches. In fact, we have: Reversible Vertical Post Stitch Crochet Ribbing One-Sided Vertical Post Stitch Crochet Ribbing Horizontal Post Stitch Crochet Ribbing Horizontal tbl Crochet Ribbing We will be covering ALL of these in future Technique Tuesday articles but, for today's Reversible Vertical Post Stitch Crochet Ribbing tutorial, we are creating a reversible vertical post stitch ribbing with wales on both sides of the fabric through the use alternating Front Post Double Crochet Stitches and Back Post Double Crochet Stitches. Remember: Post stitches are worked around the post of a crochet stitch creating a stitch that is raised to the front or the back of our working row depending on whether we work a Front Post Crochet Stitch or a Back Post Crochet Stitch. Reversible Vertical Post Stitch Crochet Ribbing creates a series of wales and troughs that are made vertically in relation to the working direction of our crochet fabric. That is, we start at the top or bottom of the fabric and create wales and troughs by working rows of alternating Front and Back Post Stitches. These alternating Front Post Crochet Stitches and Back Post Crochet Stitches build off of one another in successive rows creating the vertical wales and troughs – Ribbing! For a quick review of crochet post stitches check out these tutorials: Front Post Double Crochet Stitch Tutorial Back Post Double Crochet Stitch Tutorial then come right back! We'll wait… Okay… back now? Good… let's carry on… Click "Read More" link below for the full post.
|
AuthorShannon and Jason Leave us a tip to help us do what we do!


Archives
September 2022
 

 Categories
All
     |


 RSS Feed
