SHANNON & JASON
  • Home
  • Blog
    • Tips
    • tutorials
  • Our Books
    • Contemporary Kogin-zashi
    • Boro & Sashiko, Harmonious Imperfection: The Art of Japanese Mending & Stitching
    • Complete Crochet Course
    • Designer Crochet
    • Crochet Geometry
  • All Shopping
    • Books and Digital Patterns
    • Sashiko Shop
    • Thread
    • Fabric
    • Stitchips
  • Classes
  • Sashiko
  • About
  • Contact and Subscribe
  • Sponsors

 Shannon & Jason's Blog 

Technique Tuesday – Reversible Horizontal Post Stitch Crochet Ribbing Tutorial

10/21/2014

0 Comments


How To Make Reversible Horizontal Post Stitch Crochet Ribbing


Technique Tuesday - Step-by-step crochet and knitting photo tutorials by Shibaguyz Designz

Technique
Reversible Horizontal Post Stitch Crochet Ribbing

So far in our Technique Tuesday journey exploring Crochet Ribbing we have covered two of the four types of Crochet Ribbing: Reversible Vertical Post Stitch Crochet Ribbing and One-Sided Vertical Post Stitch Crochet Ribbing. As the names indicate, both of these methods are made vertically using Post Stitches. Today, we are shifting perspectives a bit and going sideways…


(oh… don't worry… the fourth kind of Crochet Ribbing, Horizontal tbl Crochet Ribbing, is coming soon… stay tuned!)

Technique Tuesday - How to make Reversible Horizontal Post Stitch Crochet Ribbing - a step-by-step photo tutorial by Shibaguyz Designz
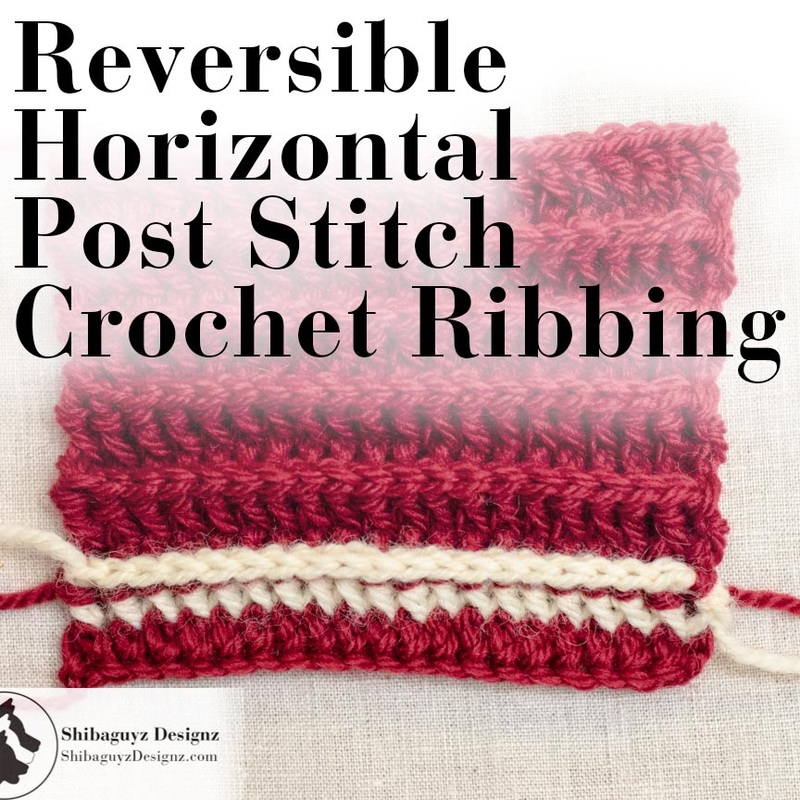
Click "Read More" link below for the full post.

What is it?
Reversible Horizontal Post Stitch Crochet Ribbing is another of the Post Stitch methods of making Crochet Ribbing.

Again, as indicated in the name, Reversible Horizontal Post Stitch Crochet Ribbing is, indeed, made horizontally. That means we create the wales (raised ridges) and troughs (lines of lower areas) by working the fabric from side to side. The finished fabric can then be turned sideways so the ribs run vertically in the finished project.

Technique Tuesday - How to make Reversible Horizontal Post Stitch Crochet Ribbing - a step-by-step photo tutorial by Shibaguyz Designz

Here is a photo showing the working direction of today's Horizontal Post Stitch Crochet Ribbing swatch.

Technique Tuesday - How to make Reversible Horizontal Post Stitch Crochet Ribbing - a step-by-step photo tutorial by Shibaguyz Designz

And here is a photo of that same swatch turned so the wales and troughs are in a vertical alignment.


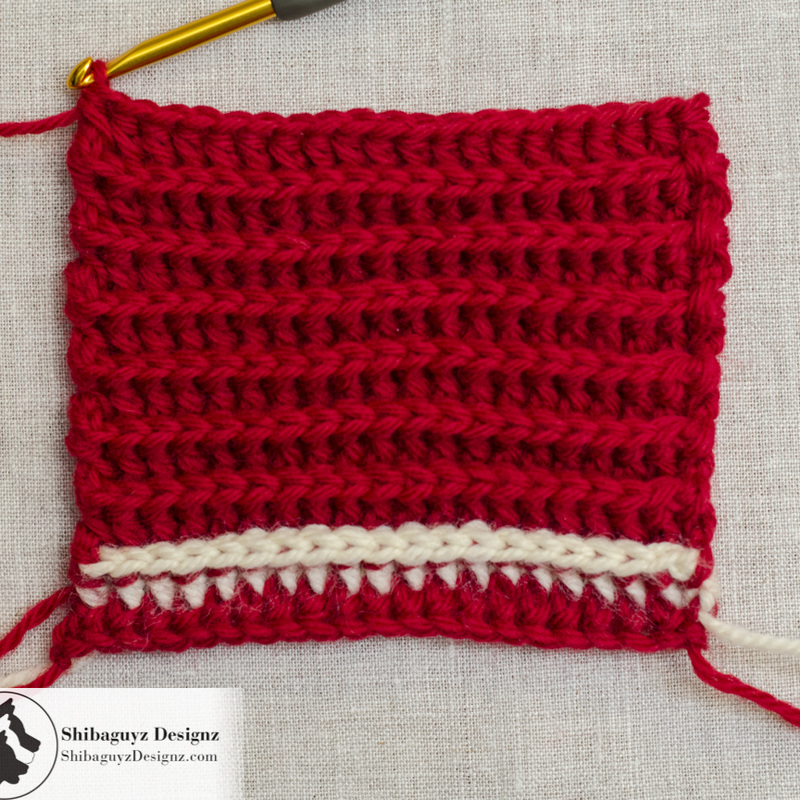
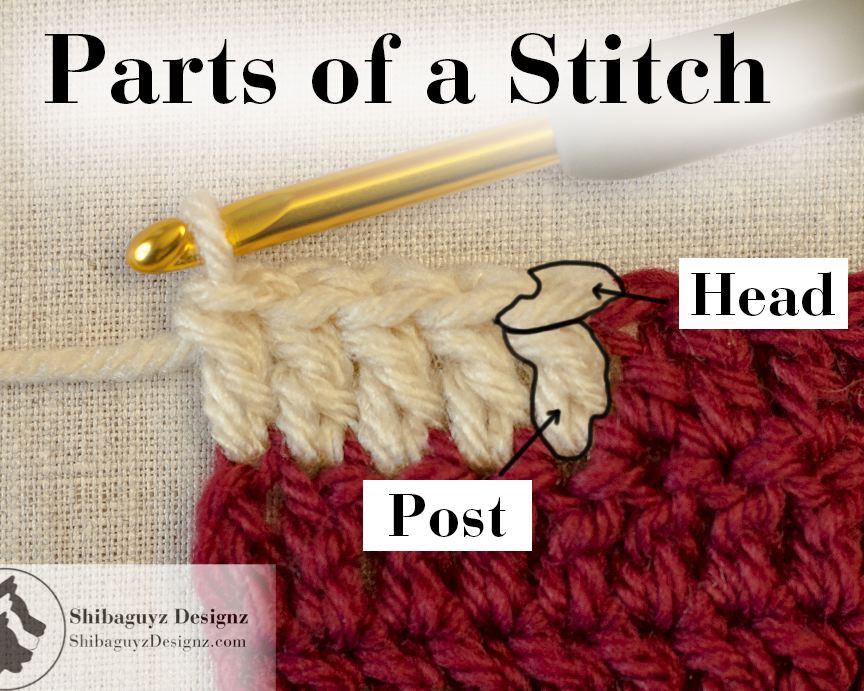
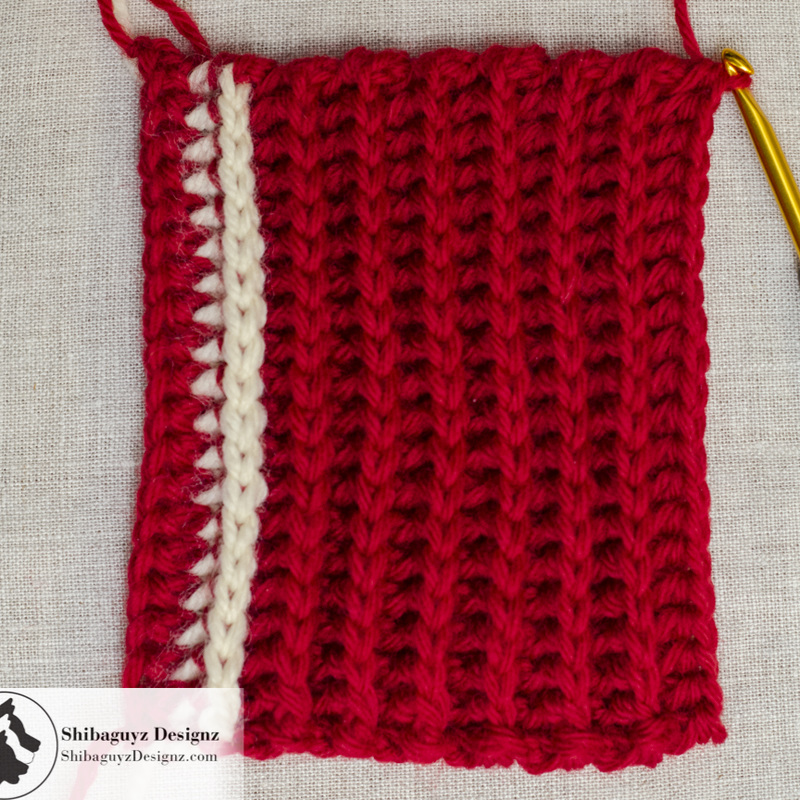
You can see that turning the swatch sideways creates the Vertical lines of wales and troughs that we are used to seeing in ribbing. Yes, ribbing can be USED in fabric in just about any direction your creative brains can come up with… remember here, in our Technique Tuesday articles, we are talking Horizontal and Vertical in relation to how the Crochet Ribbing is MADE relative to the starting and ending working rows.

Also as the name says, the fabric is Reversible and looks, NEARLY the same from both sides. I say NEARLY because the little heart (or arrowhead depending on how you look at it) shape of the heads of the crochet stitches will be pointing a different direction on one side of the fabric when compared to the other side.

This makes sense because we know post stitches are worked around the post of a crochet stitch. The result is the head of the stitch that is worked around is raised to the front or the back of our working row depending on whether we work a Front Post Crochet Stitch or a Back Post Crochet Stitch.

 
For visual reference, here is a handy-dandy illustration of the parts of a crochet stitch showing the head and post of a double crochet stitch like one of the swatches we will be working on today.    
Technique Tuesday - How to make Reversible Horizontal Post Stitch Crochet Ribbing - a step-by-step photo tutorial by Shibaguyz Designz

Reversible Horizontal Post Stitch Crochet Ribbing is dramatically different than the previous methods we have explored for making crochet ribbing… and not just because it is made horizontally in relation to the vertical ribbing rows.

With both Reversible Vertical Post Stitch Crochet Ribbing and One-Sided Vertical Post Stitch Crochet Ribbing, the posts of the crochet stitches are what stand out from the surface of the finished fabric to create the wales and troughs we know as Crochet Ribbing.

In Reversible Horizontal Post Stitch Crochet Ribbing, it is the heads of the crochet stitches that creates the raised wales and the posts create the lower trough areas.

AHA!!

Did you catch that last bit? It is the POSTS that create the troughs between the HEADS what create the wales.

Post hoc ergo propter hoc: the taller the stitch (i.e. hdc, dc, tr, dtr, etc…), the further apart the heads (wales) will be.

I wonder how this will affect the final Crochet Ribbing fabric… hhhmmmm

Why Use It?
Texturally, and visually, the fabric we create with Reversible Horizontal Post Stitch Crochet Ribbing is very smooth and tidy looking. The bent over heads of the crochet stitches create these neat little rows of stitches that stack up on each other in an unbroken line when turned so the ribbing is aligned vertically. These sharp lines create bold raised detailing that stands out strongly from the surface of the fabric.

The difference in fabrics comes when we work post stitches of different heights. In our AHA!! moment above, we discovered that the taller the posts of our stitches, the further apart the heads of our stitches are. As the posts become taller, the troughs become wider and the wales are farther apart.

Pay very close attention to this as you are making your two swatches today!

How does the height of the stitches post affect the distance of the wales and, therefore, affect the finished crochet fabric?

How does that affect on the finished crochet fabric influence why and where you will use this technique for making Crochet Ribbing?

Here were our observations and answers to those questions:

The fabric we made with Front Post Double Crochet stitches was wonderfully chunky with bold graphic details because of the wide troughs between the wales. This technique for creating Reversible Horizontal Post Stitch Crochet Ribbing created a solid, very firm finished fabric. We have used this technique for making edgings on hats, wrist warmers, and along the bottom edges of garments where we wanted the bold graphics of ribbing without the binding that can come with ribbing.

The fabric we made with Front Post Half Double Crochet stitches was equally as bold graphically, but because of the shortened posts, the wales were much closer together and we found the fabric to be very dense but more elastic that its Front Post Double Crochet counterpart. For this reason, we use this stitch where we want more snap back or memory in our finished fabric. 
Heady Affairs - 7 Impetuous Hats to Crochet by Shannon Mullett-Bowlsby

Here is an example from the cover of our book Heady Affairs where we used Front Post Half Double Crochet stitches to create Reversible Horizontal Post Stitch Crochet Ribbing around the brim of our Chinese Acrobat Hat (the red had on the left of the photo).

Note the bold, chunky texture of the ribbing and how graphic of the brim of the hat looks. This type of ribbing makes a great detail anywhere you want the option of fabric memory (that snap back we mentioned earlier) to hold the shape of a fabric over an area that moves a lot or that gets a lot of wear and use. Hats, hems of kids clothes, outer wear, wrist warmers… these are all places we have put this technique for making Reversible Horizontal Post Stitch Crochet Ribbing to great use.


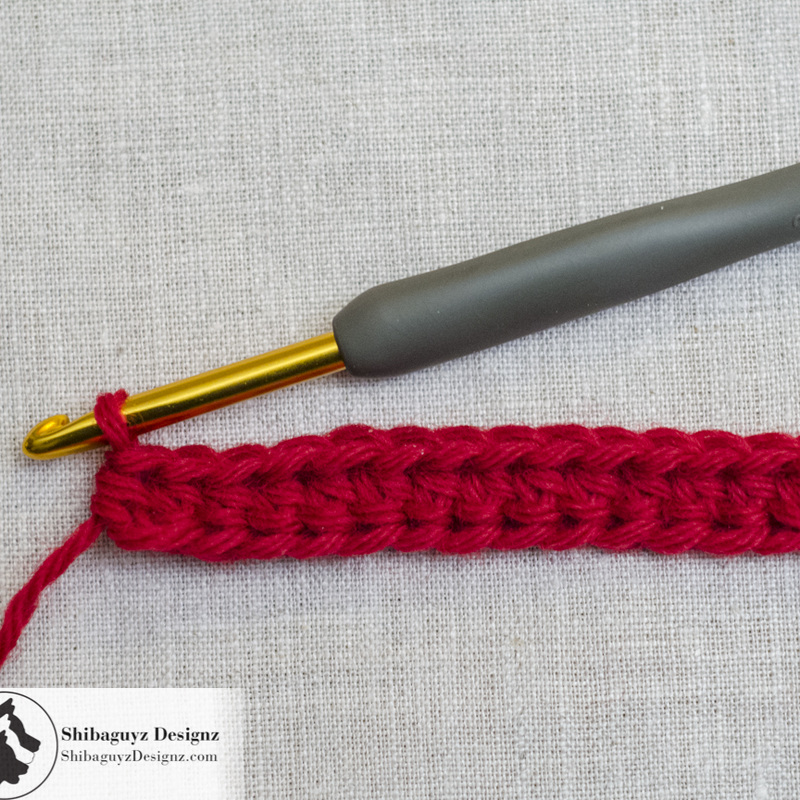
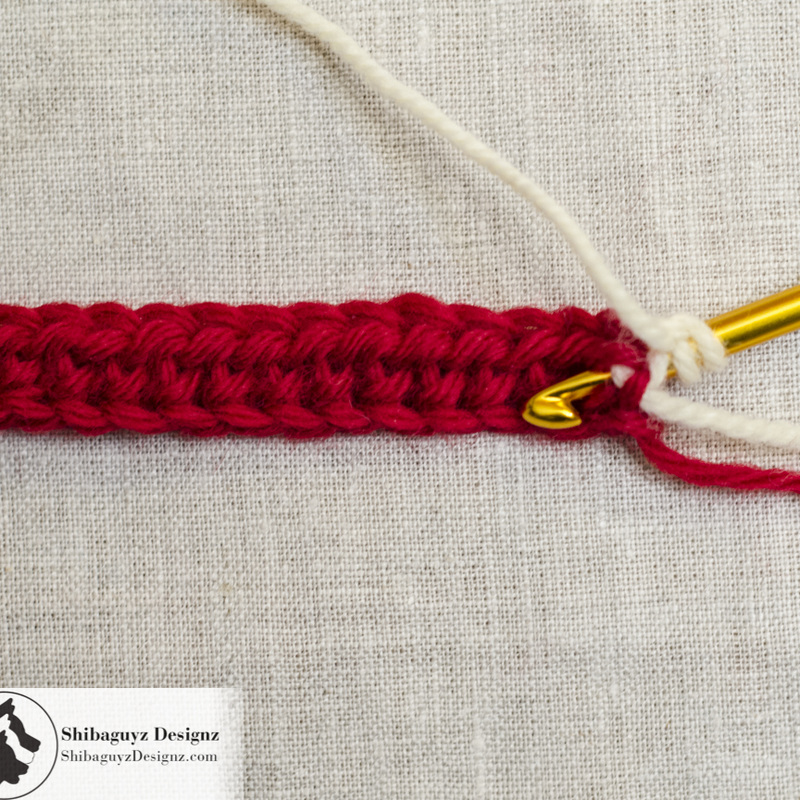
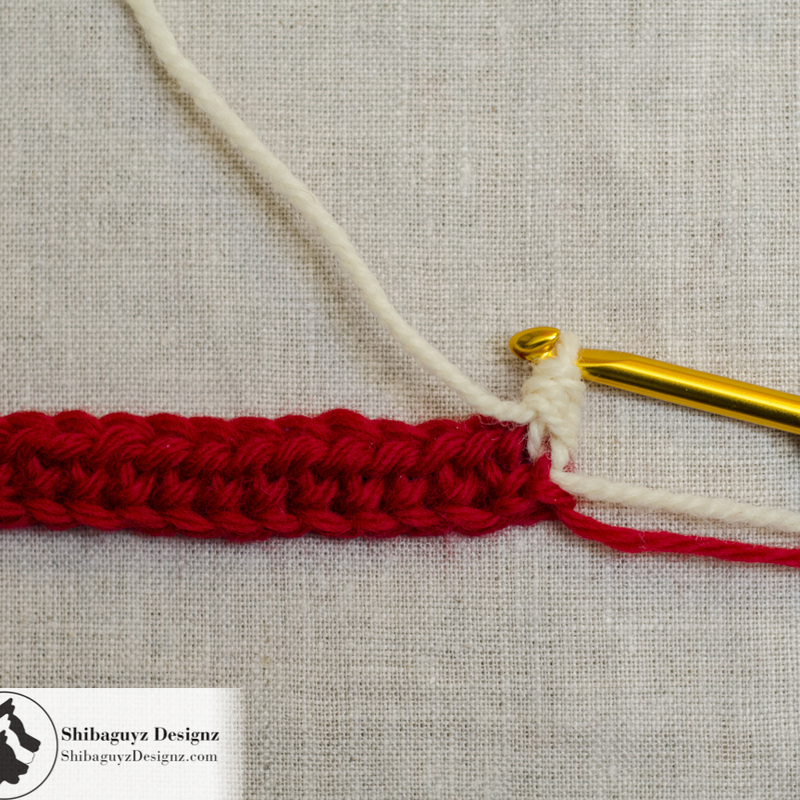
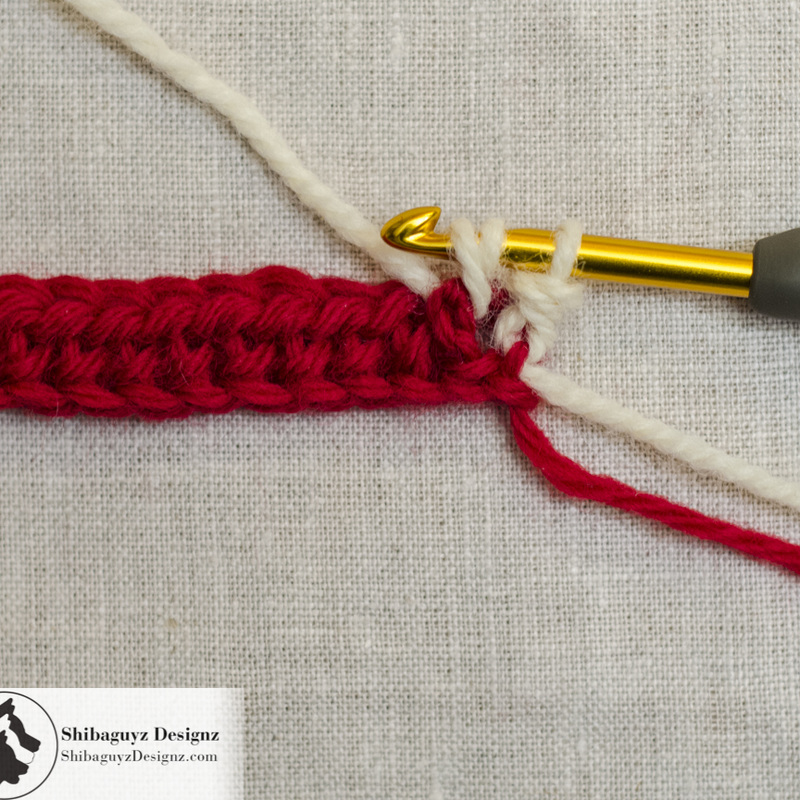
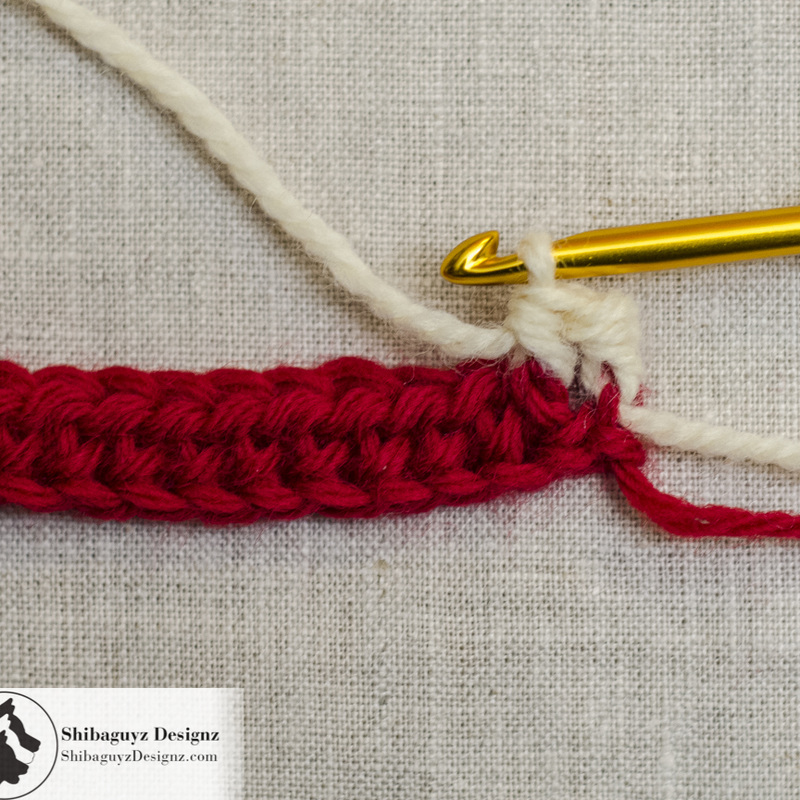
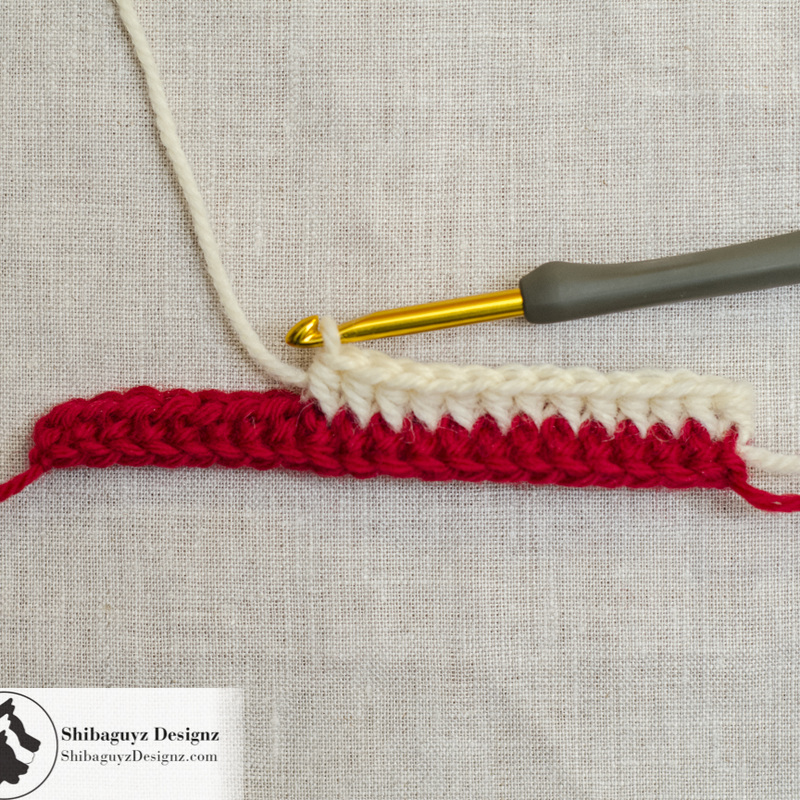
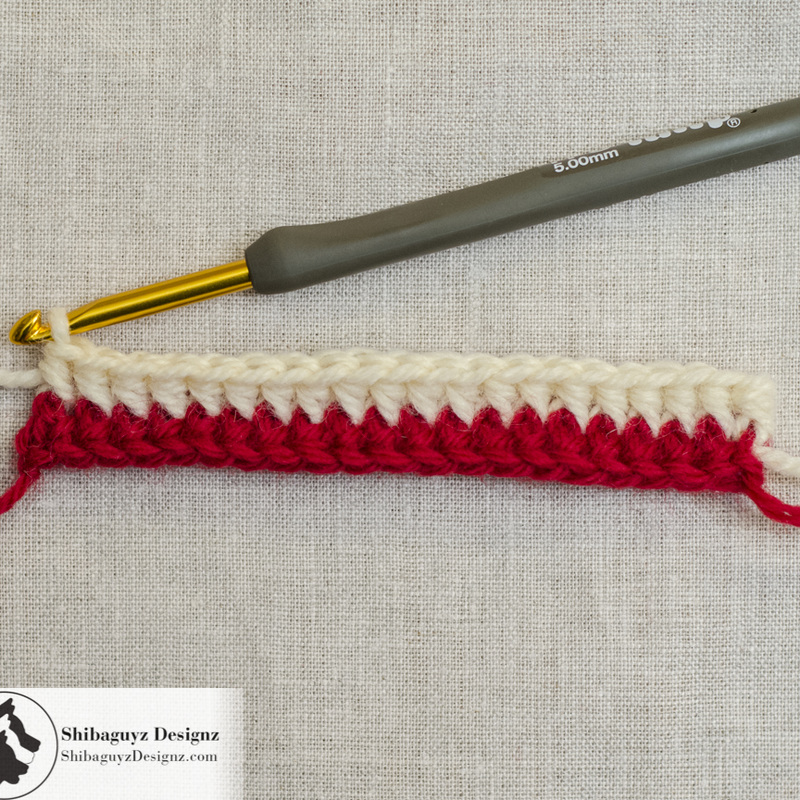
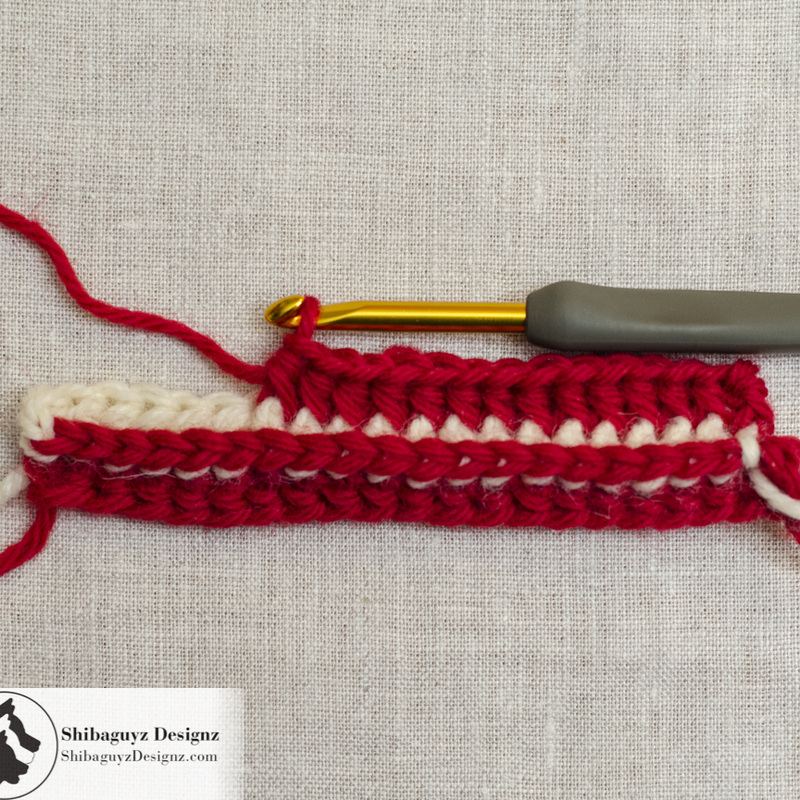
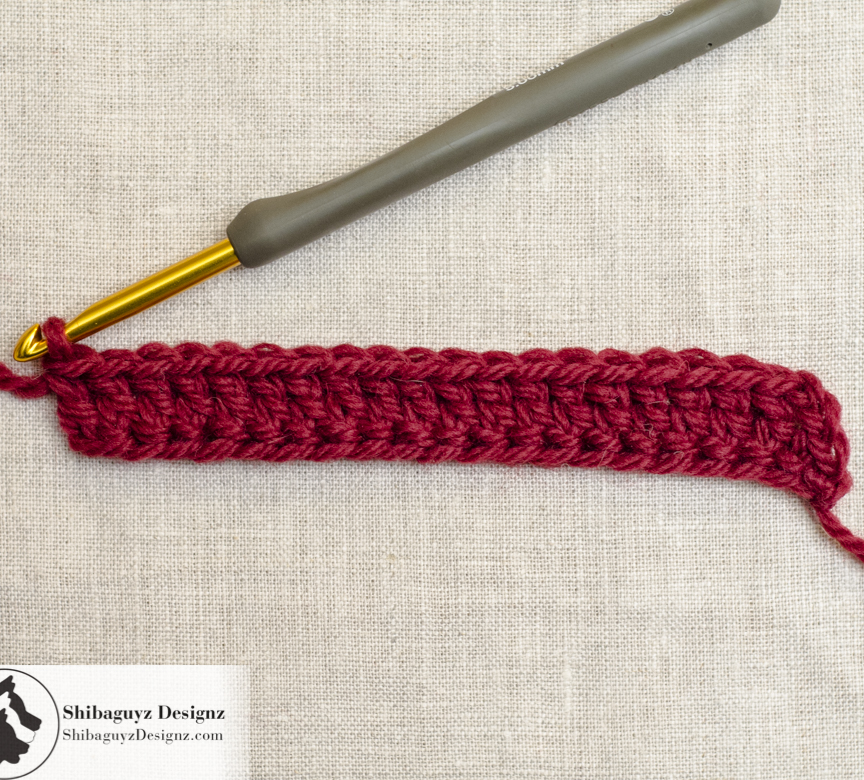
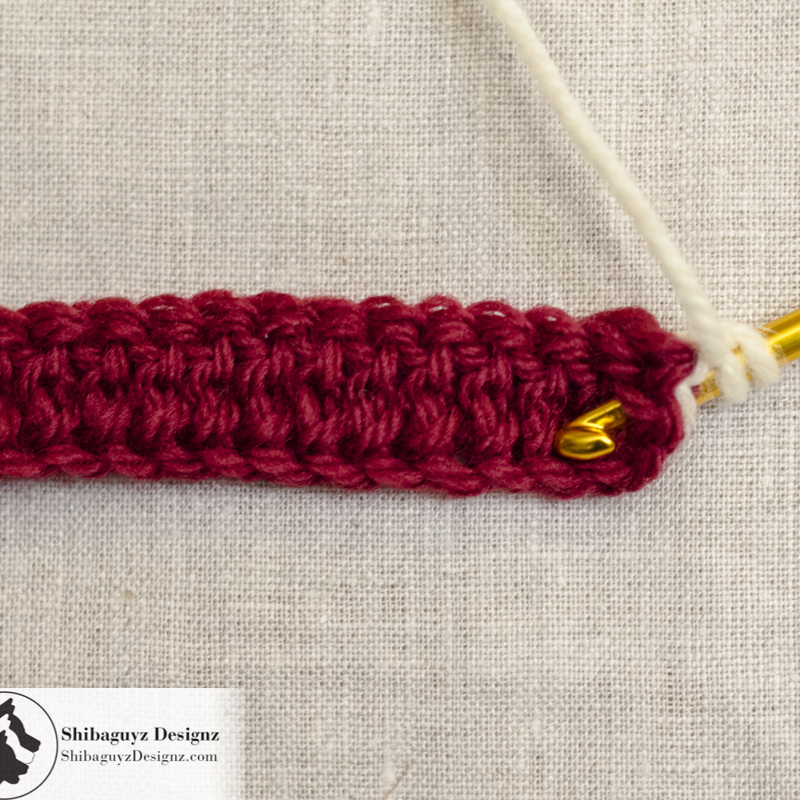
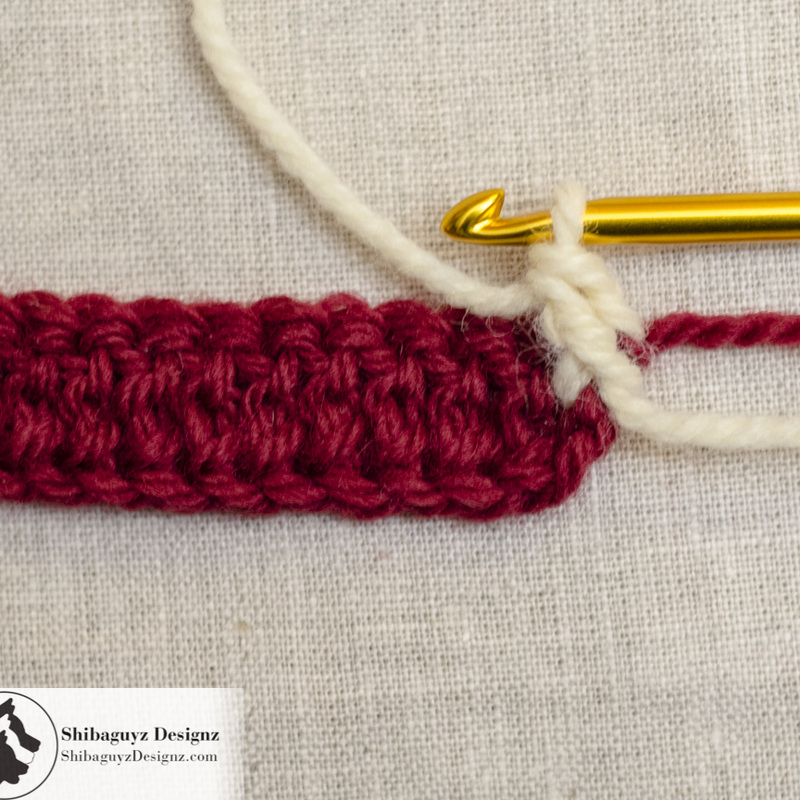
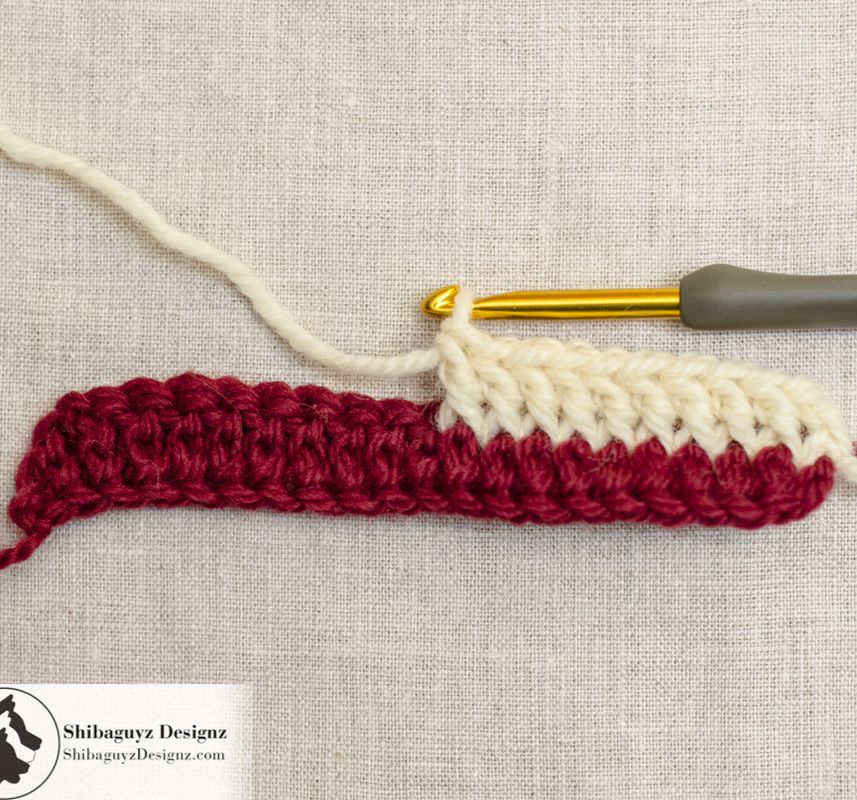
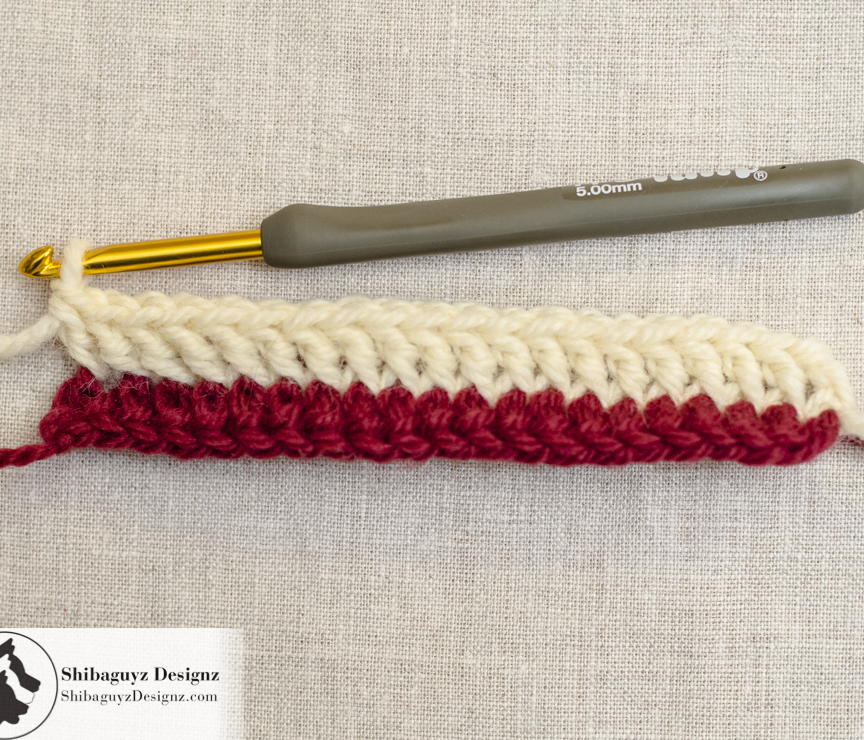
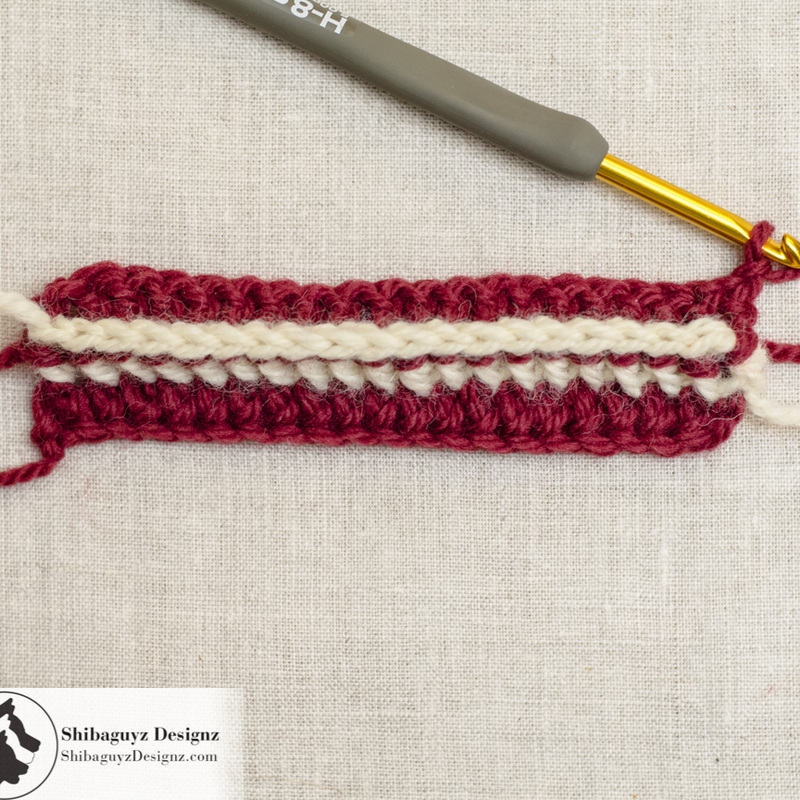
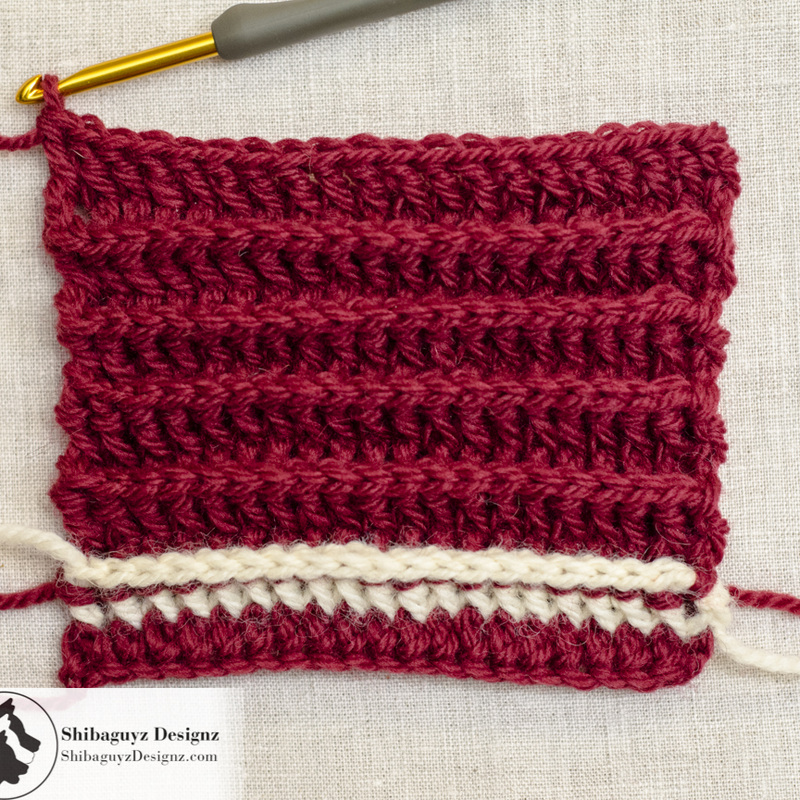
To Make Today's Swatch
Here's a list of materials we used to make today's swatch. You should, of course, experiment (as we have) with different yarn weights and hook sizes to see what kinds of FAB fabrics you come up with. These materials listed are what we recommend you use for your learning swatches.

Yarn Used
CYCA 4
Worsted Weight, 100% Pure Wool

Hook Used
H-8/5.00mm Crochet Hook

Skillz Used
Foundation Half Double Crochet (Fhdc) – How to make the Foundation Half Double Crochet Tutorial
Foundation Double Crochet (Fdc) – NOTE: the tutorial for how to make the Foundation Half Double Crochet stitch will help you with this stitch… just make a Double Crochet instead of a Half Double Crochet
Front Post Double Crochet (FPdc) – How to make the Front Post Double Crochet Tutorial
Front Post Half Double Crochet (FPhdc) – see photo tutorial below

Break It Down
Swatch #1: Reversible Horizontal Post Stitch Half Double Crochet Ribbing

Here is the pattern for Swatch #1: Reversible Horizontal Post Stitch Half Double Crochet Ribbing
Row 1: Fhdc 20, turn.
Row 2: Ch 1, FPhdc around first st, FPhdc around each stitch to end of row, turn.
Row 3–16: Repeat Row 2.
Fasten off.

1. Row 1: 20 Foundation Half Double Crochet Stitches

If you need help with this stitch, jump on over to our tutorial for How to Make the Foundation Half Double Crochet Stitch. We'll wait right here…

Technique Tuesday - How to make Reversible Horizontal Post Stitch Crochet Ribbing - a step-by-step photo tutorial by Shibaguyz Designz

Technique Tuesday - How to make Reversible Horizontal Post Stitch Crochet Ribbing - a step-by-step photo tutorial by Shibaguyz Designz
2. Row 2: Front Post Half Double Crochet around first stitch…

We are working in a lighter colored yarn here because it is easier to see the exact placement of the stitches and how they are worked.

Here we've done the first yarn over for a Half Double Crochet and have inserted the hook from the front to the back and then to the front again around the Post of the first stitch of the row.


3. Finished Front Post Half Double Crochet

We've completed the next steps for a Front Post Half Double Crochet stitch: yarn over and draw up a loop, yarn over and draw through all three loops on hook.


Technique Tuesday - How to make Reversible Horizontal Post Stitch Crochet Ribbing - a step-by-step photo tutorial by Shibaguyz Designz

Technique Tuesday - How to make Reversible Horizontal Post Stitch Crochet Ribbing - a step-by-step photo tutorial by Shibaguyz Designz
4. Front Post Half Double Crochet around each stitch to end of row…

Again, the first yarn over of our Half Double Crochet and the hook is inserted from the front to the back and then to the front again around the post of the next stitch.


5. Next step in the Front Post Half Double Crochet Stitch

Yarn over and draw up a loop – be sure to bring the hook and the loop you picked up back the way your hook went around the post of the stitch. You will have 3 loops on your hook at this point.

Technique Tuesday - How to make Reversible Horizontal Post Stitch Crochet Ribbing - a step-by-step photo tutorial by Shibaguyz Designz

Technique Tuesday - How to make Reversible Horizontal Post Stitch Crochet Ribbing - a step-by-step photo tutorial by Shibaguyz Designz
6. Finished Front Post Half Double Crochet

Yarn over and draw through all 3 loops on your hook.


7. Just keep stitching… just keep stitching… 

Technique Tuesday - How to make Reversible Horizontal Post Stitch Crochet Ribbing - a step-by-step photo tutorial by Shibaguyz Designz

Technique Tuesday - How to make Reversible Horizontal Post Stitch Crochet Ribbing - a step-by-step photo tutorial by Shibaguyz Designz
8. And a finished row of Front Post Half Double Crochet stitches.


9. Row 3: Repeat Row 2.

Again, here we are working in a contrasting yarn so you can see the placement of the stitches as well as how the wales and troughs are created.

After turning, work a row of Front Post Half Double Crochet Stitches just as you did for Row 2.


Technique Tuesday - How to make Reversible Horizontal Post Stitch Crochet Ribbing - a step-by-step photo tutorial by Shibaguyz Designz

Technique Tuesday - How to make Reversible Horizontal Post Stitch Crochet Ribbing - a step-by-step photo tutorial by Shibaguyz Designz
10: Finished Row 3


11. The back side of your fabric after completing Row 3.

Note how Row 2 is now standing out in dramatic contrast to Row 1 and Row 3. In the lighter colored yarn, it is easy to see how the heads of the Row 2 stitches have been bent outward to the surface of the crochet fabric creating those FAB wales we are looking for.


Technique Tuesday - How to make Reversible Horizontal Post Stitch Crochet Ribbing - a step-by-step photo tutorial by Shibaguyz Designz

Technique Tuesday - How to make Reversible Horizontal Post Stitch Crochet Ribbing - a step-by-step photo tutorial by Shibaguyz Designz
12. Row 4–16: Repeat Row 2.

Just keep stitching… just keep stitching…

This is such a FAB fabric to make and watch develop as the wales and troughs roll off your hook. Even without the lighter colored yarn, the bold ridges of the ribbed fabric are easy to see.


13. Flip!

And here's a shot of the other side of that fabric after completing Row 16.

As always, these swatch photos are NOT blocked. We want y'all to be able to see what you're going to get when you finish a swatch.

NOTE: To maintain some elasticity (fabric memory) when blocking this type of fabric, do not pull the wales very far apart. Only block this type of ribbing from side to side (as stitched) to make the heads of the bent stitches line up more evenly. This will make your wales look neater and will keep the post stitches from stretching out too far and losing their elasticity.

Technique Tuesday - How to make Reversible Horizontal Post Stitch Crochet Ribbing - a step-by-step photo tutorial by Shibaguyz Designz

Technique Tuesday - How to make Reversible Horizontal Post Stitch Crochet Ribbing - a step-by-step photo tutorial by Shibaguyz Designz
14. Rotate!

Photo of that same swatch rotated so the ribs run vertically as in traditional ribbing.


Technique Tuesday - How to make Reversible Horizontal Post Stitch Crochet Ribbing - a step-by-step photo tutorial by Shibaguyz Designz
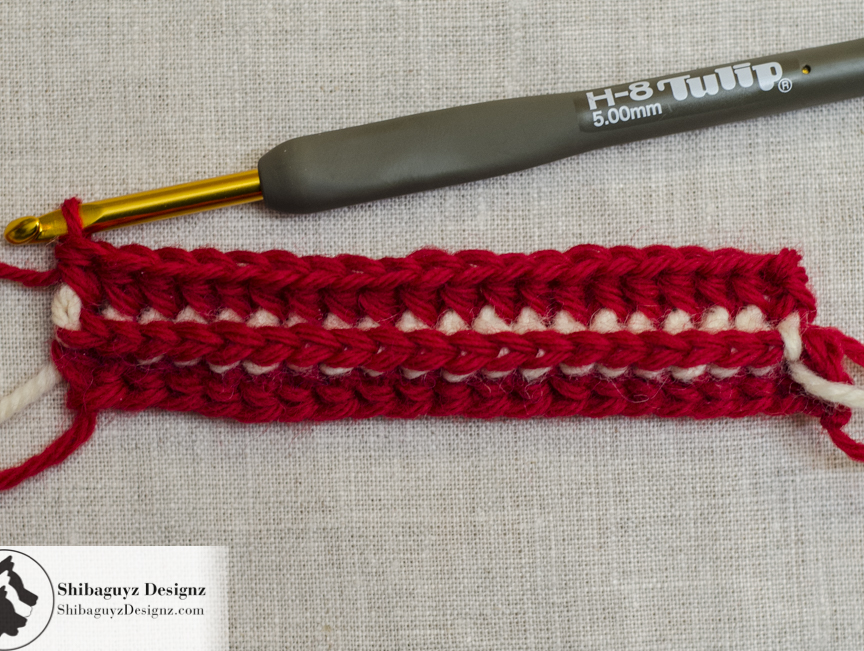
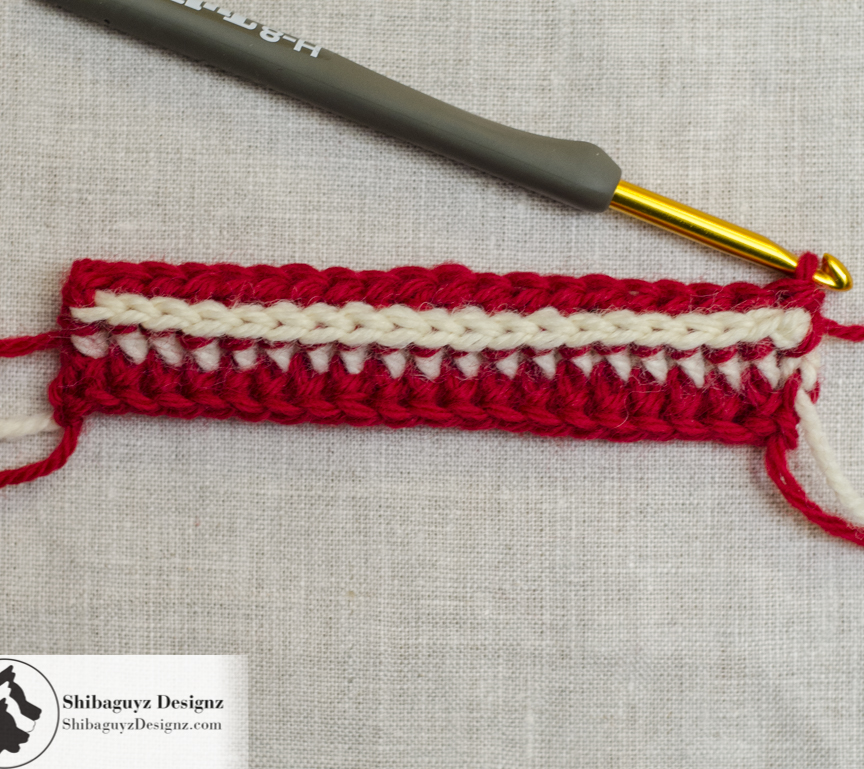
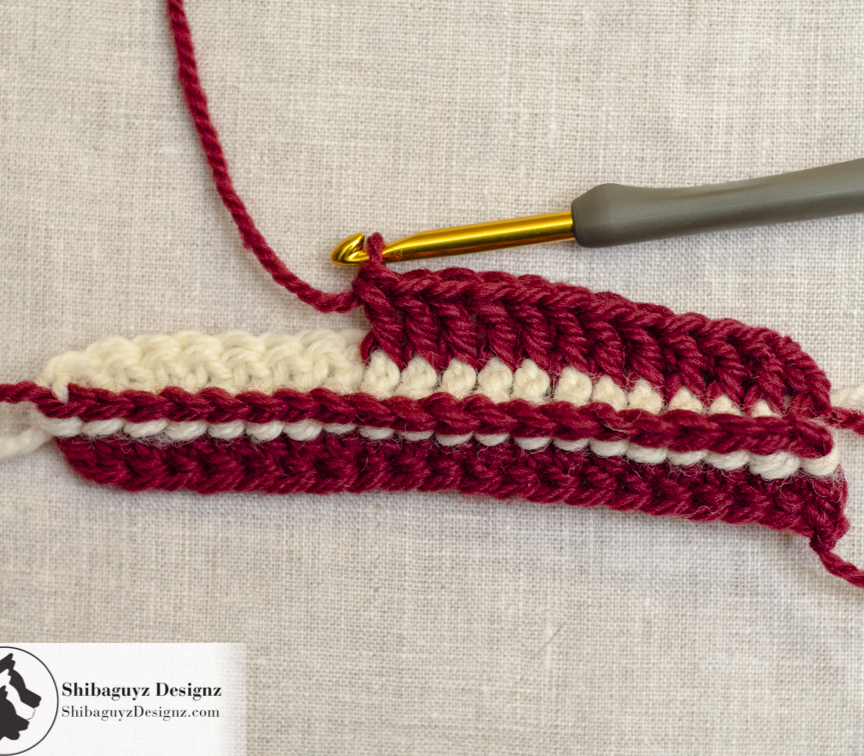
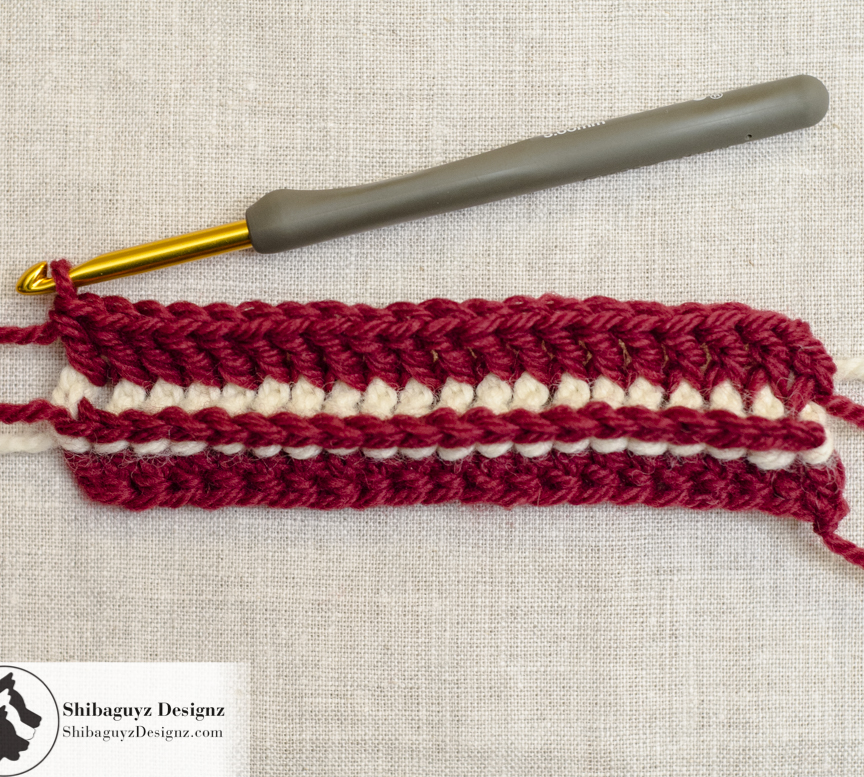
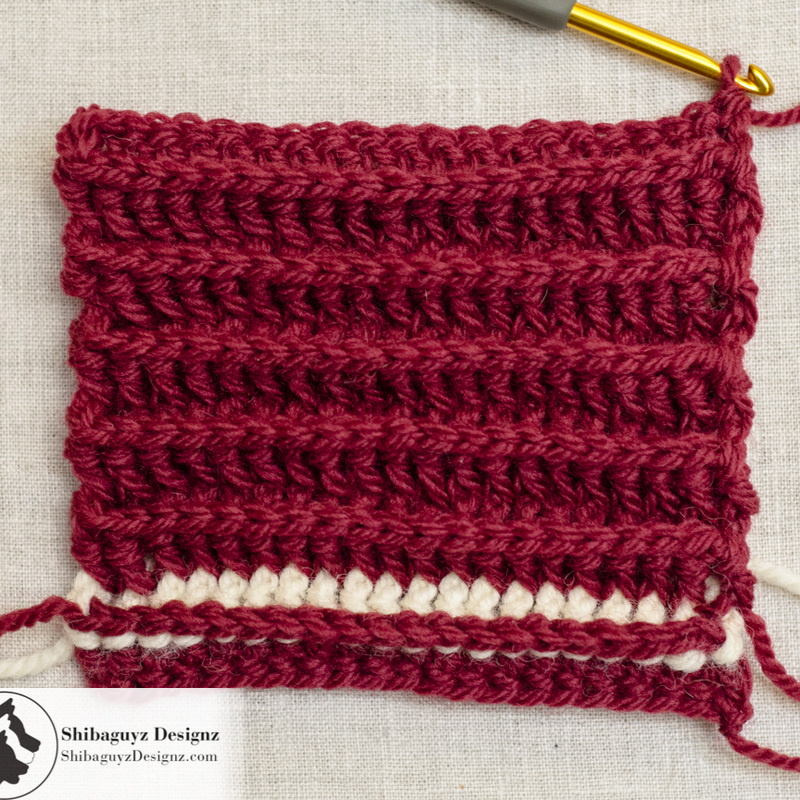
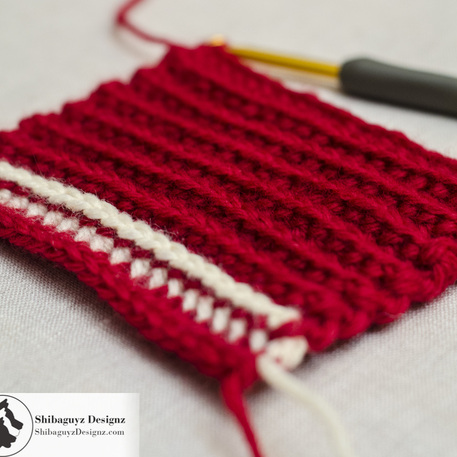
15. And the beauty shot of the Reversible Horizontal Post Stitch Half Double Crochet Ribbing swatch.

It's a beautiful thing… check out those wales and troughs… HUBBA HUBBA!


Swatch #2: Reversible Horizontal Post Stitch Double Crochet Ribbing
Here is the pattern for Swatch #1: Reversible Horizontal Post Stitch Double Crochet Ribbing
Row 1: Fdc 20, turn.
Row 2: Ch 1, FPdc around first st, FPdc around each stitch to end of row, turn.
Row 3–12: Repeat Row 2.
Fasten off.

1. Row 1: Foudation Double Crochet 20, turn.

Technique Tuesday - How to make Reversible Horizontal Post Stitch Crochet Ribbing - a step-by-step photo tutorial by Shibaguyz Designz

Technique Tuesday - How to make Reversible Horizontal Post Stitch Crochet Ribbing - a step-by-step photo tutorial by Shibaguyz Designz
2. Row 2: Chain 1, Front Post Double Crochet around first stitch…

Here, we are using a lighter colored contrasting yarn so the stitches are easier to see.

Insert the hook from the front to the back and then to the front again around the post of the first stitch.

Wait… what? Yes… we know. We said Chain 1 at the beginning of the row. And that's what we meant! Because of the way this fabric works out, we only chain 1 at the beginning of the rows. We found that using a First-dc or chaining two just didn't give a neat, tidy edge at all. You'll see…


NOTE: For a refresher on the Front Post Double Crochet stitch, jump on over to our tutorial for How to Make the Front Post Double Crochet Stitch. Again… we'll wait… lalalalalala…


3. First FPdc made

Technique Tuesday - How to make Reversible Horizontal Post Stitch Crochet Ribbing - a step-by-step photo tutorial by Shibaguyz Designz

Technique Tuesday - How to make Reversible Horizontal Post Stitch Crochet Ribbing - a step-by-step photo tutorial by Shibaguyz Designz
4. Just keep stitching… just keep stitching… 


5. And finished row of Front Post Double Crochet stitches.

Technique Tuesday - How to make Reversible Horizontal Post Stitch Crochet Ribbing - a step-by-step photo tutorial by Shibaguyz Designz

Technique Tuesday - How to make Reversible Horizontal Post Stitch Crochet Ribbing - a step-by-step photo tutorial by Shibaguyz Designz
6. Row 3: Repeat Row 2


We've switched back to the darker color yarn so you all can see the stitch placement and resulting fabric components better.


7. Finished row of Front Post Double Crochet stitches.

Technique Tuesday - How to make Reversible Horizontal Post Stitch Crochet Ribbing - a step-by-step photo tutorial by Shibaguyz Designz

Technique Tuesday - How to make Reversible Horizontal Post Stitch Crochet Ribbing - a step-by-step photo tutorial by Shibaguyz Designz
8. And the other side of your fabric after completing Row 3.


Note how the heads of the stitches from Row 2 stand out against the posts of Row 1 and Row 3.


9. Row 3–12: Repeat Row 2.

Here we are again at the end of our FAB ribbed fabric swatch.

Technique Tuesday - How to make Reversible Horizontal Post Stitch Crochet Ribbing - a step-by-step photo tutorial by Shibaguyz Designz

Technique Tuesday - How to make Reversible Horizontal Post Stitch Crochet Ribbing - a step-by-step photo tutorial by Shibaguyz Designz
10: Flip!


And the other side of that completed swatch.

11. Rotate!

Quick shot of our swatch rotated so the wales and troughs align vertically in the form of traditional ribbing.

Technique Tuesday - How to make Reversible Horizontal Post Stitch Crochet Ribbing - a step-by-step photo tutorial by Shibaguyz Designz

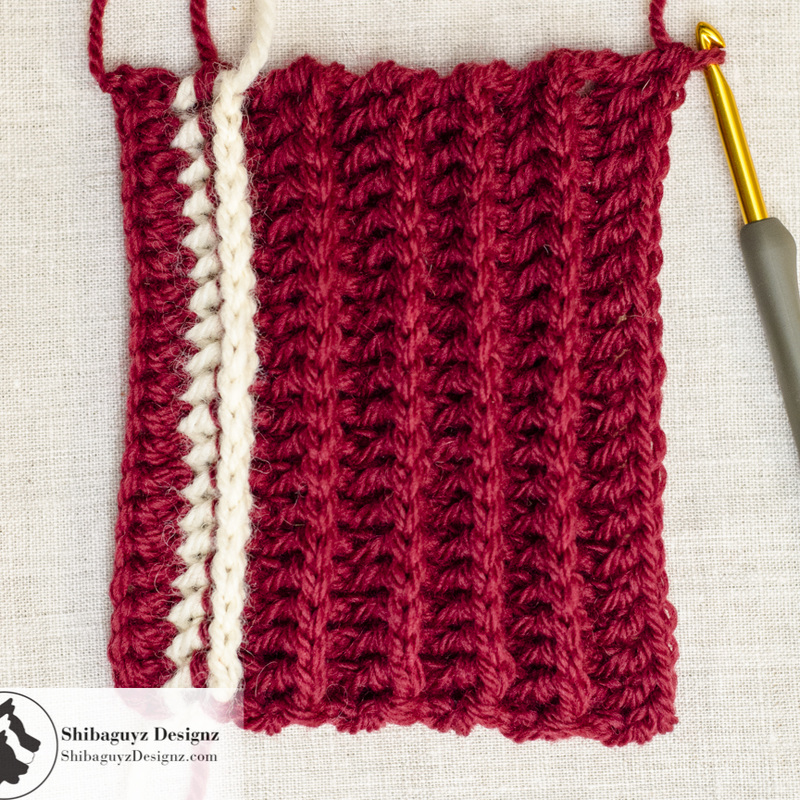
12. The beauty shot of the Reversible Horizontal Post Stitch Double Crochet Ribbing swatch.

FAB!

Remember, we don't block these swatches in our tutorials because we want you folks to see exactly what you will be holding in your hands when you finish your swatch.

Technique Tuesday - How to make Reversible Horizontal Post Stitch Crochet Ribbing - a step-by-step photo tutorial by Shibaguyz Designz


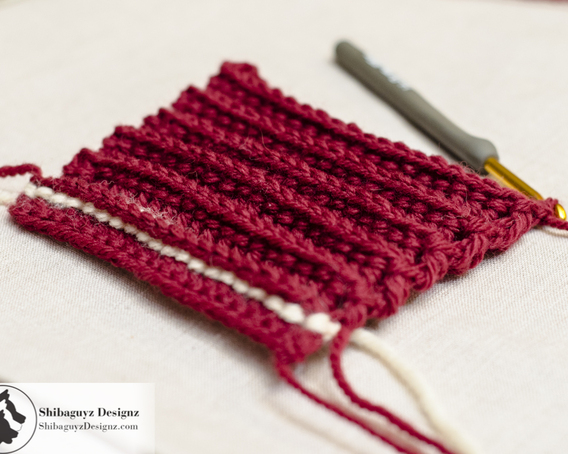
TAADAA!!


A Few Final Important Words
The first few times you practice this technique, we suggest using two colors of yarn just like we did so you can see which stitches go where more easily AND you can compare your work to our tutorial photos more easily.  After that, of course, you'll probably want to work in all one color… or not… it depends on how you are going to use them. Right?

And, as always with ANY new skill, all it takes is practice for new techniques to feel natural and easy for you.

We recommend stitching up a few quick swatches like ours and, using our photo walk through to compare your stitches, to make sure your stitches are lining up correctly. And, hey, if you aren't happy, rip 'em back out and go again! You'll get it!


Finally, PLEASE DO EXPERIMENT and PLAY with these techniques for creating crochet ribbing. NONE of our Technique Tuesday tutorials are meant to be the stopping point for your stitching. To the contrary, they are all meant to be a starting point where you experiment and play with with different yarn weights and hook sizes to see what kind of fabric you can create. Once you get the basics down and can create a swatch that looks like the ones pictured, STITCH ON! and create your own fabric variations.


Thanks for dropping by for another Technique Tuesday! Our aim is to build the skillz of our FAB fiber community here on the web and it's always FAB to hear from you all that what we are doing is helping you and your fiber friends.

Check back often or, better yet, click on that RSS Feed button over there in the right-hand column of the page you are on right now. That way you will always be up to date and never miss a thing!

Stitch On!
S&J

Oh hey… before you go… Here are a few more pages we thought you might be interested in. Click on any of the photos below… enjoy!

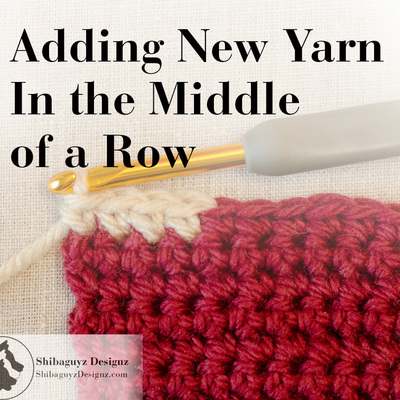
Come look us up on Facebook, Twitter, and Pinterest by clicking on one of these icons.


0 Comments

Your comment will be posted after it is approved.


Leave a Reply.

    Author

    Shannon and Jason

    RSS Feed

    Sign Up For Our Newsletter

    Leave us a tip to help us do what we do!

    BERNINA Ambassador Badge
    Daylight Company Lamps
    Shibaguyz Aurifil Thread Collection

    Archives

    September 2022
    June 2022
    February 2022
    June 2021
    November 2020
    September 2020
    June 2020
    May 2020
    April 2020
    March 2020
    January 2020
    February 2019
    December 2018
    November 2018
    August 2018
    July 2018
    May 2018
    April 2018
    March 2018
    February 2018
    January 2018
    December 2017
    November 2017
    October 2017
    September 2017
    August 2017
    July 2017
    March 2017
    February 2017
    January 2017
    November 2016
    October 2016
    September 2016
    July 2016
    June 2016
    May 2016
    April 2016
    March 2016
    February 2016
    November 2015
    August 2015
    July 2015
    June 2015
    May 2015
    April 2015
    March 2015
    February 2015
    January 2015
    December 2014
    November 2014
    October 2014
    September 2014
    August 2014
    July 2014
    April 2014
    March 2014
    January 2014

    www.dickblick.com
    Picture
    Picture

    RSS Feed

    Categories

    All
    Afghan
    Aurifil
    Books
    Boro
    Camp STITCHES
    Classes
    Cleaning
    Clip On
    Clover
    Cowl
    Craft
    Craftsy
    CraftU Classes
    Crochet
    Crochet Geometry
    Daylight
    Daylight Company
    Design
    Designer Crochet
    Digital Download
    Donate
    Download
    English Paper Piecing
    Event
    Free
    Giveaway
    Hand Cream
    Hooks
    Inspirations
    International Crochet Month
    Interview
    Interweave
    Knit
    Knitting
    Lamp
    Marcus
    Marcus Fabrics
    Men
    Menswear
    National Craft Month
    National Crochet Month
    Needles
    Online Classes
    Ottlite
    Pattern
    Patterns
    Paypal
    Photography
    Podcast
    Prize
    Product Review
    Project
    Quilt
    Quilting
    Recipe
    Rotary Cutter
    Sashiko
    Season Of Giving Away
    Sew Expo
    Sewing
    Shibaguyz
    Shibaguyz Designz
    Shibaguyz Designz Indie Maker Pattern
    Shibaguyz LIVE
    Shibaguyz Photography
    Shop
    Soak
    STITCHES Events
    Sweater
    Thread
    Tool School
    Tools Of The Trade
    Travel Lamp
    Tutorials
    Vogue Knitting LIVE
    Walkthrough
    Warm Up America
    Wash
    Weaving
    Women
    Yarn
    Zoom Loom

    www.dickblick.com

Stay current on the news and events from Shannon and Jason as well as exclusive offers and tutorials available only for our newsletter subscribers.

* indicates required
Email Format

  • Home
  • Blog
    • Tips
    • tutorials
  • Our Books
    • Contemporary Kogin-zashi
    • Boro & Sashiko, Harmonious Imperfection: The Art of Japanese Mending & Stitching
    • Complete Crochet Course
    • Designer Crochet
    • Crochet Geometry
  • All Shopping
    • Books and Digital Patterns
    • Sashiko Shop
    • Thread
    • Fabric
    • Stitchips
  • Classes
  • Sashiko
  • About
  • Contact and Subscribe
  • Sponsors