 Four Techniques for How To Block Your Crochet and Knit FabricsTechnique Four Ways to Block Crochet and Knit Fabrics
Why Use It? Do you REALLY need to ask?? Okay… if you haven't already been back through our posts and read how strongly we feel about blocking… here's a summary: 1. Beginning with swatches: You MUST block your crochet and knit swatches in order to know exactly how your fabric will turn out. Yes, we know… you've been crocheting/knitting for 120 years and you've never swatched or blocked anything a day in your life and you always get gauge the first time. Fine… you have a magic hook and magic needles and you work with magic yarn making magic stitches… got it. For the rest of us normal mortals, we will swatch and block because unless we do, we don't know if we are going to come out with the correct gauge for the pattern we are working from and we don't know how this particular (non-magic) yarn is going to work with this particular (non-magic) hook or this particular (non-magic) set of needles with this particular stitch pattern.
3. Until you block your finished crochet and knit fabrics, the fibers in your chosen yarn will not bloom and come to life. Those yarn fibers have been processed using methods that might include everything from dyeing, spinning, bleaching, heating, twisting, oiling, coating with any number of treatments, and crushing. Then, you've been handling that yarn with your own hands which impart to it your own natural body oils as well as any residue from hand lotions, soaps, food, or pets. All of these act to mush, squish, weigh down, and dull the fibers (even the artificial ones) in your yarn. Introducing moisture into your crochet and knit fabrics via soaking, washing (according to the manufacturer's label!), or steaming allows those fibers to wake up and bloom. One way of describing this reaction of fibers to water is the term "bloom." For an expert definition of bloom and how it occurs in wool yarns, we turned to Beth Smith, author of The Spinners Book of Fleece. We asked Beth to describe the mechanics of bloom in wool yarns.
So there you have it from an expert on fiber. And this magical bloom isn't just a concept that applies to wool fibers. In fact, as long as you can get water into the pores of the fibers, a form of blooming will happen. (psst… if you'd like to purchase Beth's FAB book, click on the photo or the name of the book above. This book is not just for spinners but for anyone who wants to know more about the wool that makes up yarn. Pick up a copy today and educate yourself!) So… why use it? Why block? Because, if you want to meet the designer's gauge, want to make your fabric look like the designer's fabric, wake up your fibers and let them bloom, and show your beautiful handmade crochet and knit fabrics in their best possible light, you are going to block. For more on blocking check out these articles here on our site: Blocking University – Course Overview Blocking Universiy – Session 1: The Right Tools For The Right Job A Tangential Post About Swatching Break It Down There are four basic ways to block your finished fabrics and they all depend on the fabric you are using and how that fabric reacts to the introduction of moisture. 1. Finger Blocking This is by far the quickest and simplest technique for blocking. No pins, wires or strings are used. Simple introduce moisture into the fabric and coax the stitches and dimensions into place with your fingers (thus the clever name… FINGER blocking). After introducing moisture to your crochet or knit fabric, if the dimensions are pretty close to correct you can probably get away with just finger blocking your piece into shape. This is usually the case when: a. The stitch you are using is a solid stitch pattern that is stitched pretty close to the blocked gauge dimensions given in the pattern you are making from. b. The yarn you are using is made from most or entirely from acrylic fiber. These fibers react really well to steam heat and will soften and stay in place once cooled. That said… make sure your recheck your finished measurements when your fabric is dried. Depending on the fiber content of your yarn and the stitch pattern, even a fabric that SEEMS to react well to finger blocking can shrink up depending on the fiber content (remember what Beth Smith said about wool?) and the elasticity of the stitch pattern you used. 2. Pinning No, we're not talking about the wildly popular social media outlet. This is a whole different type of pin. Pinning alone is usually for small pieces of fabric or is used along with Finger Blocking in order to stabilize a fabric that doesn’t need much shaping to reach finished dimensions or that is made using a stitch pattern that doesn't need opened up very much at all.
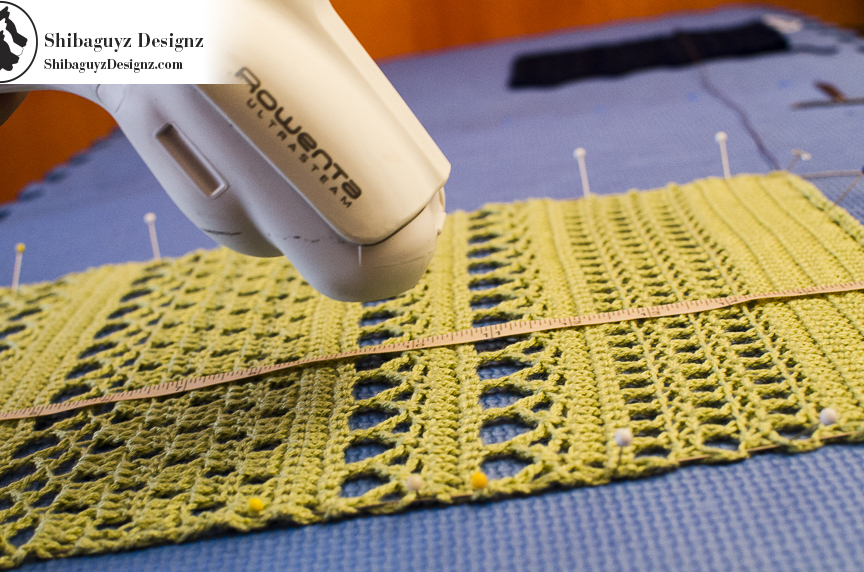
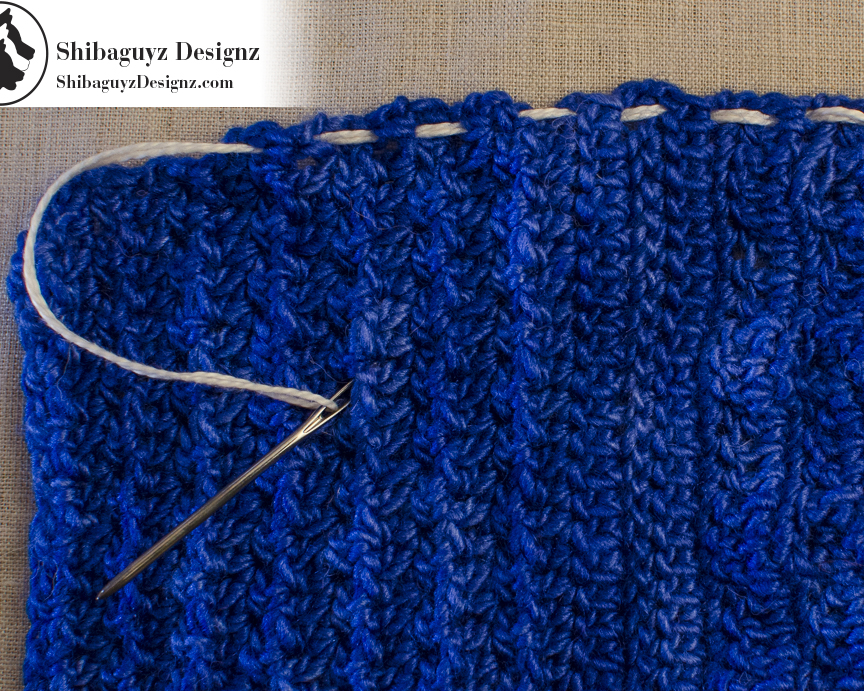
If you are soaking or washing your fabric to introduce moisture to the fibers, you will do that first before inserting the blocking wires. Otherwise… well… you'd be trying to soak or wash a piece of fabric with wires in it. And that's just silly. If, however, you are steaming your fabric (our preferred method of blocking 90% of the time), insert your wires first then steam your fabric before moving it into shape.
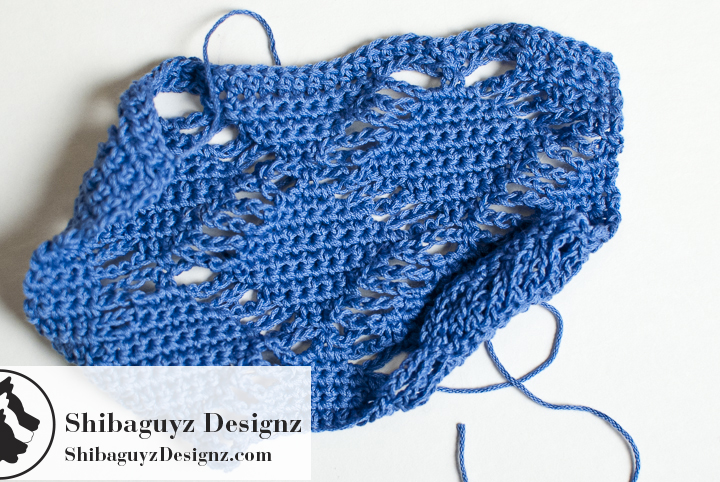
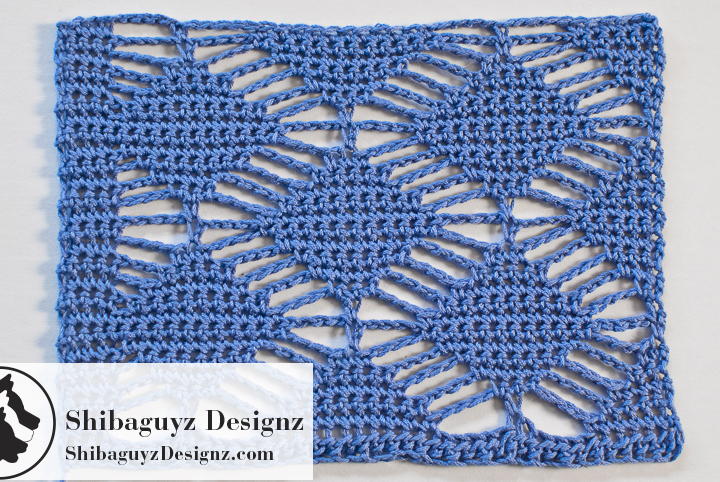
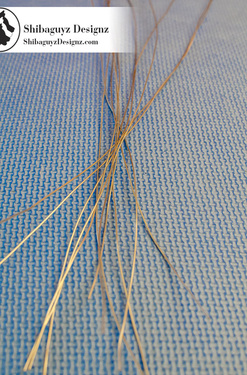
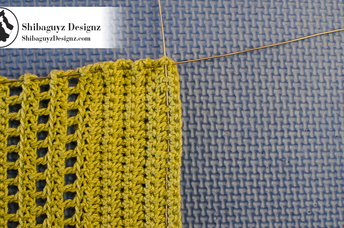
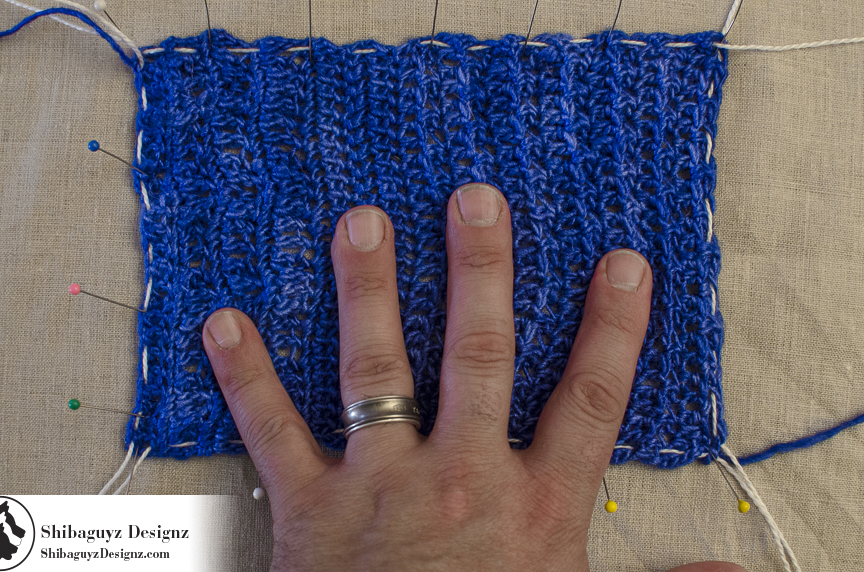
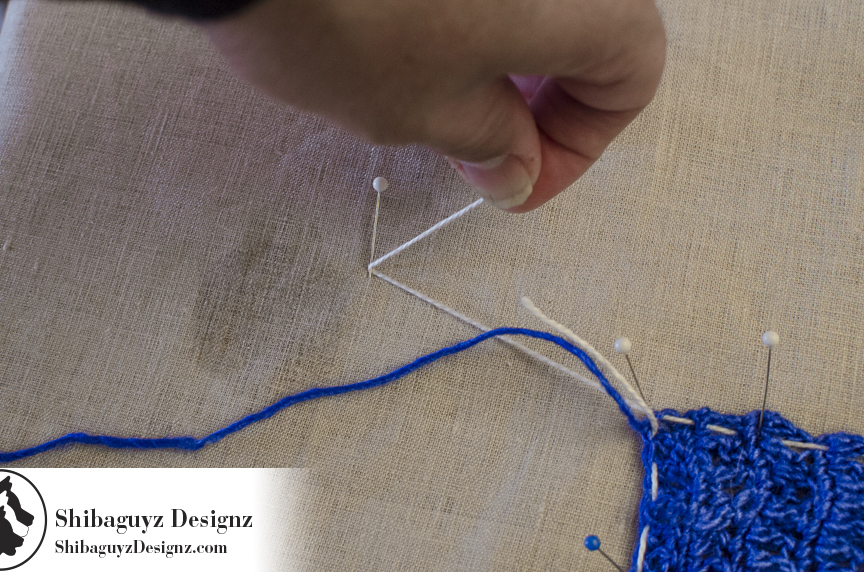
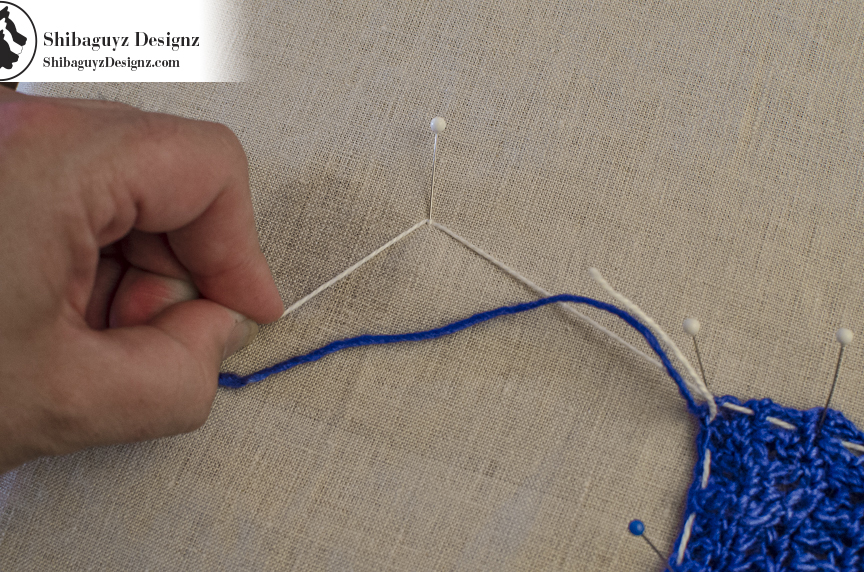
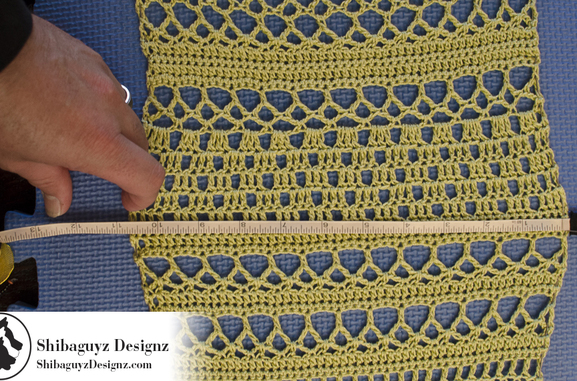 Whatever method you use to get moisture into your fabric, now it's time to gently pull your work into the desired finished dimensions as dictated by either the pattern you are working from or the stitches you used. Have your pins and tape measure handy here… and GENTLY pull the wires outward from the center of your fabric until your reach your finished dimensions or until your stitches are blocked into their proper shapes. Pin the wires into place as you go using a (gentle) pull and pin, pull and pin method. Place the pins at an angle so they are holding the wires in place otherwise they could slip as the fabric dries and the edges of your fabric will pull in aaaaaand you'll have to start all over again. IF you encounter any pulling in one particular spot while you are (gently) pulling and pinning, STOP and steam or spray down the offending spot and smooth the fabric outward with your hands away from the pulled spot. We have seen this happen a few times in solid crochet fabrics, in particularly tightly knitted fabrics, or in crochet or knit laces. It's just a matter of either not enough moisture or an uneven amount of (not-so gentle) pulling when you are (gently) pulling and pinning. Keep an eye out for this because once those stitches are popped, they are nearly impossible to put back. Then there's wailing and throwing things and stomping on… oh… what? Just me? If you are using steam to introduce moisture into your fabric, after you have evenly wired and (gently) pulled and pinned, hit the fabric with another bit of steam to set it and walk away. Otherwise, just walk away. No, really… go… the fabric has to dry now. TIP: We have been known to place a fan so it blows directly on a blocking piece of fabric to aid in the drying process. This is helpful if you live in a particularly humid climate or if you have a particularly dense fabric made with thick yarn. Fan enhanced drying is also helpful if you are on a tight deadline and you have three other projects to block out and you already have EVERY surface in your house covered in blocking mats and blocking fabrics and you feel like you're living in a factory and… and… what? Just us? Still… in a hurry or just impatient… the fan helps. 4. String This is something we stumbled upon when we were trying to block a piece of fabric that was REALLY big and it just wasn't working out to block it in sections and we didn't even have enough wires to deal with it all. We somehow got it into our heads to run string up the sides of the fabric with a yarn needle and pull the ends TIGHT like a guitar string. Yup… it worked! Blocking with string is FAB for blocking BIG pieces of fabric and for blocking curves like necklines, armholes, round afghans, and circular or semi-circular shawls and wraps. Also, if you just don't have wires, this will work just fine with a little fiddling.
Also, you don't want your string or yarn to be a larger gauge than the fabric you are blocking. Weaving a larger gauge string or yarn through the edges of your crochet or knit fabric could result in holes and pulled edge stitches. TIP: Years ago, an ingenious stitcher in one of our classes suggested using unwaxed dental floss for blocking very fine gauge crochet or knit fabrics. We love this idea and tried it on a very fine gauge yarn we used to make a particularly airy fabric. The unwaxed floss went through the stitches without leaving a mark and the project came out beautifully.
After the string is tight and the edges of your fabric are tight, place pins just as you would for blocking with wires and you're done! 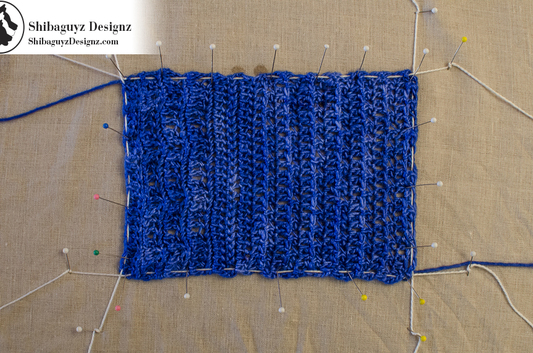 As we said, this is a FAB technique for blocking out curves and circles. We use this for blocking the curves in armholes and for blocking out big ol' circular shawls. Just run the string around the edges of the curve and pin into place. Wires are okay for slight curves over short distances but string works FAB for more dramatic curves over longer pieces of fabric. So there you have it! No matter what the fiber, fabric, or circumstances, you now have a fully loaded toolbox of information on how to beautifully block your finished crochet and knit fabrics. We're sure this won't be the last you hear from us on the subject of blocking. As long as crocheters crochet and knitters knit, there will always be more fabrics to finish and more blocking to be done. For now… Stitch On! S&J Oh hey… before you go… Here are a few more pages we thought you might be interested in. Click on any of the photos below… enjoy!     Come look us up on Facebook, Twitter, and Pinterest by clicking on one of these icons.
9 Comments
Heather McCormick
12/4/2014 07:54:40 am
Thank you so much for this. Very helpful! 1/10/2015 03:46:04 am
Just needing this very info! Thank you so much! Timely! 1/28/2015 02:40:50 pm
This is exactly what I was looking for and something tells me that once I'll start it, I will Wonder why I havn't blocked my knitting before ;)
Veronika Allister
1/29/2017 05:13:58 pm
Thank you so much. This is an extremely helpful article.
Patricia
2/23/2017 08:55:26 pm
So informative and encouraging. Am looking forward to blocking (for the first time) something I have knitted. Have knitted for years and never did this. Thank you so much for writing and illustrating this explanation. Awesome article and series of articles on blocking! I'm definitely including them on my article about blocking soon :) Thank you for helping me to learn to block my crochet pieces! I have a couple of jewelry pieces and shawls that I want to see how they turn out by using your techniques. Thank you again!
Cheryl
10/27/2018 11:34:46 am
This was extremely helpful. I never heard of finger blocking. Just finished a wool blend and it has a natural curve. Your comment will be posted after it is approved.
Leave a Reply. |
AuthorShannon and Jason Leave us a tip to help us do what we do!


Archives
May 2024
 

 Categories
All
     |

 RSS Feed
