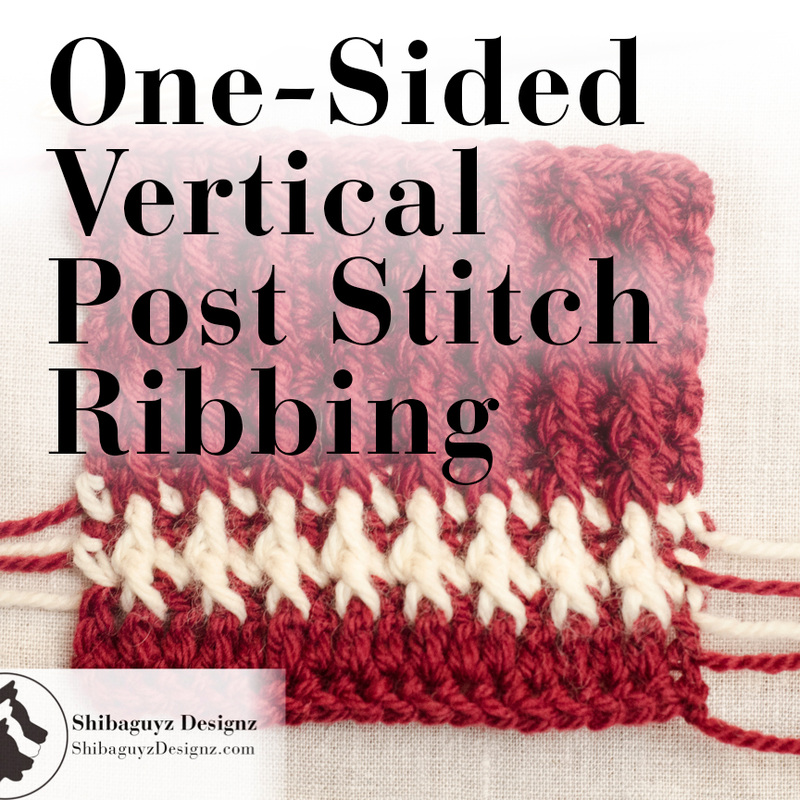
How To Make One-Sided Vertical Post Stitch Crochet Ribbing 
What is it? We started our discussion of crochet ribbing last week with a quick definition of ribbing. Simply put, Ribbing is a series of raised ridges – called wales – and contrasting low troughs. While there are a number of ways to create combinations of wales and troughs using crochet stitches, over the course of a few posts, we will be dealing with four main methods of creating crochet ribbing: Reversible Vertical Post Stitch Ribbing – the technique discussed in last week's post One-Sided Vertical Post Stitch Ribbing – our topic today! Horizontal Post Stitch Ribbing – future post Horizontal tbl Ribbing – future post… stay tuned! As you can see, we can create crochet ribbing by working post stitches either vertically or horizontally and by working horizontally using only the back loop of our stitches. While we will get to the back loop ribbing technique on a future post, today we are working on our post stitch ribbing. A quick reminder here that post stitches are worked around the post of a crochet stitch resulting in a stitch that is raised to the front or the back of our working row depending on whether we work a Front Post Crochet Stitch or a Back Post Crochet Stitch. Click "Read More" link below for the full post.
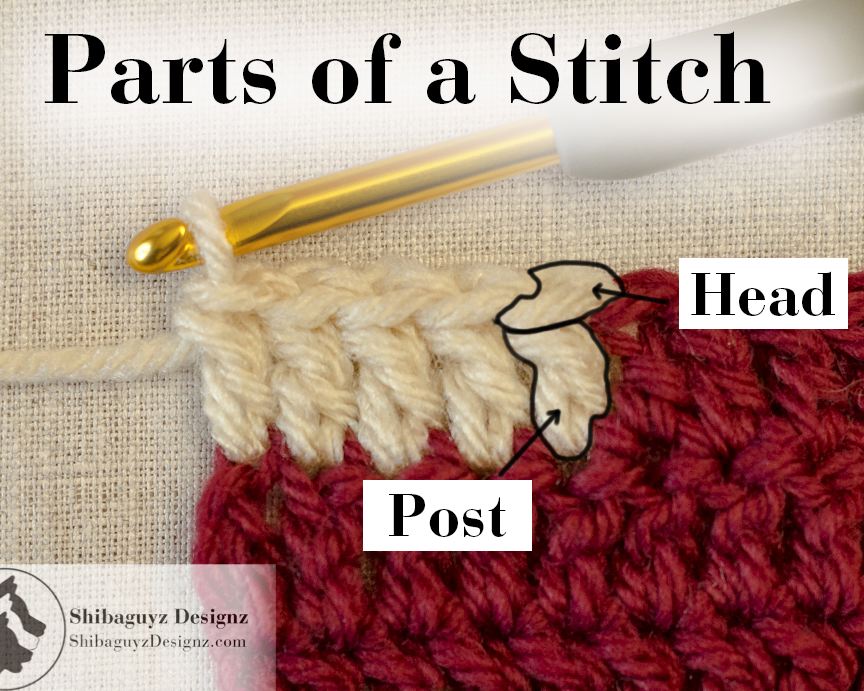
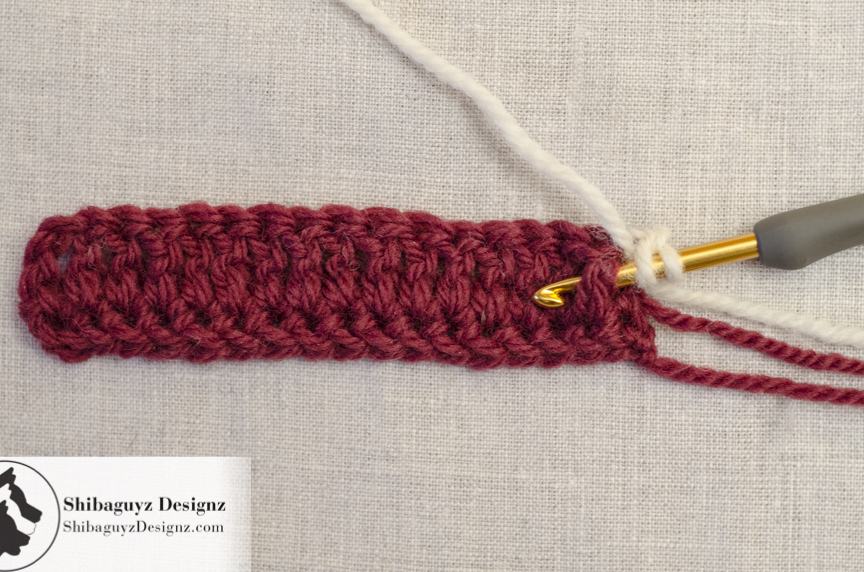
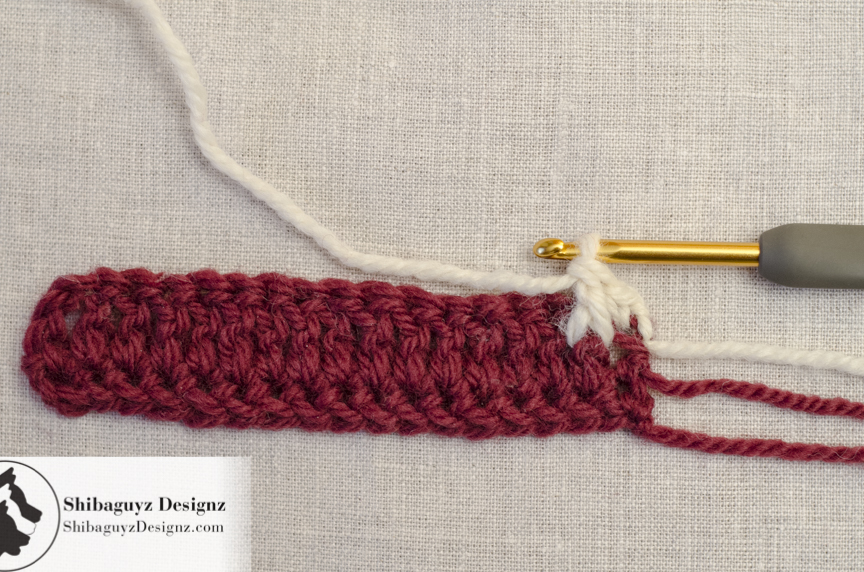
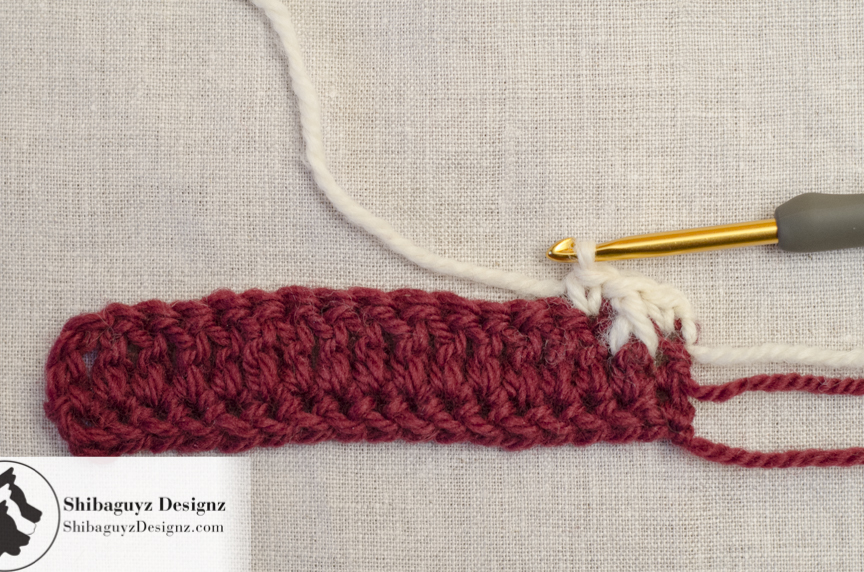
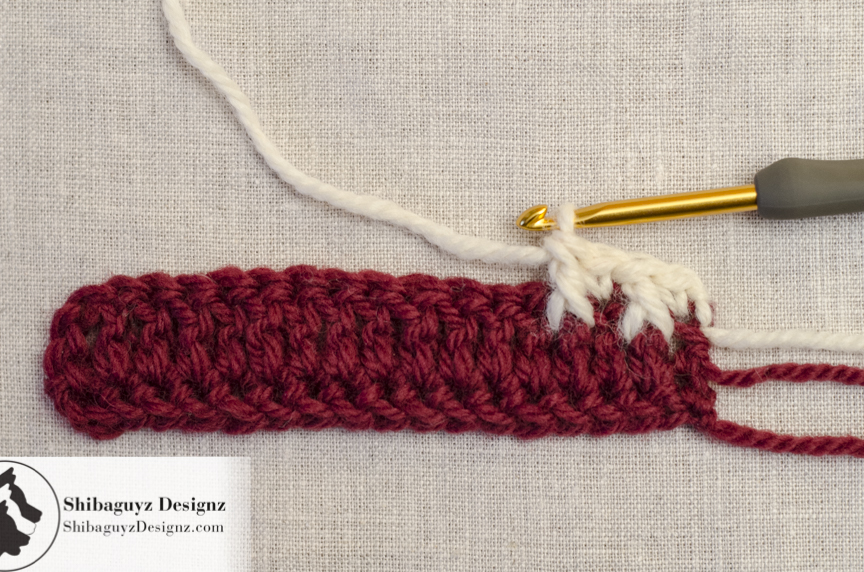
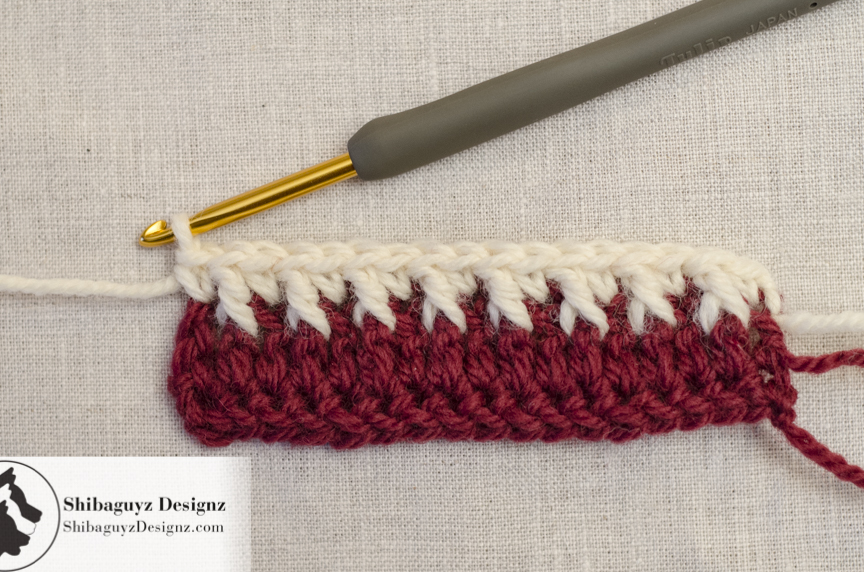
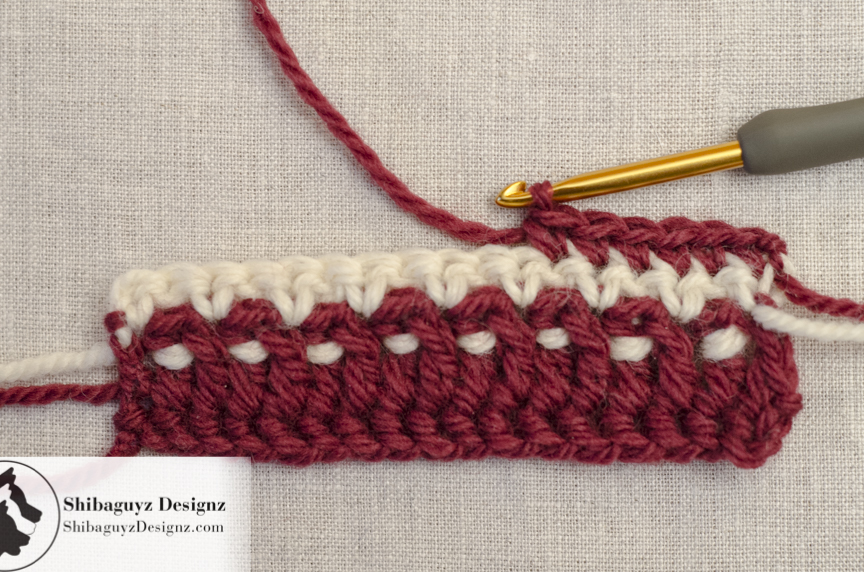
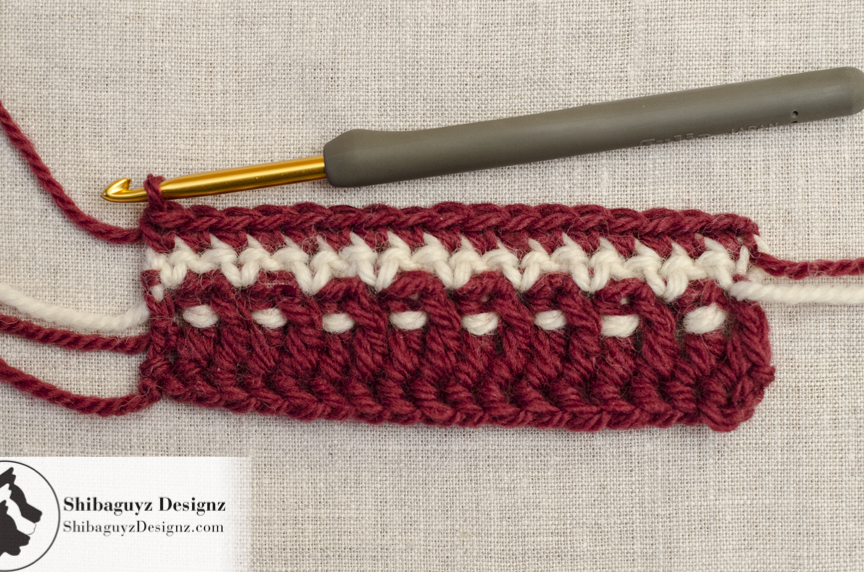
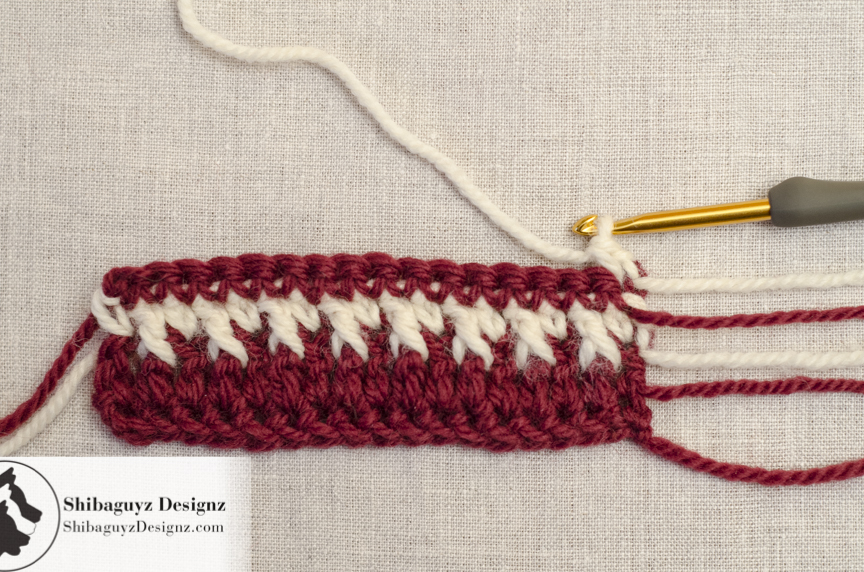
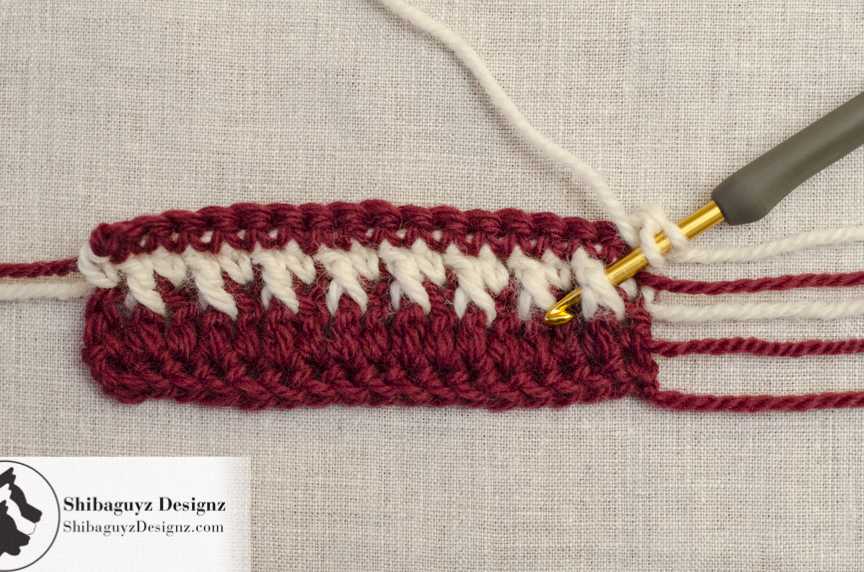
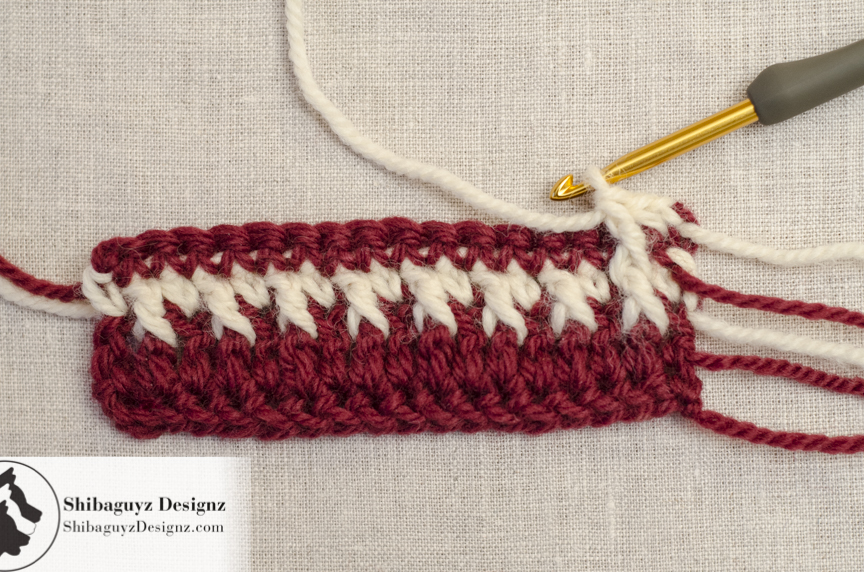
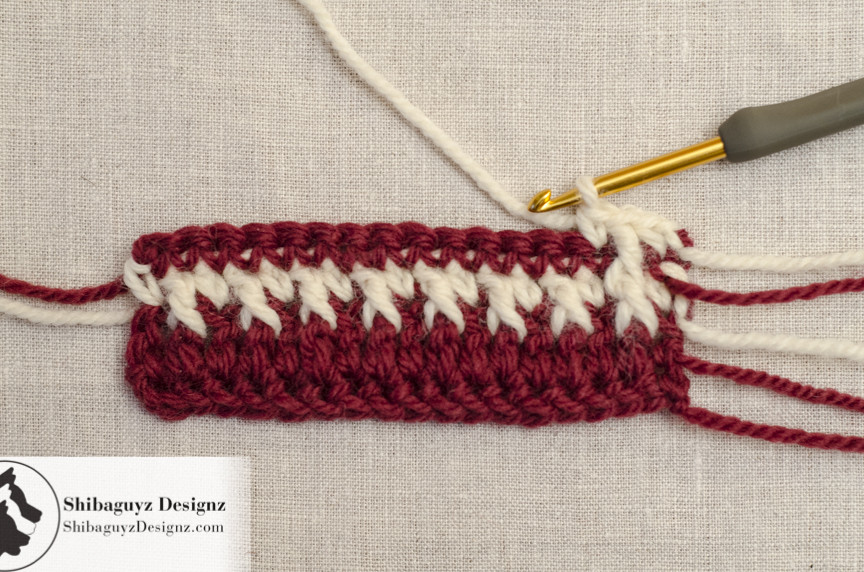
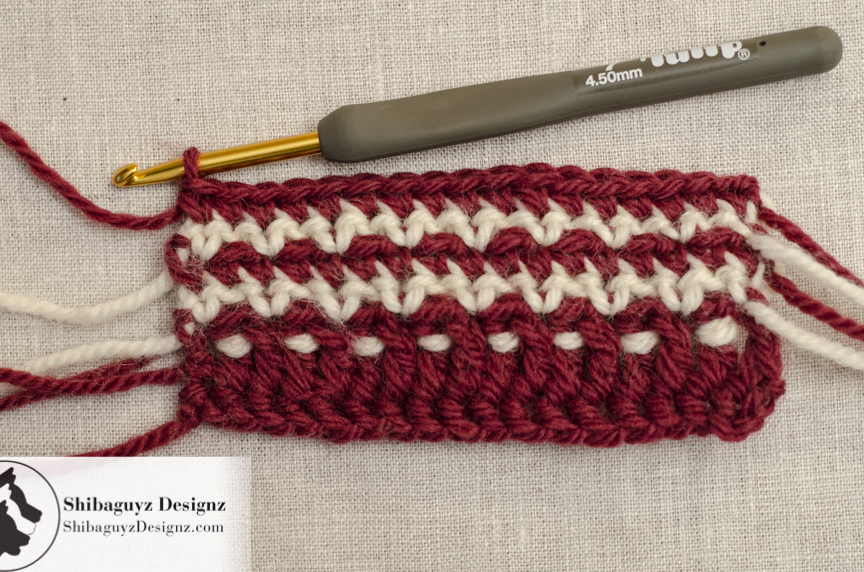
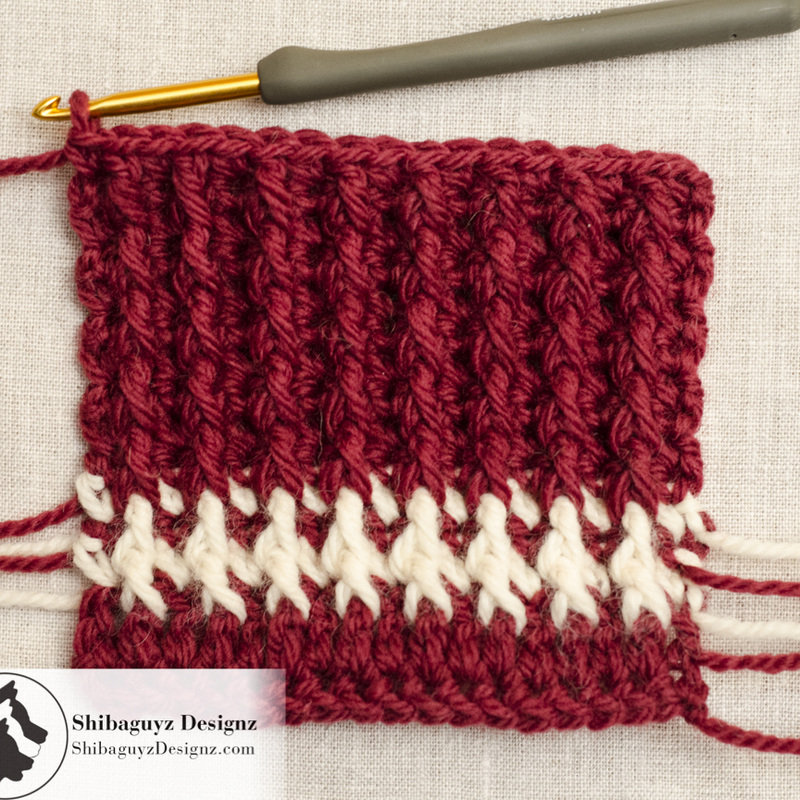
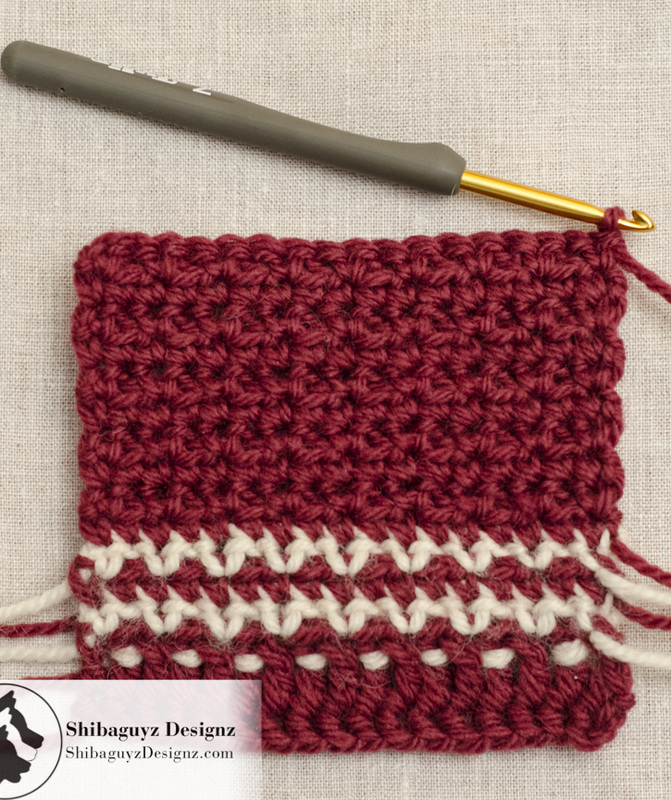
For today's One-Sided Vertical Post Stitch Crochet Ribbing tutorial, we are going to be creating a one-sided ribbing with wales on – as the name indicates – only one side of the fabric through the use of a combination of Single Crochet and Front Post Double Crochet Stitches. Further, we are working the Front Post Double Crochet stitches on every other row with a row of Single Crochet stitches between. One-Sided Vertical Post Stitch Crochet Ribbing creates a series of wales and troughs that are made vertically in relation to the working direction of our crochet fabric. That is, we start at the top or bottom of the fabric and create wales and troughs by working rows of alternating Single Crochet and Front Post Crochet Stitches. These alternating Single Crochet and Front Post Crochet Stitches off of one another in successive rows creating the vertical wales and troughs – Ribbing! Here are the instructions for the Front Post Double Crochet stitch we are using in today's tutorial: Front Post Double Crochet (Fpdc): Yarn over, insert hook from front to back and then to front again around post of indicated stitch, yarn over and draw up a loop, (yarn over and draw through 2 loops on hook) 2 times. For a more detailed breakdown of the Front Post Double Crochet stitch, see our tutorial: How to make the Front Post Double Crochet Stitch Why Use It? When considering where to use this type of crochet ribbing, it should be noted that One-Sided Vertical Post Stitch Crochet Ribbing is not as squishy as its reversible counterpart. The One-Sided Vertical Post Stitch Crochet Ribbing technique creates a much "flatter," truly less bulky version of vertical post stitch crochet ribbing than our combo front and back post Reversible Vertical Post Stitch Crochet Ribbing from last week's Technique Tuesday tutorial. This stands to reason because we are working post stitches on only one side of the fabric and only on every other row. It still makes a FAB detail stitch around hems, necklines, borders and waistlines but, without the added bulk of Reversible Vertical Post Stitch Crochet Ribbing, One-Sided Vertical Post Stitch Crochet Ribbing also serves better as an all-over stitch. In a lightweight yarn with a softer hand (think bamboo, silk, acrylic blends, and sock yarns), One-Sided Vertical Post Stitch Crochet Ribbing makes a beautiful fabric with striking surface detail. Also, this technique of working our raised stitches on only one side of our crochet fabric is the gateway to crochet cables for those who have never worked crochet cables before. Building the skillz! Basically, once you understand and are able to work this technique, there is a whole new world of texture stitches you will find available to you. In fact, you might even start playing around and discover a few of them yourself! To Make Today's Swatch Here's a list of materials we used to make today's tutorial swatch: Yarn Used CYCA 4 Worsted Weight, 100% Pure Wool Hook Used H-8/5.00mm Crochet Hook Skillz Used Single Crochet Double Crochet Foundation Single Crochet – How to make the Foundation Single Crochet tutorial Front Post Double Crochet – How to make the Front Post Double Crochet tutorial Break It Down
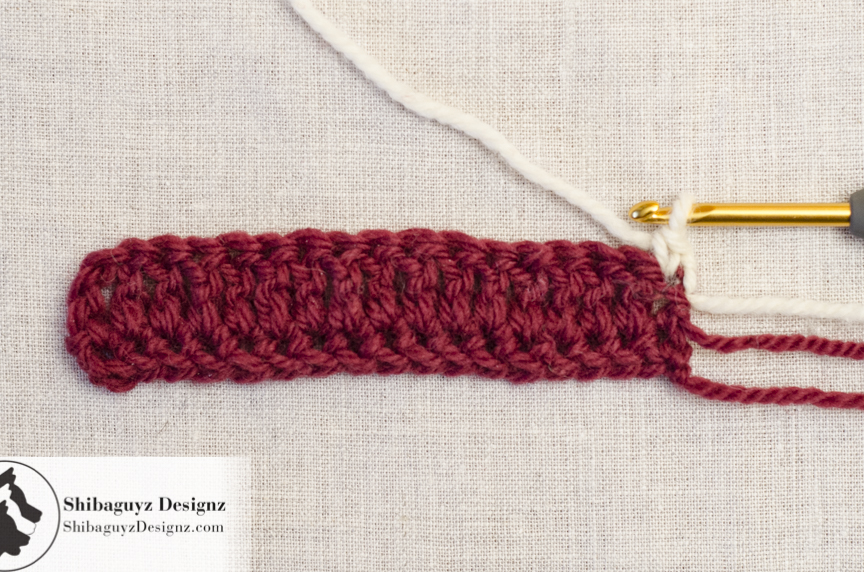
NOTE: We are using an odd number of stitches for working a flat piece of fabric. This gives us even edges that, in this case, start an end with Single Crochet stitches. Working the Single Crochet stitches at either end of the rows creates a fabric with a nice, tidy edge that doesn't go all wonky and look like it's been trampled by a herd of marauding wildebeest. If you were working your fabric in-the-round as for the brim of a hat or wrist warmers, you would work an even number of stitches and start this row with a Single Crochet and end it with a Front Post Double Crochet.
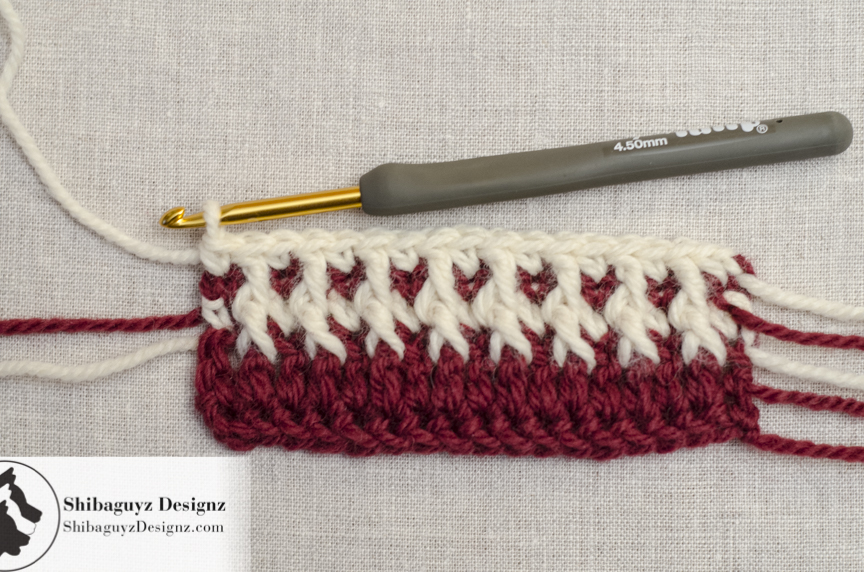
TAADAA!! 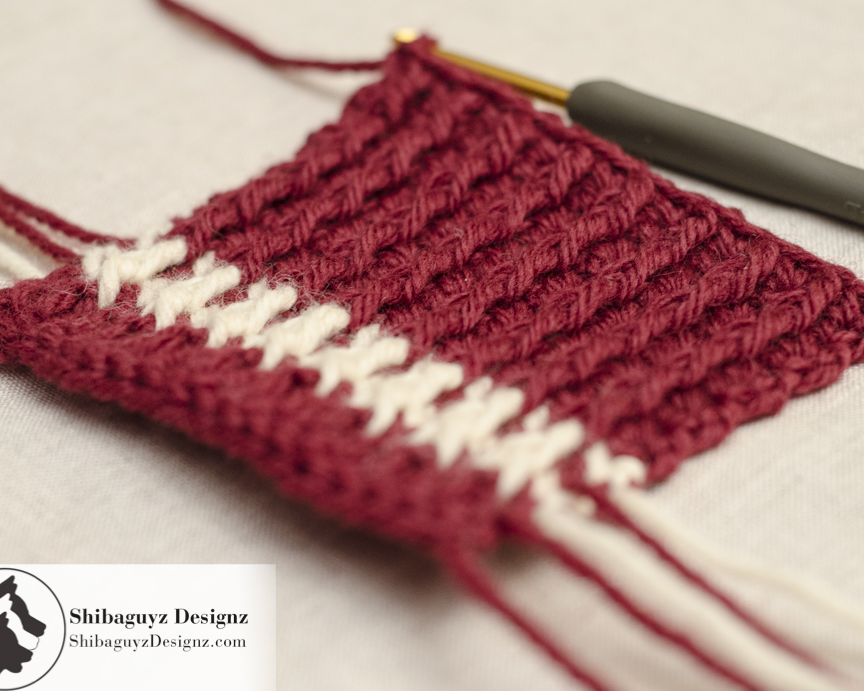 Beauty shot for effect… OOOOOOOOO… aaaaaahhhhh… As always, we did not block this swatch because we want you to see the fabric you should be holding in your hands at the end of your stitching. Note the every so slight curling. This slight curling is easily remedied with blocking BUT… and this is a BIG BUT… IF you see that your swatch is starting to curl more extremely than you see here, there's a good reason and an easy fix… so don't panic… just read on… Because this is One-Sided Vertical Post Stitch Crochet Ribbing, the Front Post Double Crochet stitches are all worked on one side of the fabric with no counterbalancing Back Post Double Crochet stitches as in Reversible Vertical Post Stitch Crochet Ribbing. This CAN cause curling if the Front Post Double Crochet stitches are worked too tightly. Slight curling like you see in our photo is not a problem and is easily fixed with blocking. More extreme curling MIGHT block out but most likely will result in overly pulled post stitches that are just going to go back to their original shape after blocking and you'll have a curled mess of a fabric. Fortunately, there are two easy peasy fixes for the more extreme curling: 1. While this is not our favorite remedy, if you are a particularly tight stitcher, you can switch up to a Front Post Treble Crochet stitch. Just do one more yarn over before you work your hook around the post of the indicated stitch and work a Treble Crochet stitch as usual. This isn't our favorite fix because we found the Front Post Treble Crochet stitch to be just a little too bulky and wobbly on the surface of our fabric. 2. Our preferred method for fixing an extreme curl is to actually pull that first yarn over up a little higher than you normally would. In the instructions for a Front Post Double Crochet stitch, the first "…yarn over and draw up a loop,…" is where you will make this adjustment… but only a SLIGHT adjustment! Don't "draw up a loop" too tall. A little goes a long way here. Just make sure that when you "yarn over and draw up a loop" you give that loop you've just drawn up a L-I-T-T-L-E bit more slack. This should only take a very slight adjustment to your regular post stitch. We say SHOULD because only YOU know what your tension is like and only YOU can see what your stitches are coming out like on any given day at any given moment. Let's face it… on days where the coffee is the main source of sustenance or on evenings where we're watching THAT movie with THAT action scene in it… our tension does vary slightly from the norm. The key to being a good stitcher is paying attention to our tension (gauge) a we go and making slight adjustments where needed… right? Right. WHEW… we covered a lot of ground today. Great job keeping up! The first few times you practice this technique, we suggest using two colors of yarn so you can see which stitches go where more easily AND you can compare your work to our tutorial photos more easily. After that, of course, you'll probably want to work in all one color… or not… it depends on how you are going to use them. Right? And, as always with ANY new skill, all it takes is practice for new techniques to feel natural and easy for you. We recommend stitching up a few quick swatches like ours and, using our photo walk through to compare your stitches, to make sure your stitches are lining up correctly. And, hey, if you aren't happy, rip 'em back out and go again! You'll get it! Thanks for dropping by for another Technique Tuesday! We appreciate the comments y'all have left for us on here and on social media and we're happy to know we could help. Our aim is to build the skillz of our little fiber community here on the web and it's always FAB to hear from you all that what we are doing is helping you and your fiber friends. Check back often or, better yet, click on that RSS Feed button over there in the right-hand column of the page you are on right now. That way you will always be up to date and never miss a thing! Stitch On! S&J Oh hey… before you go… Here are a few more pages we thought you might be interested in. Click on any of the photos below… enjoy! 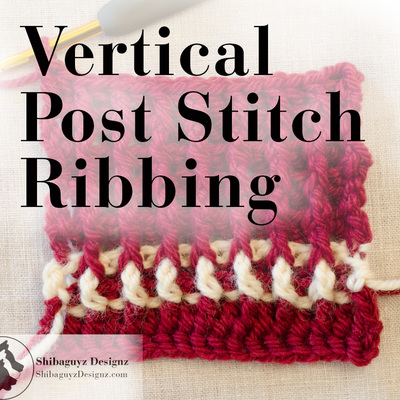    Come look us up on Facebook, Twitter, and Pinterest by clicking on one of these icons.
0 Comments
Your comment will be posted after it is approved.
Leave a Reply. |
AuthorShannon and Jason Leave us a tip to help us do what we do!


Archives
May 2024
 

 Categories
All
     |
 RSS Feed
