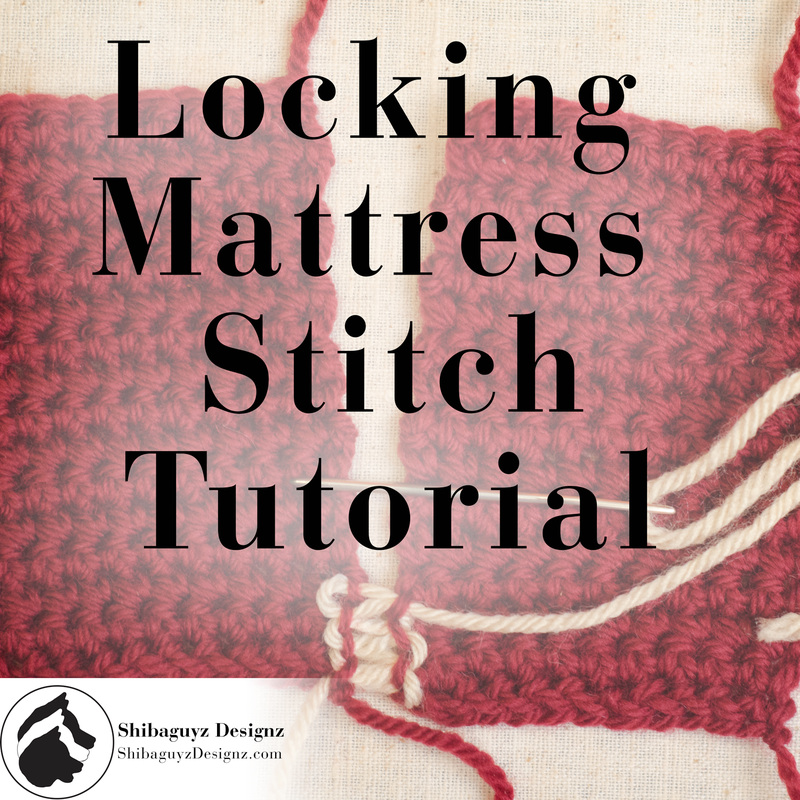
How To Make the Locking Mattress Stitch for Crochet Fabric TECHNIQUE Locking Mattress Stitch (for Crochet Fabric) NOTE: Although the Locking Mattress Stitch works FAB with both crochet and knitted fabrics, today's Technique Tuesday article will be addressing the use of this seaming technique with crochet fabrics. Look for a future article for seaming knit fabrics using the Locking Mattress Stitch.
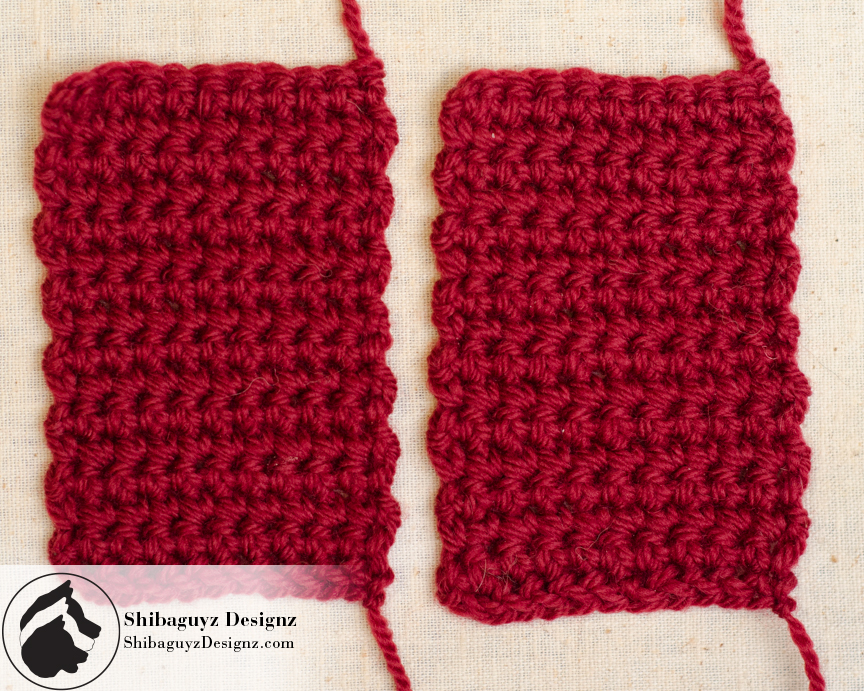
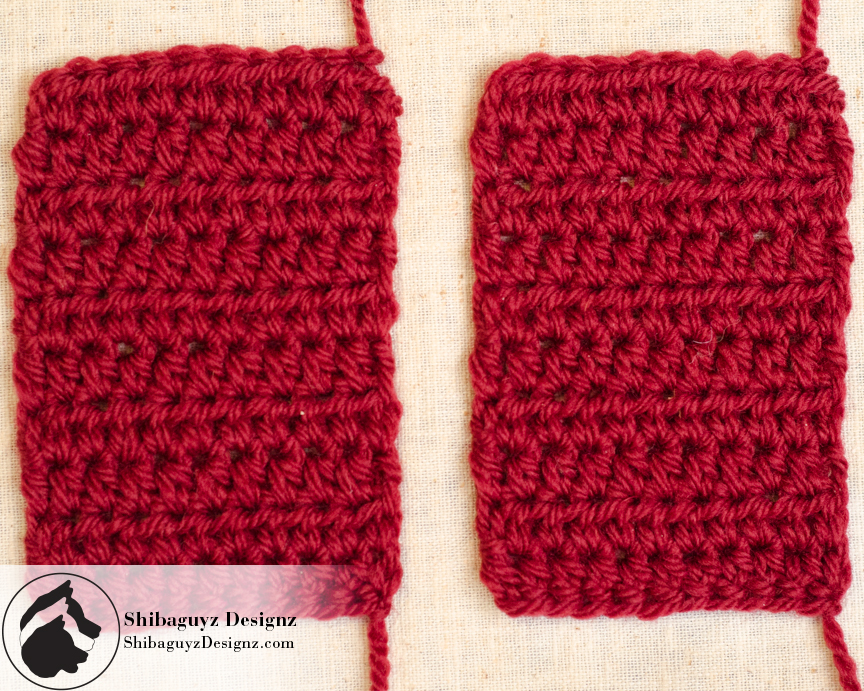
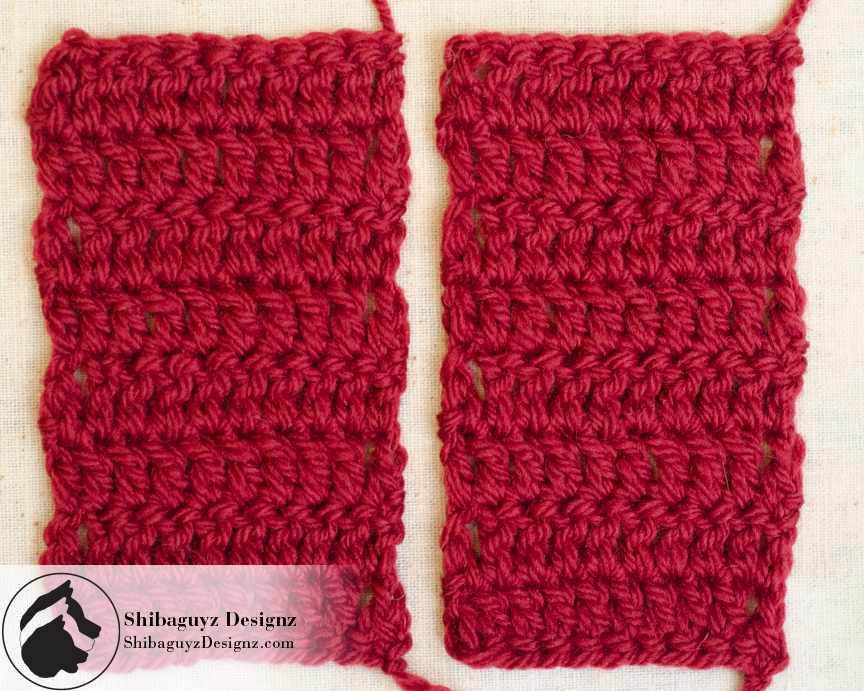
Why use the Locking Mattress Stitch? The Locking Mattress Stitch leaves a nearly invisible seam in crochet and knitted fabrics. It's really that simple. The seam is sewn using minimally invasive needle work and the stitches snug together in a neat and tidy way that leaves a seam on the inside of the fabric with no noticeable bulk and leaves the outside of the fabric looking… well… seamless! (Pun intended… thanks.) Click "Read More" link below for the full post. A Little Background Initially, we used this method of sewing seams because… well… that's how I was taught to do it when I was a kid! Sure… both of us were also accustomed to seaming with the backstitch and the blanket stitch but we found both of these created seams that were bulky and we didn't like the way the finished side of the fabric looked. So, we began using the stitch I had learned all those years ago. When we wrote our first patterns, we needed to describe what stitch we were using so we searched the internet and looked through my old books to see if there was a name for this stitch and, lo and behold, we eventually found the Mattress Stitch. Noticing that ours was a little different, we gave it the new name of Locking Mattress Stitch because of the "lock" of working back into the previous stitch. So, no, we didn't invent or even reinvent this stitch. It was taught to me and now we use it in all of our designs and we are passing it on to you all. Oh… and, no, I don't think my grandmother invented this method of seaming either. Someone probably taught it to her or she figured it out through trial and error just like someone else's grandmother probably did at the same time halfway around the world. It's that whole creative frequency thing… maybe we'll chat about that later… The 3 Keys to Working a Successful Locking Mattress Stitch There are three key factors to keep in mind in order to work a successful Locking Mattress Stitch that creates the nearly invisible seam: 1. Alignment Just like your stars, your stitches and rows must also be in alignment for a positive outcome. Okay… that's not exactly the same but you get my drift. The sides of your stitches must be matched so your rows align creating a seamless look to the finished fabric. Check your work as you go to ensure something hasn't gone a bit wonky as you are stitching. You will see in the final photos below that the rows line up but might look just a little askew until you block them… that's totally okay. What you want to avoid is the top of one row meeting the middle of another row. That's just wonky… 2. Loops You will be tempted to think you need to insert the needle under more than one loop to make sure there are no gaps in your seam. NOPE! Don't do it… resist the temptation! One loop is enough. That said… NOTE: If you do notice any gaps in your seam, you might need to consider adding an after-the-fact selvedge like a border of single or half double crochet stitches to sew into. In that case, you would then sew your seams like you would for a shoulder seam (shown below). 3. Tension It is vital that you maintain even tension as you snug your sewing yarn along the length of the seam to prevent painful puckering. Check your work as you go to make sure your fabric is still hanging correctly and that you aren't gathering or puckering the fabric as you pull your seaming stitches snug. A Very Special Note From The Designer About Seams steps up on soapbox For your consideration: Sometimes we design a seam into a garment for structural purposes. No… despite cries we have heard to the contrary… not every seam is put in there just so you have something else to sew together. Sometimes, seams are actually structural elements that keep your garment from sagging and bagging. And, in the case of the tops of your shoulders, the seam is, literally, what your entire garment hangs from and is supported by. Yes, we've heard the complaining. But saying you love making garments but don't do it because you don't want to sew seams is like saying you like driving but don't like moving your foot from the gas to the brake. Yes, there are seamless patterns that are great and you can drive around a racetrack all day (although we're pretty sure you'd still have to use the whole gas/brake thing there too) but, eventually, you are going to want to drive to the park to play in the grass or fall in love with a garment that just isn't meant to be made seamless. Moral of the story: Seamless is good but seamless is not always the way to go! steps off soapbox… for now… Break It Down For the Break Down, since crochet stitches all look different making it difficult to know exactly where the loops are you are supposed to be working your needle into, we've included photo walk throughs for Single Crochet, Half Double Crochet, and Double Crochet fabrics as well as for Shoulder Seams. They are pictured below in that order. 1. Lay work with right sides facing down and edges to be sewn side by side. Stitches will be worked through the top loop only of both sides.
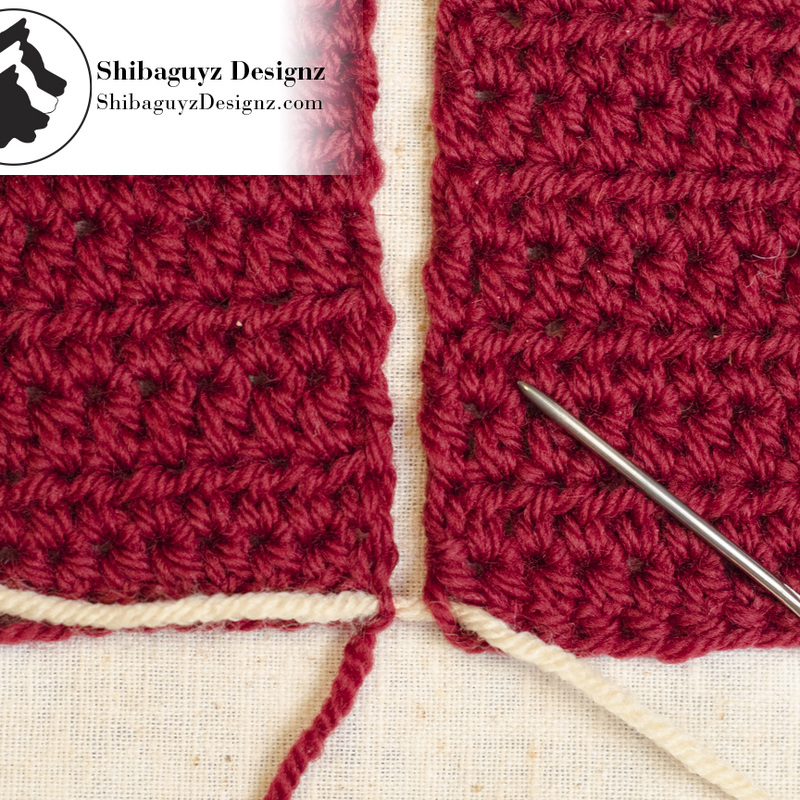
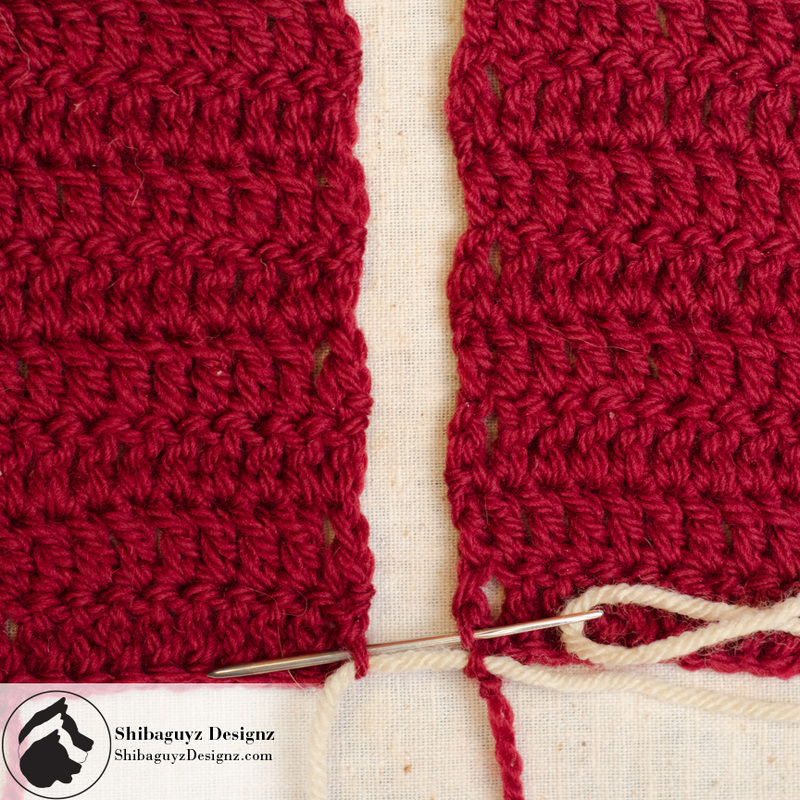
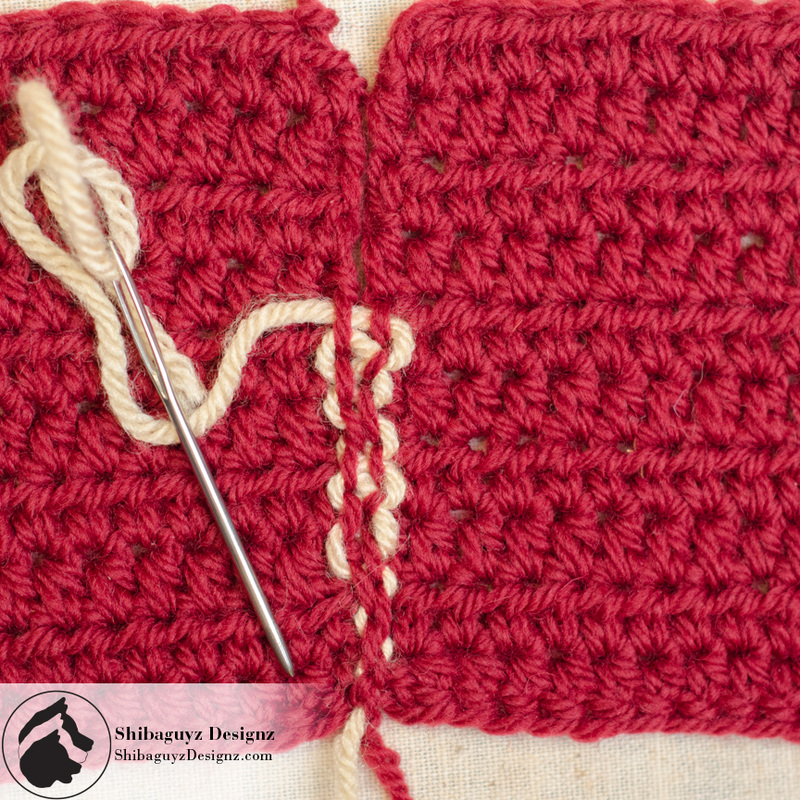
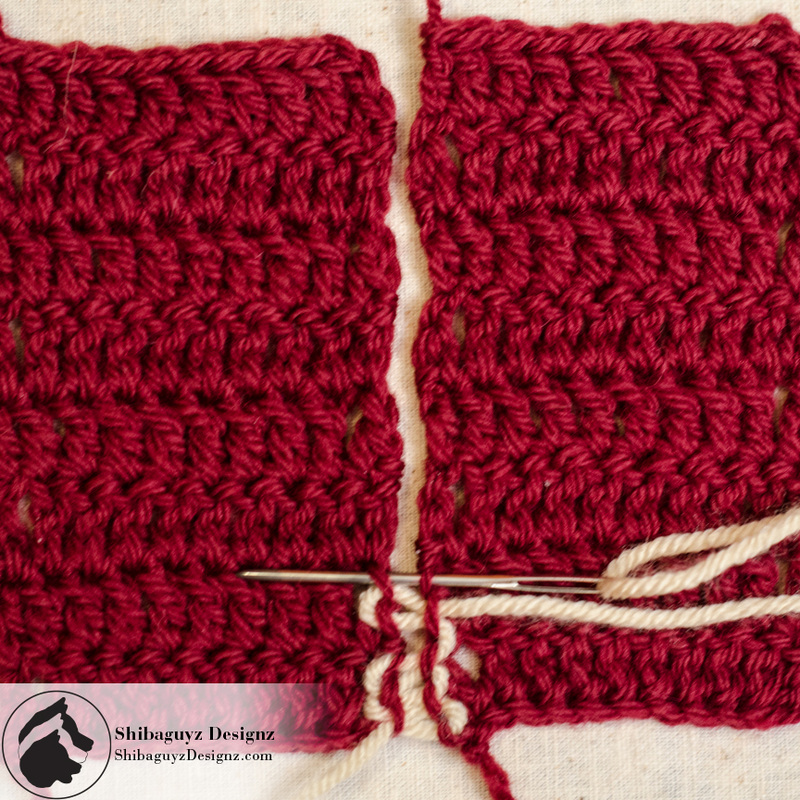
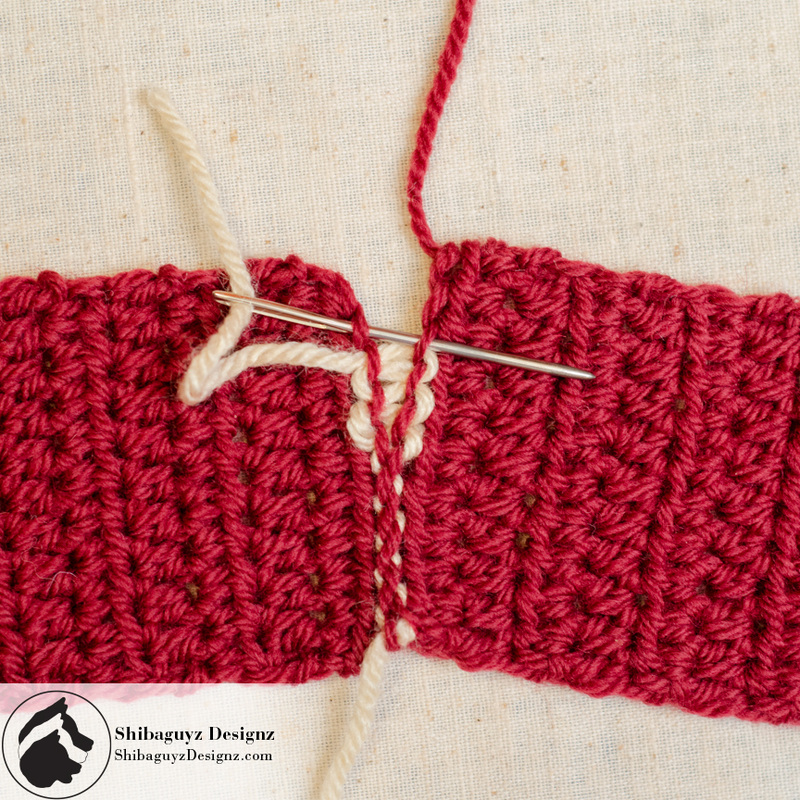
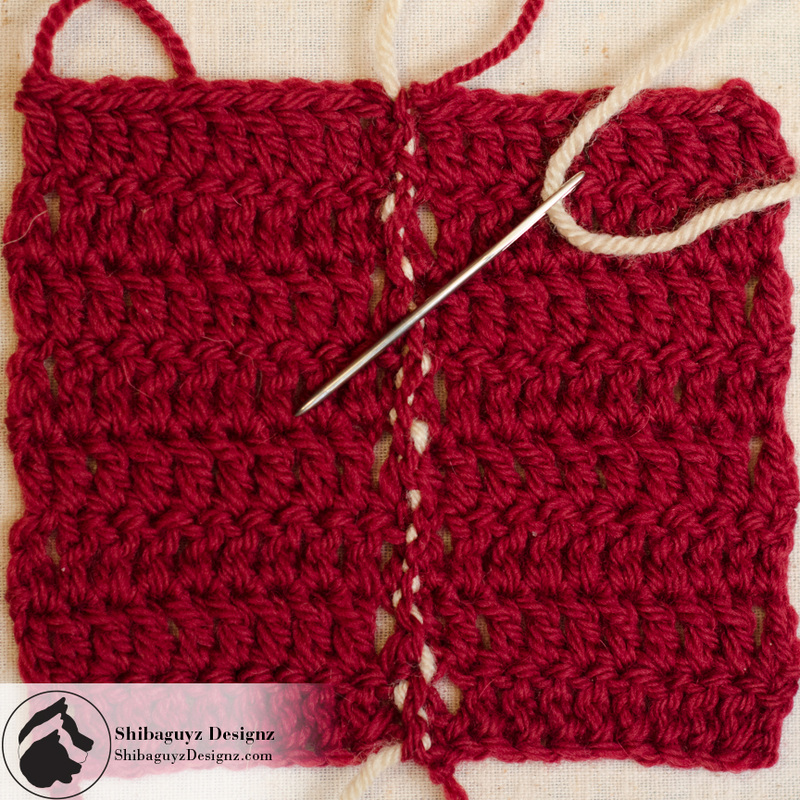
2. Insert needle from left to right through the first stitches of both panels at the bottom of your work to begin joining the two panels.
3. Insert needle from right to left into the next stitch of the right panel and continue through the last stitch worked on the left panel.
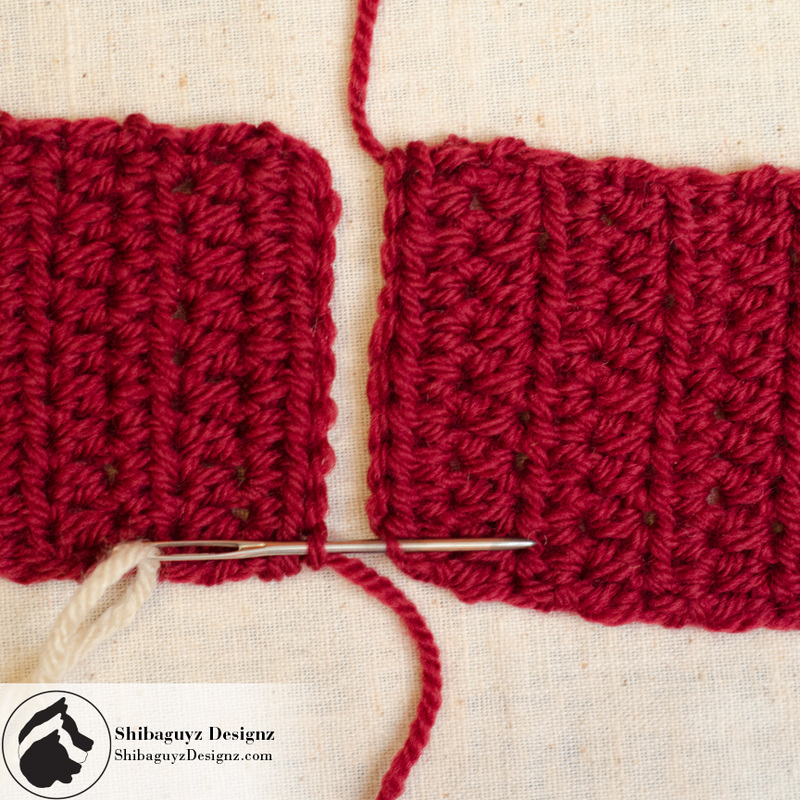
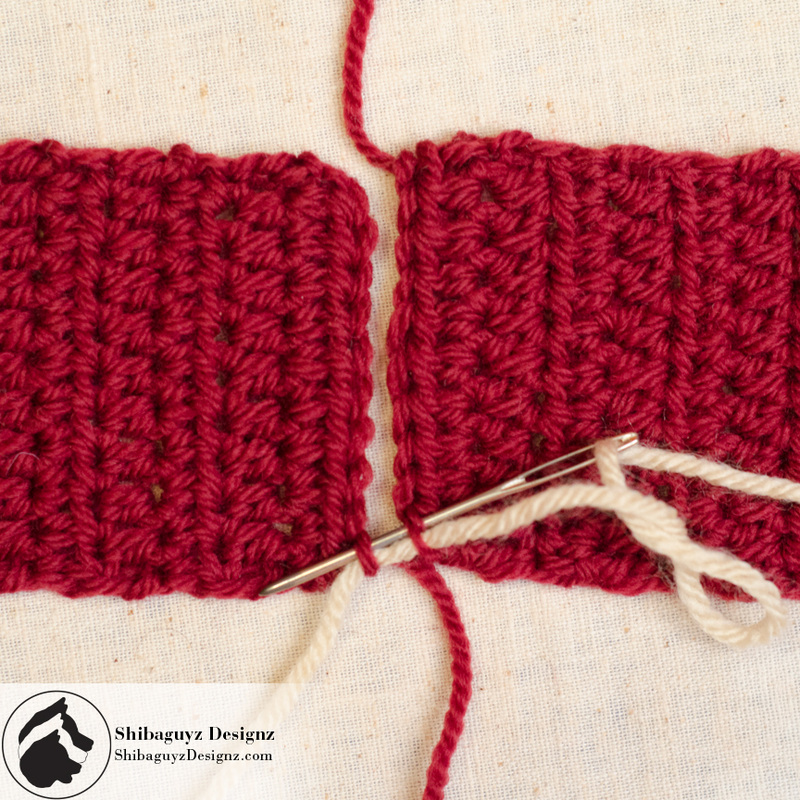
4. Insert needle from left to right into the next stitch of the left panel and continue through the last stitch worked of the right panel.
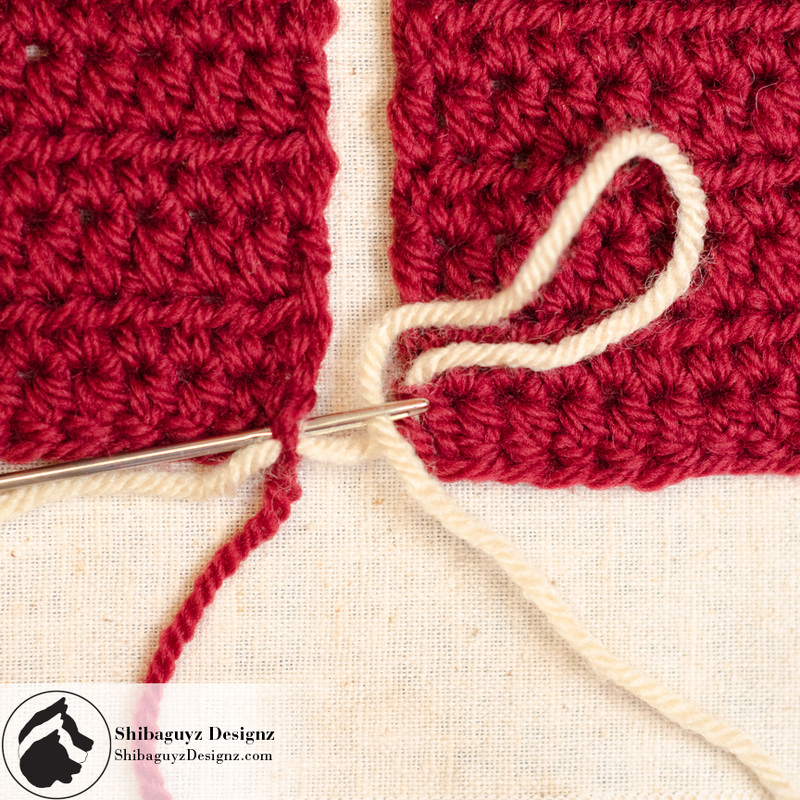
5. Continue in this manner gently pulling the yarn snug as you go to close the seam.
6. Every few stitches pull the yarn snug to secure and even out the seam.
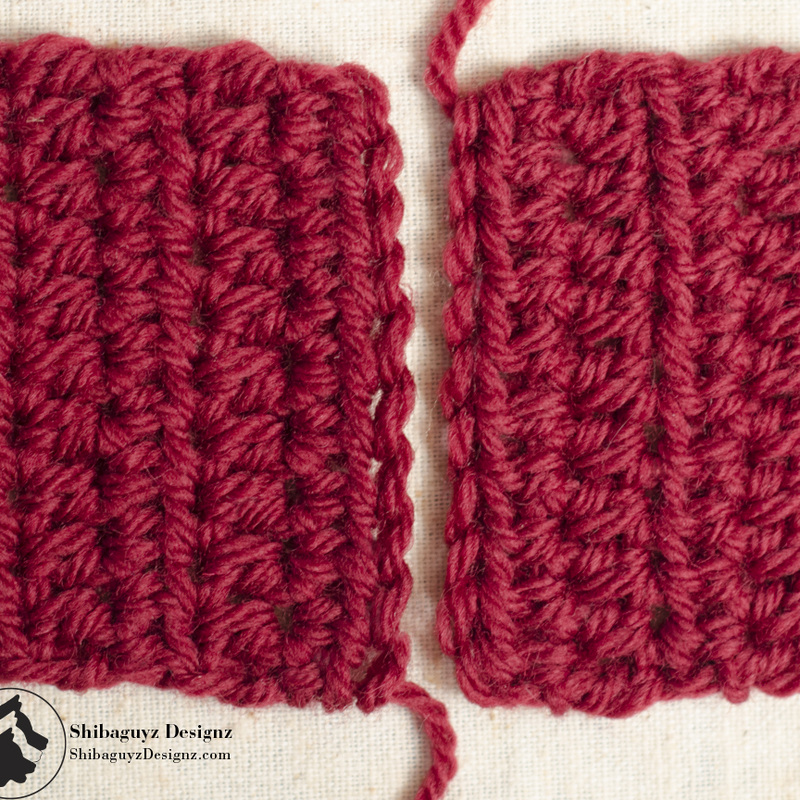
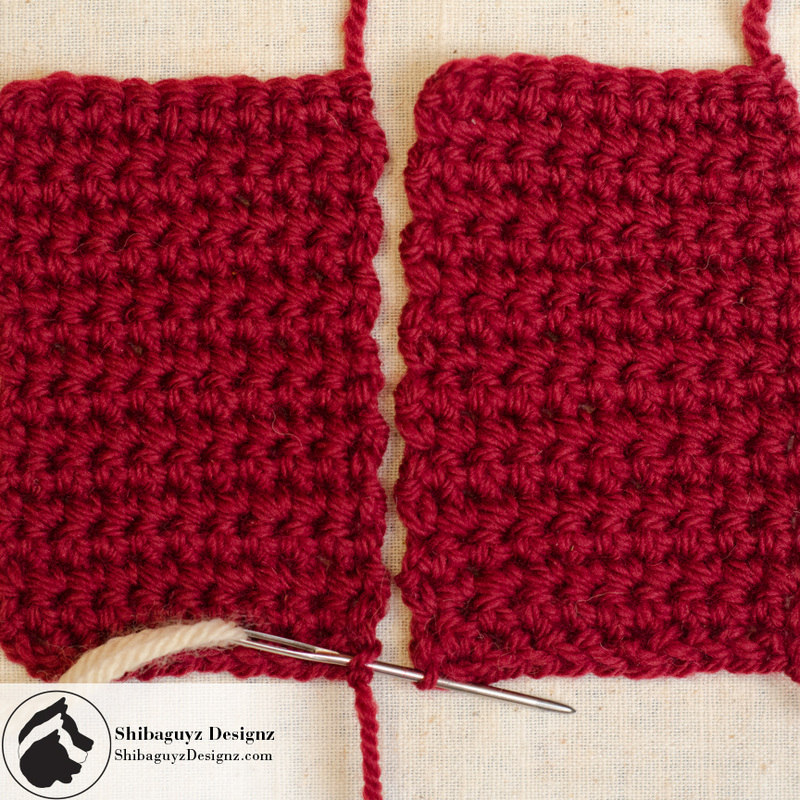
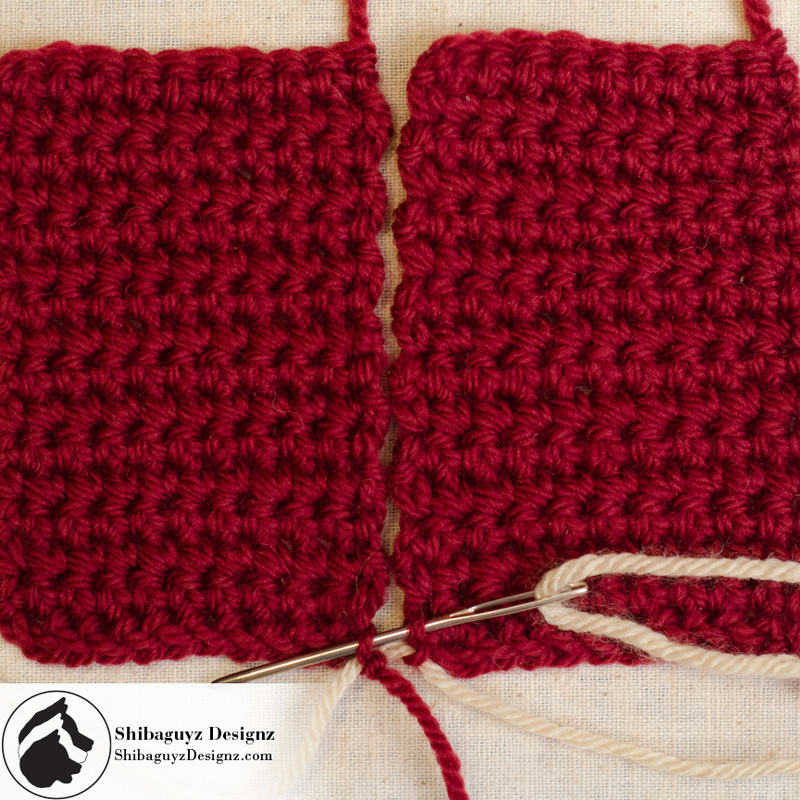
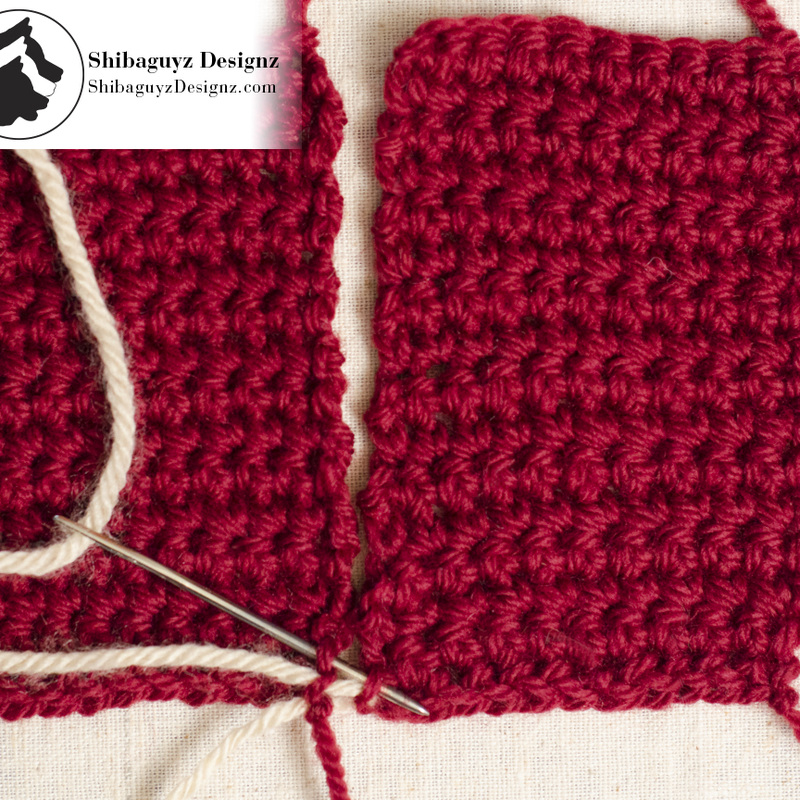
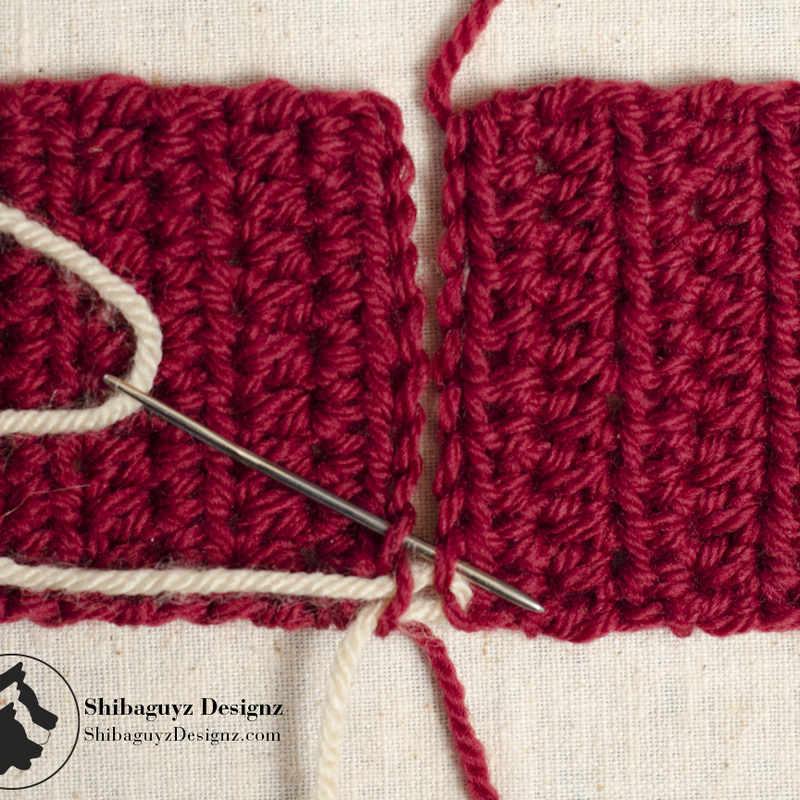
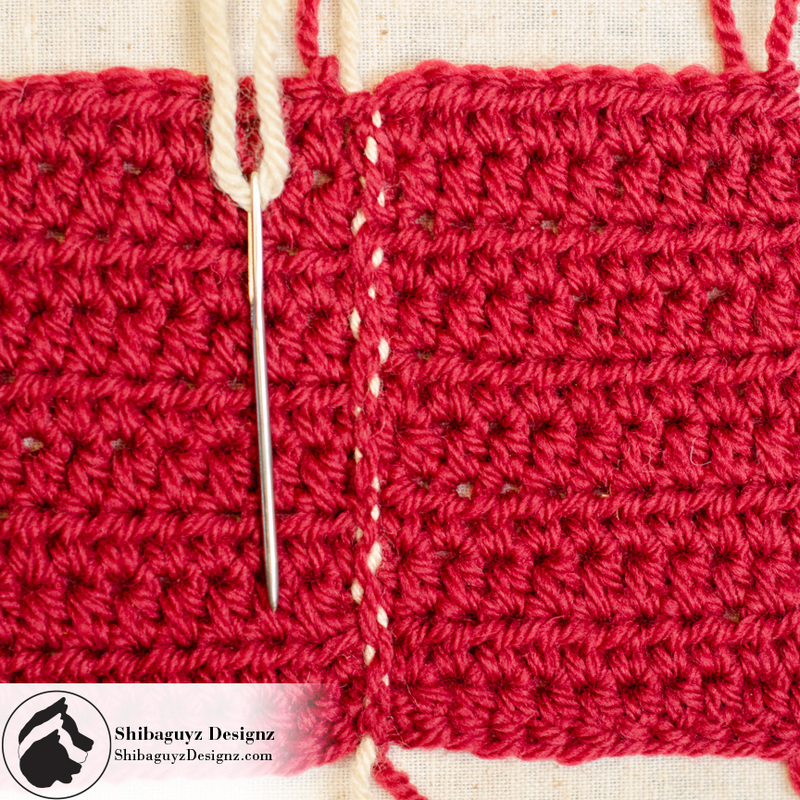
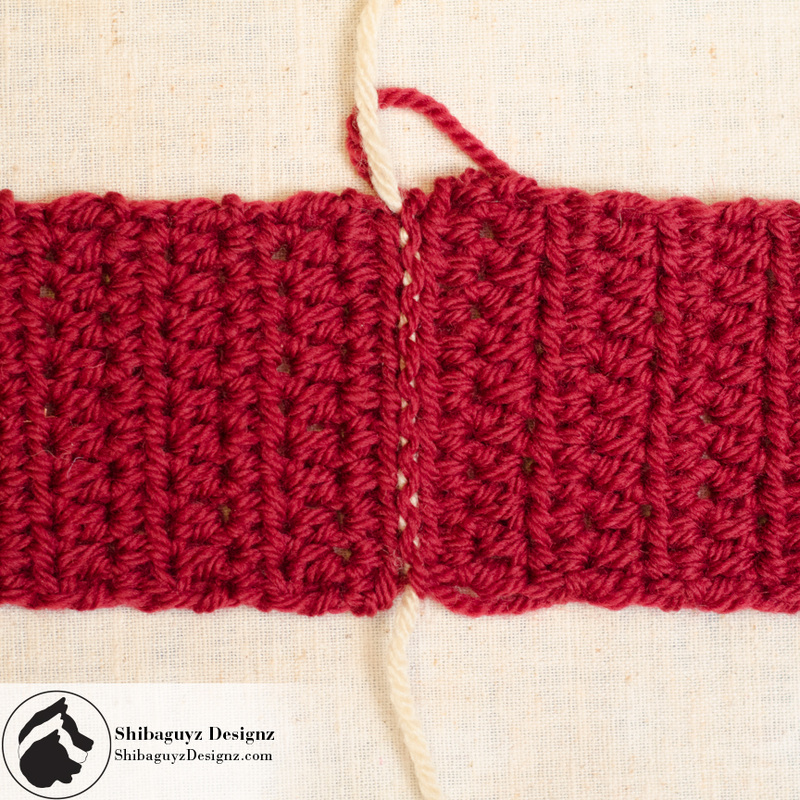
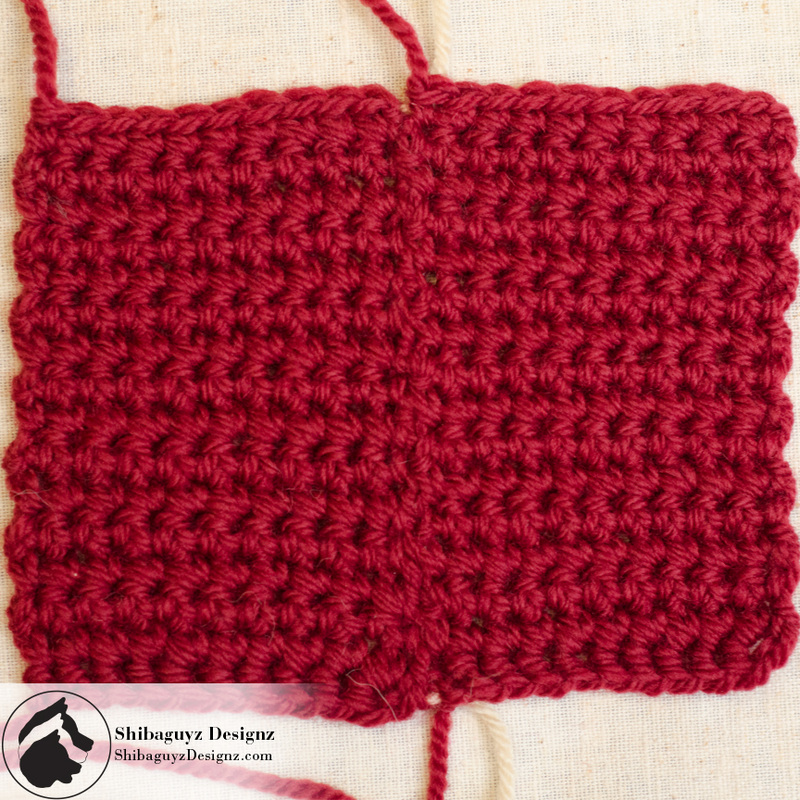
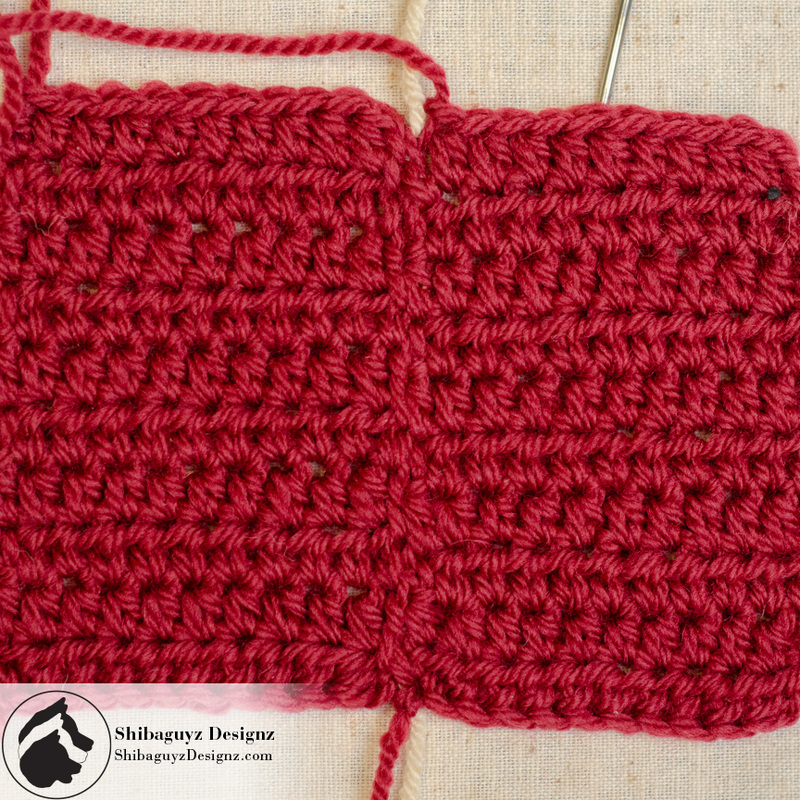
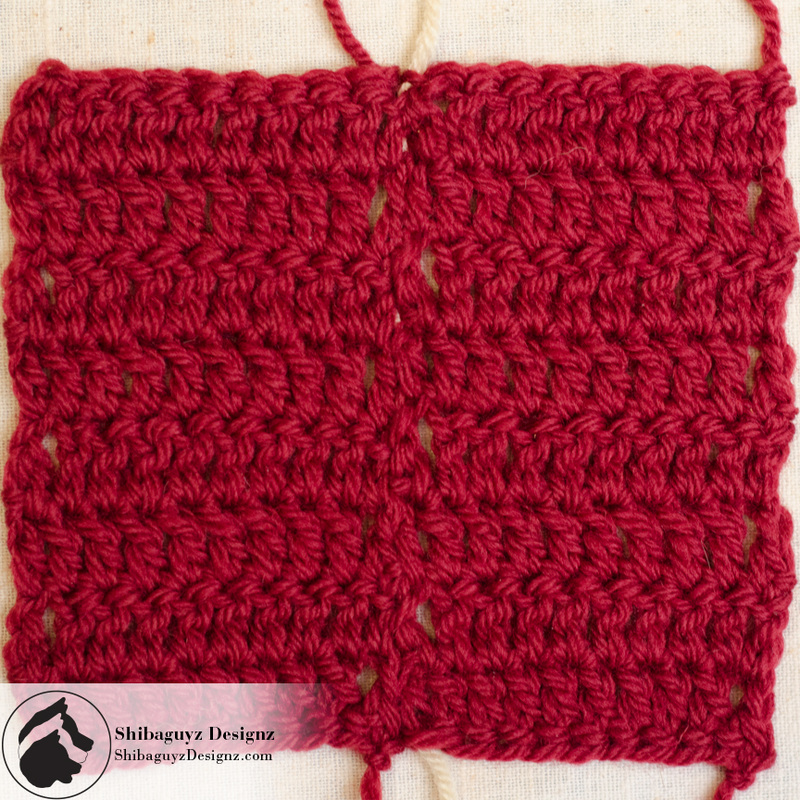
TAADAA!! To give you a TRUE view of what you sewn seam will look like, here are unblocked photos of each fabric. Note that the rows are still just SLIGHTLY askew so don't freak out if your crochet seam doesn't look flawless pre-blocking. This will, of course, even out with blocking but we wanted you to see what you work will look like when you initially finish. Again, a quick blocking and your fabric will be all evened out and beautiful.
As with any new technique, you will find working the Locking Mattress Stitch becomes easier after a few times. For practice, we recommend stitching up a few quick swatches like ours and using our photo walk through to compare your stitches and make sure you are making neat and tidy seams. Thanks for dropping by for another Technique Tuesday! Be sure to check out our other tutorials and Technique Tuesday posts by CLICKING HERE and come back soon for more! We appreciate the comments y'all have left for us on here and on social media and we're happy to know we could help. Please feel free to share this with your fiber friends on Twitter, Facebook, Ravelry, Pinterest, Google+… whatever floats your social media boat! What other techniques would YOU like to see included in our Technique Tuesday articles? Is there a particular technique that you've always wanted to learn but every time you try it just gives you fits so you throw your work across the room and stomp around and just go back to the other way of doing it even though it looks like a deranged wombat gnawed on it? Yeah… we've been there too… Let us hear from you in the comments section below to let us know what techniques you'd like to learn and maybe we'll feature yours in a future Technique Tuesday… because nobody likes their work to look like it's been gnawed on by a deranged wombat. Stitch On! S&J We hope you enjoy our articles and posts here on Shibaguyz Designz and hope you will share them with other stitchers. Take a minute to look around and check out our other posts as well as our patterns and books in our online shop. Here are a few suggestions for you we thought you might like. Just click on one of the photos below! Enjoy!     We'd love to hear from you! Leave a comment to this post and catch up with us on Ravelry, Facebook, Twitter, and Pinterest by clicking on one of these icons.
10 Comments
Sharon Clark
8/27/2014 03:42:06 pm
This is great information. I have a project I am working on now and this technique would be the perfect solution for me. Thanks for sharing
Dianne
9/6/2014 05:51:33 am
This is heaven sent info.! My seams always look awful and make me NOT want to do them at all. I choose seamless and less wonderful pcs. instead. Now I can make anything I choose to and will know exactly how to stitch them together at their seams. Thanks SO MUCH!! Angel wings are sprouting behind your shoulders and there's a hint of a halo coming up from behind your left ear. :)
Jude
12/31/2017 08:34:07 pm
Awesome! I am working on a poncho pattern and it called for the mattress stitch. I asked my mom, who taught me, but she had never heard of it before. Not being tech savvy I looked at old patterns then finally went to good old Google. First page! There it was! Thanks for the info and keep up the great work.
Tisha
4/25/2018 07:22:40 am
Working on a crochet cardigan that says to whip stitch every seam. I think this technique would be more structured and neater. The photos are a big help as I am just learning crochet: the pattern is mainly hdc except edgings
Ginger
5/9/2018 04:11:24 pm
Thanks for this - great pictures. I'm a visual learner, so pictures are the ticket!
Amanda
8/20/2018 01:35:17 am
Thank you! Especially for demonstrating this with crochet! I saw several other websites demonstrate with just knitting and then say a variation on “it’s the same with crochet” but I just wasn’t getting it. This made learning the mattress stitch so simple! Love the examples with different crochet stitches also!
colchones queretaro
8/9/2022 08:18:29 am
Un nuevo colchón puede literalmente cambiar tu vida. Es fundamental para la comodidad y funcionalidad de tu dormitorio y la forma en la que vives en tu hogar, ya que no dormir bien genera irritabilidad, mala alimentación y una disminución general de la salud. Dormir es algo en lo que todos deberíamos invertir. 2/2/2023 04:35:51 am
Excellent article! Thank you for your excellent post, and I look forward to the next one. If you're seeking for discount codes and offers, go to couponplusdeals.com. Leave a Reply. |
AuthorShannon and Jason Leave us a tip to help us do what we do!


Archives
May 2024
 

 Categories
All
     |


 RSS Feed
