SHANNON & JASON
  • Home
  • Blog
    • Tips
    • tutorials
  • Our Books
    • Contemporary Kogin-zashi
    • Boro & Sashiko, Harmonious Imperfection: The Art of Japanese Mending & Stitching
    • Complete Crochet Course
    • Designer Crochet
    • Crochet Geometry
  • All Shopping
    • Books and Digital Patterns
    • Sashiko Shop
    • Thread
    • Fabric
    • Stitchips
  • Classes
  • Sashiko
  • About
  • Contact and Subscribe
  • Sponsors

 Shannon & Jason's Blog 

Technique Tuesday - Back Post Double Crochet Tutorial

9/30/2014

 
Technique Tuesday - Step-by-step crochet and knitting photo tutorials by Shibaguyz Designz
Technique

Post Stitches – Back Post Double Crochet Stitch

Crochet Post Stitches: How to make the Back Post Double Crochet Stitch - A step-by-step crochet photo tutorial by Shibaguyz Designz

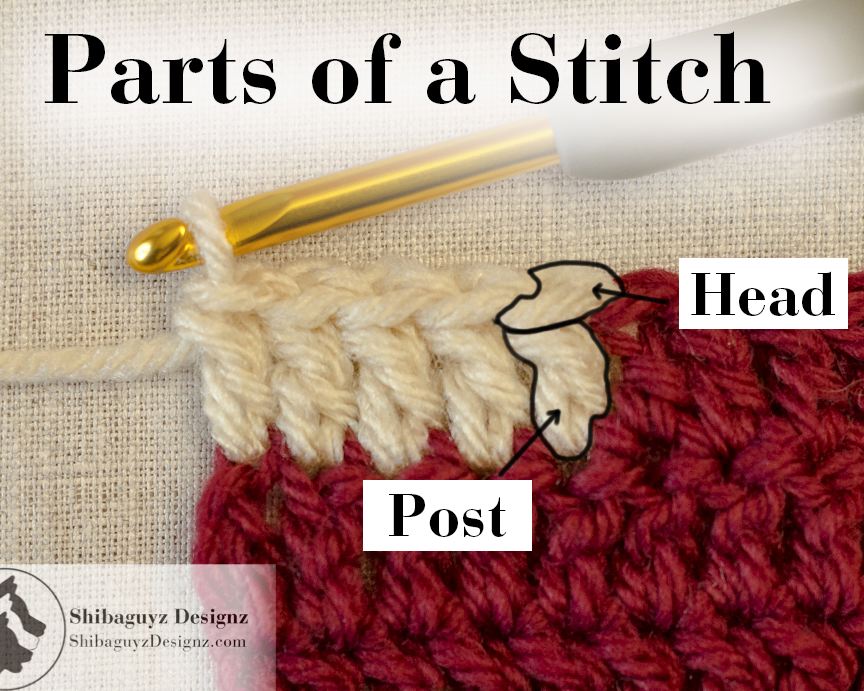
What is it?

Last week, we started our discussion about post stitches with a brief overview of what a post stitch is. You can find that post here:
Technique Tuesday - Post Stitches: How to make the Front Post Double Crochet stitch.

Let's do a quick review…

Post stitches are just like any other crochet stitches only the stitches are worked around the "post" of a crochet stitch rather than through the loops of the "head" of a crochet stitch.

Click "Read More" link below for the full post.
Crochet Post Stitches: How to make the Back Post Double Crochet Stitch - A step-by-step crochet photo tutorial by Shibaguyz Designz
Here's a hand dandy illustration of the parts of a crochet stitch… in this case, a double crochet stitch.

There are two basic parts:
1. Head
2. Post


(Yes, yes… we know… there are many more parts to a crochet stitch. But these are the only two that count for now…)

With non-post crochet stitches, we insert our hook into the loops of the head of a crochet stitch.

Note the hook going into the head of the stitch in this photo.

Crochet Post Stitches: How to make the Back Post Double Crochet Stitch - A step-by-step crochet photo tutorial by Shibaguyz Designz

In the case of post stitches, we are using the spaces between stitches to work our hook around the post of a crochet stitch.

Note the hook going around the post of the stitch in this photo.

NOTE: Since this week is a BACK post stitch, this shows the hook going around the post as for a back post stitch.

Crochet Post Stitches: How to make the Back Post Double Crochet Stitch - A step-by-step crochet photo tutorial by Shibaguyz Designz
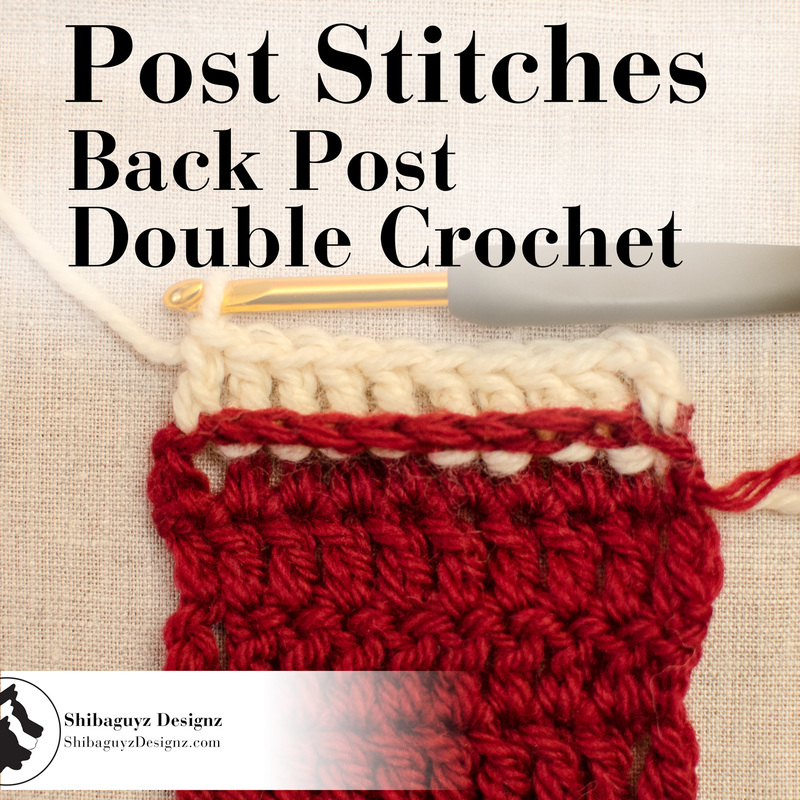
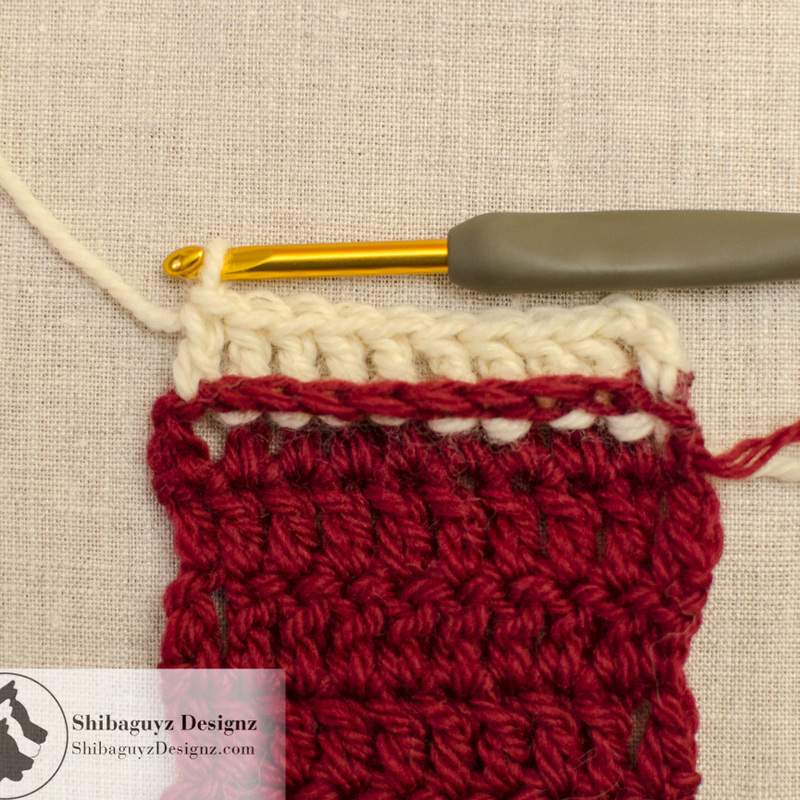
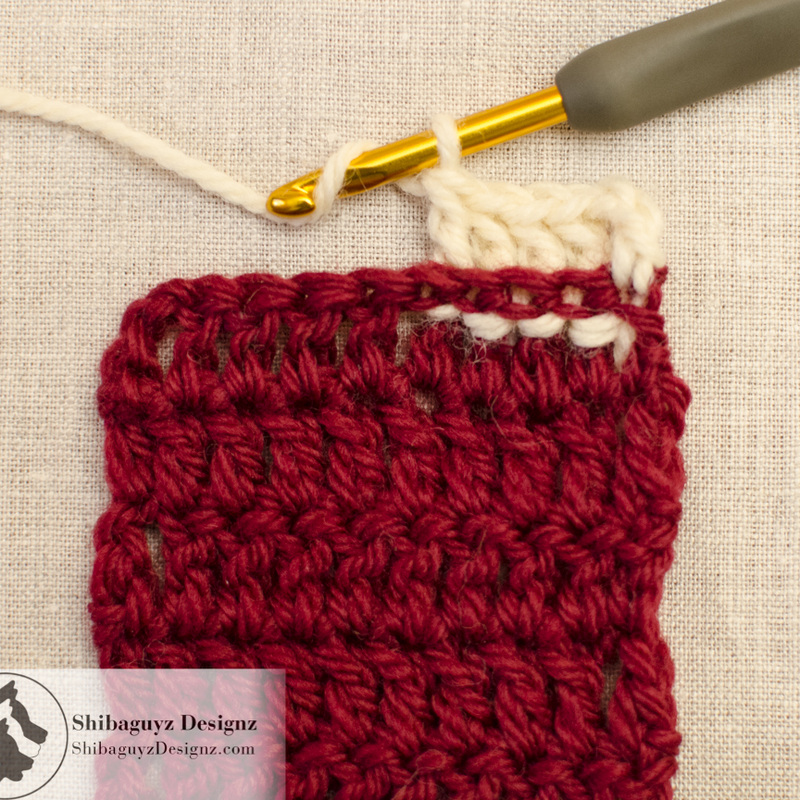
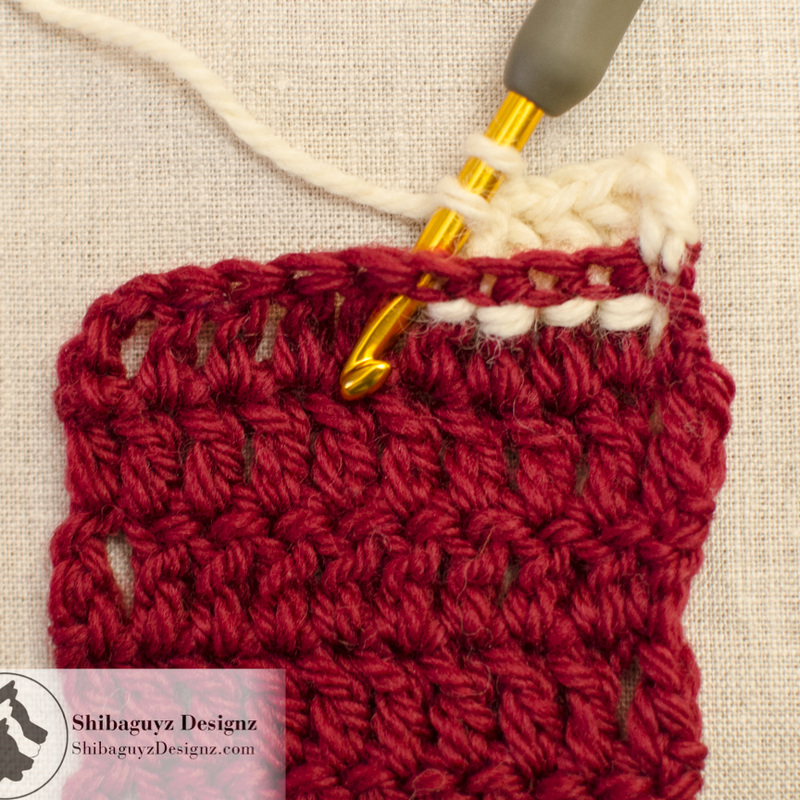
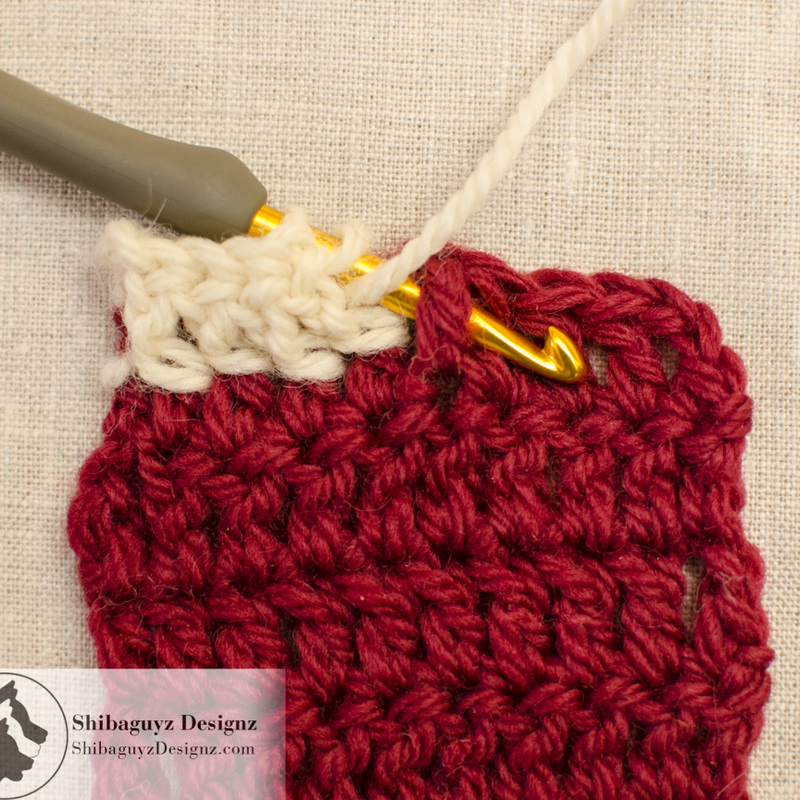
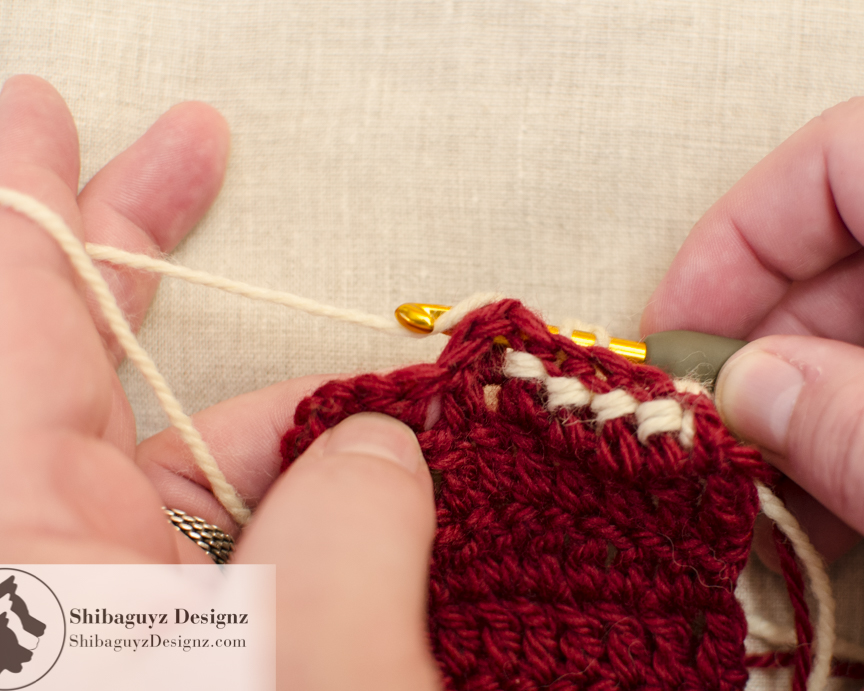
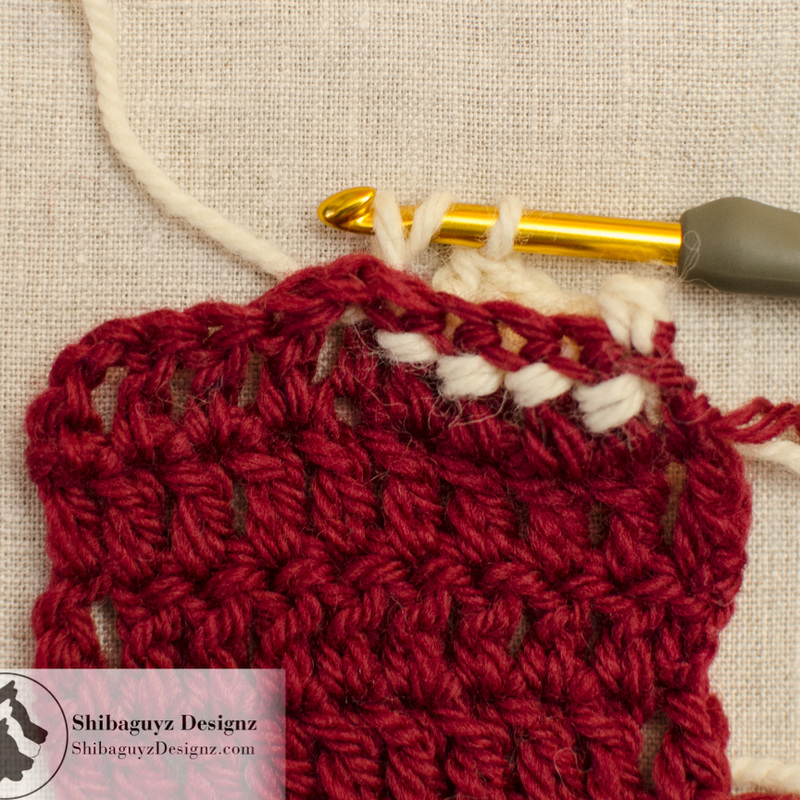
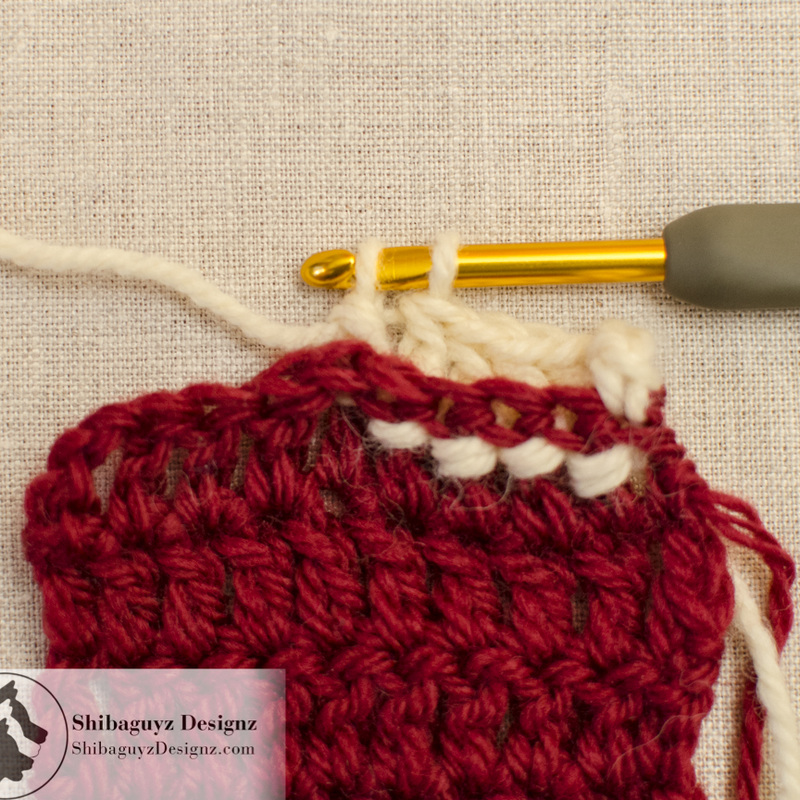
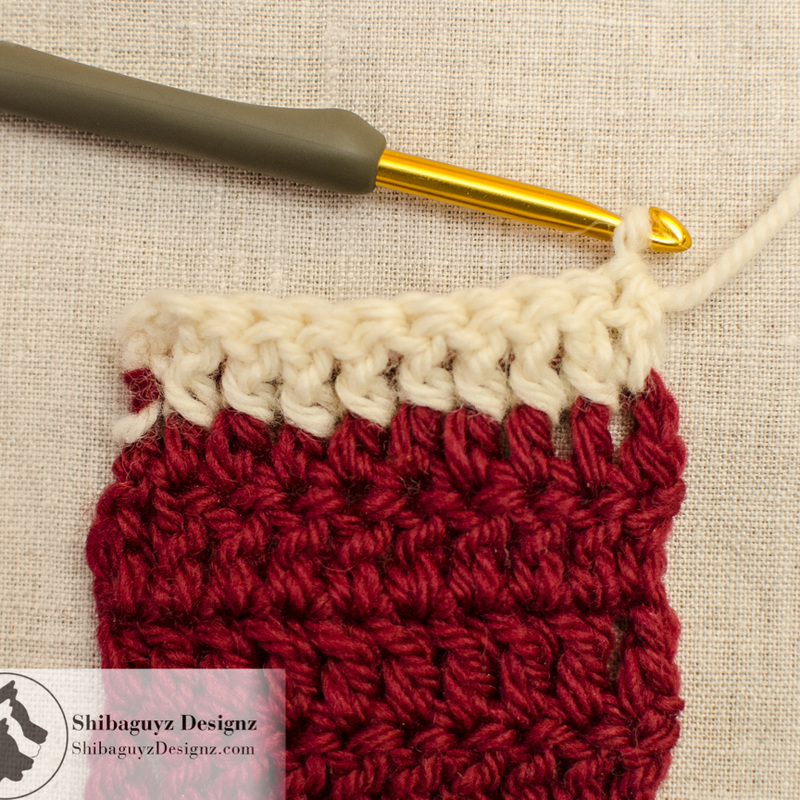
While there are both front and back post crochet stitches, today we are working on Back Post crochet stitches. Specifically, we are tackling the Back Post Double Crochet stitch.

Here are the instructions for a Back Post Double Crochet stitch:

Back Post Double Crochet (BPdc): Yarn over, insert hook from back to front and then to the back again around the post of the indicated stitch, yarn over and draw up a loop, (yarn over and draw through 2 loops on hook) 2 times.


Why Use It?

Why use a post stitch at all? Post Stitches are the SUPERSTARS of texture of the crochet stitch universe. Since a post stitch is worked around the post of the worked stitch, the post of that worked stitch is bent. Because it is perched on top of that bent post, the head of the worked stitch is bent to the outside of the crochet fabric and becomes a raised feature on the surface of the fabric you are creating.

Whether you work a front or back post stitch depends on where you want that surface feature to show in relation to your fabric.

Crochet Post Stitches: How to make the Back Post Double Crochet Stitch - A step-by-step crochet photo tutorial by Shibaguyz Designz
Here's a photo showing a row of Back Post Double Crochet stitches (the lighter colored yarn). This photo shows how the double crochet stitches are worked around the post of the stitch in the row below. You can clearly see the heads of the stitches that were worked around (the darker colored yarn) bending outward to the surface of the crochet fabric.


As with all of our tutorials, we do not block the steps before photography. This way you can see what the stitches look like while they are being worked.
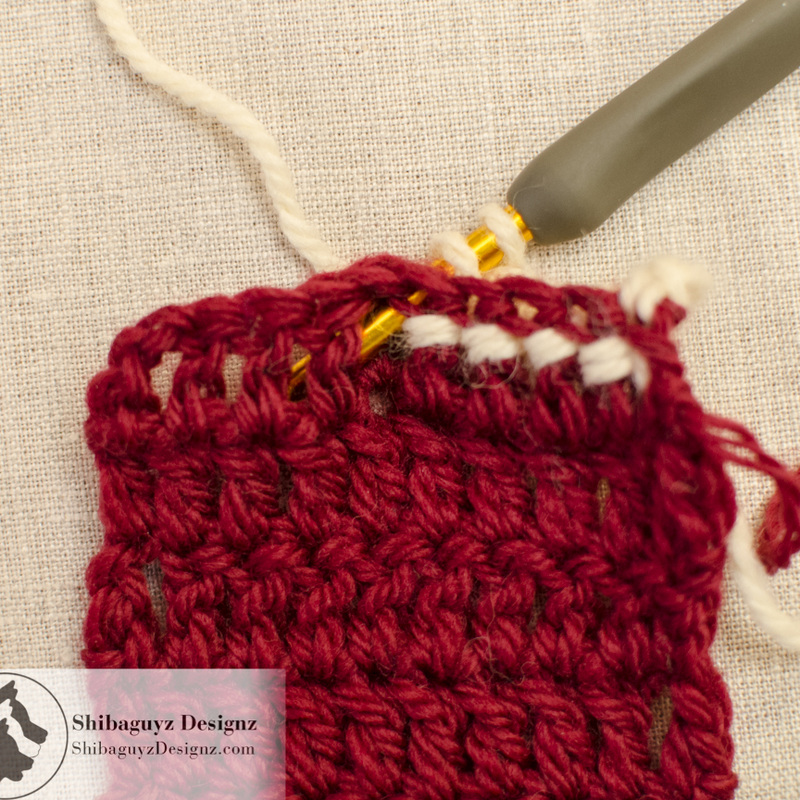
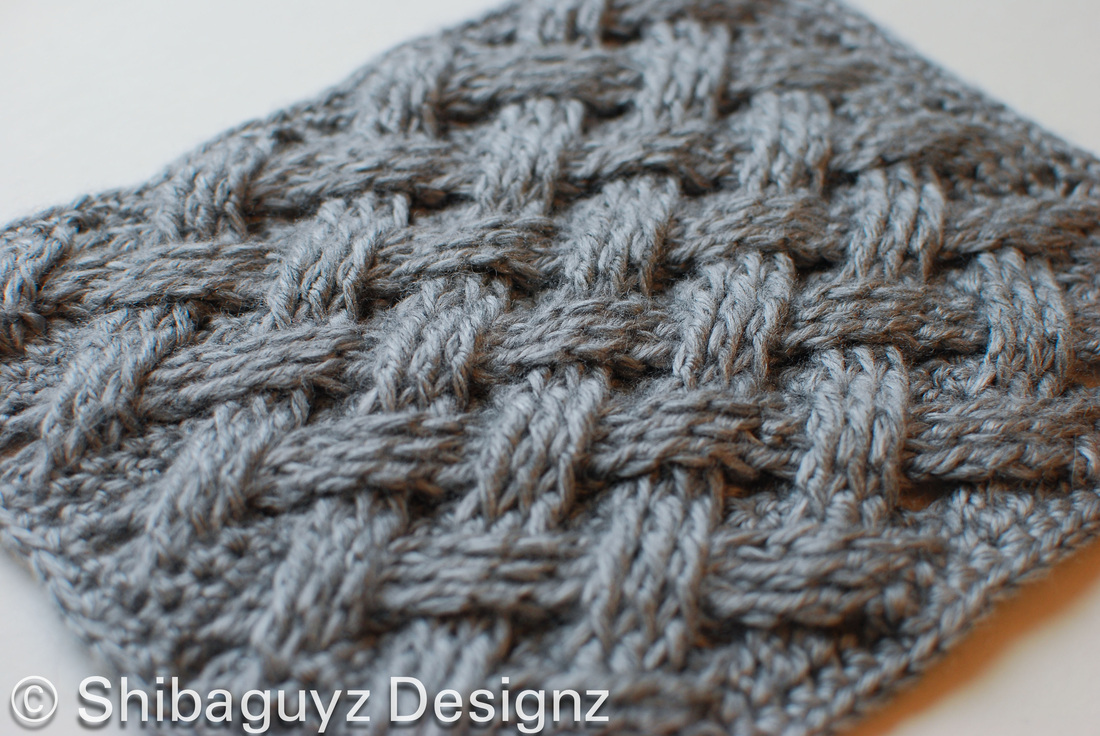
Post stitches can also be worked in combination with other crochet stitches to make raised surface details such as vertical or horizontal ribbing, and cables.

Here are three examples of post stitches used as surface details.


The first example uses both front and back post stitches to create vertically worked ribbing for the brim of the Boyfriend Beanie from our book Heady Affairs.


Since we are going to be working on crochet ribbing in the very near future, you might want to go back to last week's tutorial and catch up if you missed it:
Post Stitches: How to make the Front Post Double Crochet stitch.
The Boyfriend Beanie crochet hat from the book Heady Affairs by Shannon Mullett-Bowlsby of Shibaguyz Designz

The Side-by-Side crochet hat from the book Heady Affairs by Shannon Mullett-Bowlsby of Shibaguyz Designz
The second example uses front and back post stitches to create horizontally worked ribbing for the main body of the Side-by-Side hat from our book Heady Affairs.


(pssst… in the next couple of weeks, we are going to be showing you just how to make both of these types of crochet ribbing stitches… check back soon!)
The third example uses front post stitches to create crochet cables as seen here in our Woven Cables Stitch afghan block we created for our free Warm Up America booklet.


Once you have your post stitch mojo working, you can check out these tutorials on how to make the stitches for this afghan block:
Woven Cables Pattern Stitch Part 1: Double Treble Left Cross Crochet Cable

Woven Cables Pattern Stitch Part 2: Double Treble Right Cross Crochet Cable
Woven Cables crochet afghan block by Shibaguyz Designz


As you can see… it's all about the texture!


In a future post, we will demonstrate some of the uses for these post stitches so y'all can make FAB textured fabrics for yourselves! Specifically, we are going to be covering Crochet Ribbing… three kinds! Check back soon for that… You don't want to miss it!

For now… let's carry on with the Back Post Double Crochet stitch!


Break It Down
1. Yarn over,…

Here, we've started working a row of Back Post Double Crochet stitches and we've done the first yarn over just like we would for any other double crochet stitch.
Crochet Post Stitches: How to make the Back Post Double Crochet Stitch - A step-by-step crochet photo tutorial by Shibaguyz Designz

Crochet Post Stitches: How to make the Back Post Double Crochet Stitch - A step-by-step crochet photo tutorial by Shibaguyz Designz
2. …insert hook from back to front…

See how we are now inserting the hook into the space BETWEEN the crochet stitches from the BACK side of the fabric to the FRONT side of the fabric.

3. …and then to the back again around the post of the indicated stitch…

Now , working again in the space BETWEEN the stitches, we are bringing the hook through to the BACK of the fabric.

Crochet Post Stitches: How to make the Back Post Double Crochet Stitch - A step-by-step crochet photo tutorial by Shibaguyz Designz
We have worked our hook around the post of the worked stitch.

We flipped the swatch over here to show you a shot of the post of the worked stitch standing out against the hook on the back side of the fabric.

Crochet Post Stitches: How to make the Back Post Double Crochet Stitch - A step-by-step crochet photo tutorial by Shibaguyz Designz

Crochet Post Stitches: How to make the Back Post Double Crochet Stitch - A step-by-step crochet photo tutorial by Shibaguyz Designz
4. …yarn over…

We are back to working just like any other double crochet stitch.

Hands are making an appearance here so you can see how this yarn over is happening behind the working fabric since that is where the head of our hook is at.

This also shows how your work can look a little twisted at times… and that's totally okay…


5. …and draw up a loop,…

Draw that loop on your hook back out the way you came around the stitch.


Note: Since this is a Back Post Double Crochet stitch, the working yarn (light colored) is BEHIND the worked row of stitches (darker colored yarn).
Crochet Post Stitches: How to make the Back Post Double Crochet Stitch - A step-by-step crochet photo tutorial by Shibaguyz Designz

Crochet Post Stitches: How to make the Back Post Double Crochet Stitch - A step-by-step crochet photo tutorial by Shibaguyz Designz
6. …(yarn over and draw through 2 loops on hook) 2 times.

One Back Post Double Crochet stitch completed! WOOHOO!!

7. And here is the completed row of Back Post Double Crochet stitches.

Note how the stitches are wrapped around the post of the previous row of stitches.

Note again the neat little row of heads from the previous row of stitches facing outward. They look like a raised row of crochet chain stitches on the surface of the fabric.
Crochet Post Stitches: How to make the Back Post Double Crochet Stitch - A step-by-step crochet photo tutorial by Shibaguyz Designz

Crochet Post Stitches: How to make the Back Post Double Crochet Stitch - A step-by-step crochet photo tutorial by Shibaguyz Designz
8. And here's that photo of the OTHER side of the fabric showing the lighter colored post stitches wrapped around the posts of the darker colored stitches of the previous row. 

TAADAA!!

IMPORTANT NOTE: This tutorial is specifically for a post stitch using a double crochet stitch. If you want to do post stitches with taller stitches like treble, double treble, and triple treble crochet stitches, simply yarn over the number of times you would for that height of stitch THEN start with inserting your hook around the post of the stitch.
The first few times you practice this technique, we suggest using two colors of yarn so you can see which stitches go where more easily AND you can compare your work to our tutorial photos more easily.  After that, of course, you'll probably want to work in all one color… or not… it depends on how you are going to use them. Right?

As with any new skill, all it takes is practice for new techniques to feel natural and easy for you.

As always, we recommend stitching up a few quick swatches like ours and, using our photo walk through to compare your stitches, to make sure your stitches are lining up correctly. If you aren't happy, rip 'em back out and go again!


Thanks for dropping by for another Technique Tuesday! We appreciate the comments y'all have left for us on here and on social media and we're happy to know we could help.

Let us hear from you in the comments section below to let us know what techniques you'd like to learn and maybe we'll feature yours in a future Technique Tuesday.

Be sure to catch up on all of our FREE Technique Tuesday tutorials by Shibaguyz Designz right here on our blog.

We hope you enjoy our articles and posts here on Shibaguyz Designz and hope you will share them with other stitchers. Here are a few of our articles and patterns we thought you might like to get you started. Just click on one of the photos below to open the link! Enjoy!

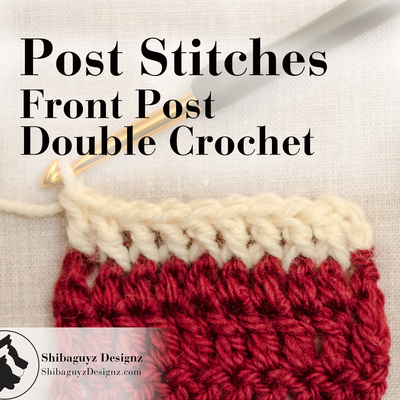
Catch up with us on Facebook, Twitter, and Pinterest by clicking on one of these icons.

Comments are closed.

    Author

    Shannon and Jason

    RSS Feed

    Sign Up For Our Newsletter

    Leave us a tip to help us do what we do!

    BERNINA Ambassador Badge
    Daylight Company Lamps
    Shibaguyz Aurifil Thread Collection

    Archives

    September 2022
    June 2022
    February 2022
    June 2021
    November 2020
    September 2020
    June 2020
    May 2020
    April 2020
    March 2020
    January 2020
    February 2019
    December 2018
    November 2018
    August 2018
    July 2018
    May 2018
    April 2018
    March 2018
    February 2018
    January 2018
    December 2017
    November 2017
    October 2017
    September 2017
    August 2017
    July 2017
    March 2017
    February 2017
    January 2017
    November 2016
    October 2016
    September 2016
    July 2016
    June 2016
    May 2016
    April 2016
    March 2016
    February 2016
    November 2015
    August 2015
    July 2015
    June 2015
    May 2015
    April 2015
    March 2015
    February 2015
    January 2015
    December 2014
    November 2014
    October 2014
    September 2014
    August 2014
    July 2014
    April 2014
    March 2014
    January 2014

    www.dickblick.com
    Picture
    Picture

    RSS Feed

    Categories

    All
    Afghan
    Aurifil
    Books
    Boro
    Camp STITCHES
    Classes
    Cleaning
    Clip On
    Clover
    Cowl
    Craft
    Craftsy
    CraftU Classes
    Crochet
    Crochet Geometry
    Daylight
    Daylight Company
    Design
    Designer Crochet
    Digital Download
    Donate
    Download
    English Paper Piecing
    Event
    Free
    Giveaway
    Hand Cream
    Hooks
    Inspirations
    International Crochet Month
    Interview
    Interweave
    Knit
    Knitting
    Lamp
    Marcus
    Marcus Fabrics
    Men
    Menswear
    National Craft Month
    National Crochet Month
    Needles
    Online Classes
    Ottlite
    Pattern
    Patterns
    Paypal
    Photography
    Podcast
    Prize
    Product Review
    Project
    Quilt
    Quilting
    Recipe
    Rotary Cutter
    Sashiko
    Season Of Giving Away
    Sew Expo
    Sewing
    Shibaguyz
    Shibaguyz Designz
    Shibaguyz Designz Indie Maker Pattern
    Shibaguyz LIVE
    Shibaguyz Photography
    Shop
    Soak
    STITCHES Events
    Sweater
    Thread
    Tool School
    Tools Of The Trade
    Travel Lamp
    Tutorials
    Vogue Knitting LIVE
    Walkthrough
    Warm Up America
    Wash
    Weaving
    Women
    Yarn
    Zoom Loom

    www.dickblick.com

Stay current on the news and events from Shannon and Jason as well as exclusive offers and tutorials available only for our newsletter subscribers.

* indicates required
Email Format

  • Home
  • Blog
    • Tips
    • tutorials
  • Our Books
    • Contemporary Kogin-zashi
    • Boro & Sashiko, Harmonious Imperfection: The Art of Japanese Mending & Stitching
    • Complete Crochet Course
    • Designer Crochet
    • Crochet Geometry
  • All Shopping
    • Books and Digital Patterns
    • Sashiko Shop
    • Thread
    • Fabric
    • Stitchips
  • Classes
  • Sashiko
  • About
  • Contact and Subscribe
  • Sponsors