SHANNON & JASON
  • Home
  • Blog
    • Tips
    • tutorials
  • Our Books
    • Contemporary Kogin-zashi
    • Boro & Sashiko, Harmonious Imperfection: The Art of Japanese Mending & Stitching
    • Complete Crochet Course
    • Designer Crochet
    • Crochet Geometry
  • All Shopping
    • Books and Digital Patterns
    • Sashiko Shop
    • Thread
    • Fabric
    • Stitchips
  • Classes
  • Sashiko
  • About
  • Contact and Subscribe
  • Sponsors

 Shannon & Jason's Blog 

Technique Tuesday Crochet Tutorial – the Knotless Starting Chain

2/3/2015

2 Comments

 
Technique Tuesday - Step-by-step crochet and knitting photo tutorials by Shibaguyz Designz

How To Make the Crochet Knotless Starting Chain


Technique
The Knotless Starting Chain


What is it?

The Knotless Starting Chain is an alternate technique for starting that first stitch off your crochet hook. As the name indicates, the Knotless Starting Chain eliminates the slipknot usually made around the crochet hook before pulling through the first loop.

How To Make the Knotless Starting Chain - A free step-by-step crochet tutorial by Shibaguyz Designz

Why Use It?

In our quest to create perfect finishes on our crochet designs, that little bump at the beginning of every project has been a nuisance that just won't go away. Sure, we could hide it when we woven in the starting tail, but it was still there… taunting us… the evil little bump.

Click the "Read More" link for the full tutorial.


This photo clearly shows the origins of the evil little bump. That slipknot we all make to start off our first crochet stitch.
How To Make the Knotless Starting Chain - A free step-by-step crochet tutorial by Shibaguyz Designz


Here, we've chained 6 then worked 5 single crochet stitches back into that starting chain. Look at the bump. Just sitting there… taunting us… 


And here is the spiteful little bump at the beginning of a row of 5 Foundation Single Crochet stitches. Nasty little thing… 
How To Make the Knotless Starting Chain - A free step-by-step crochet tutorial by Shibaguyz Designz
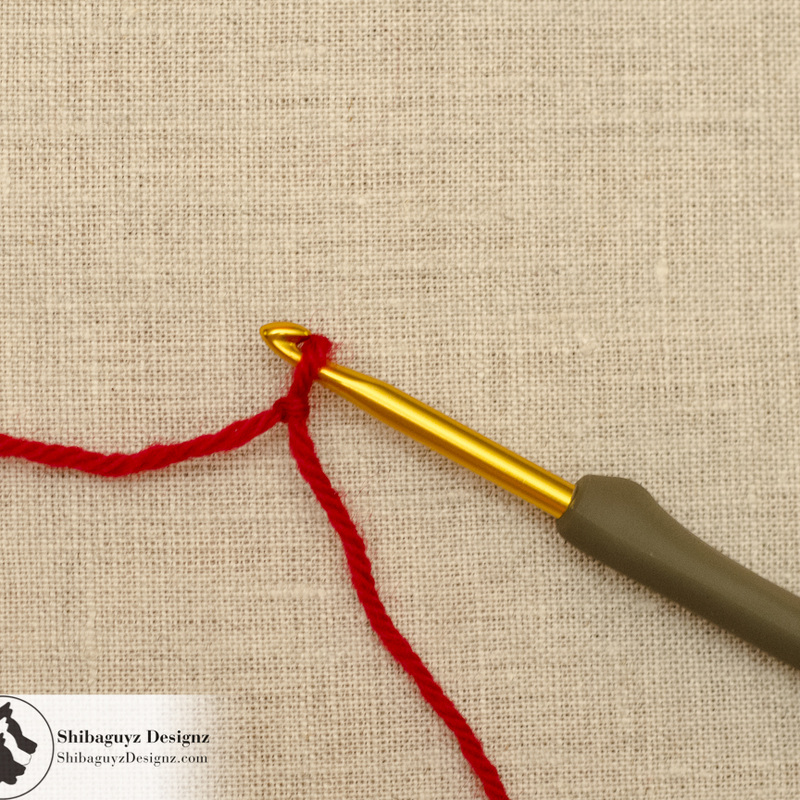
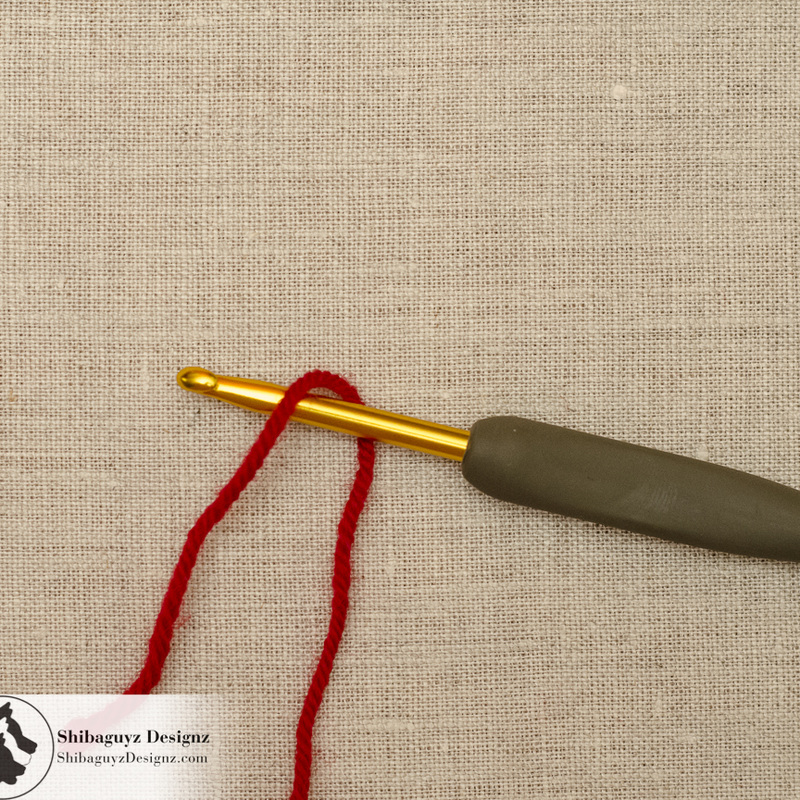
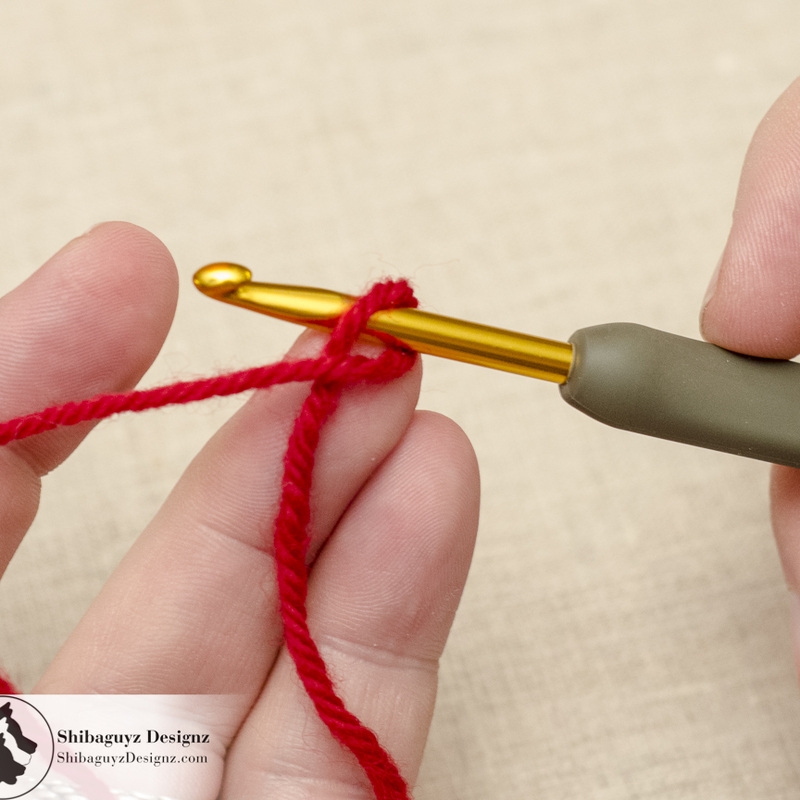
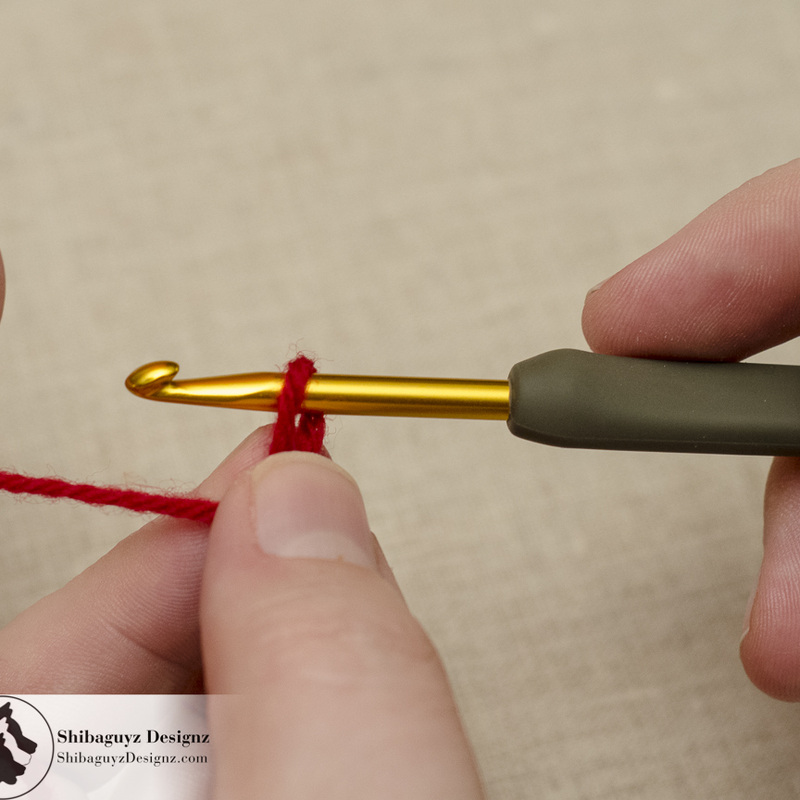
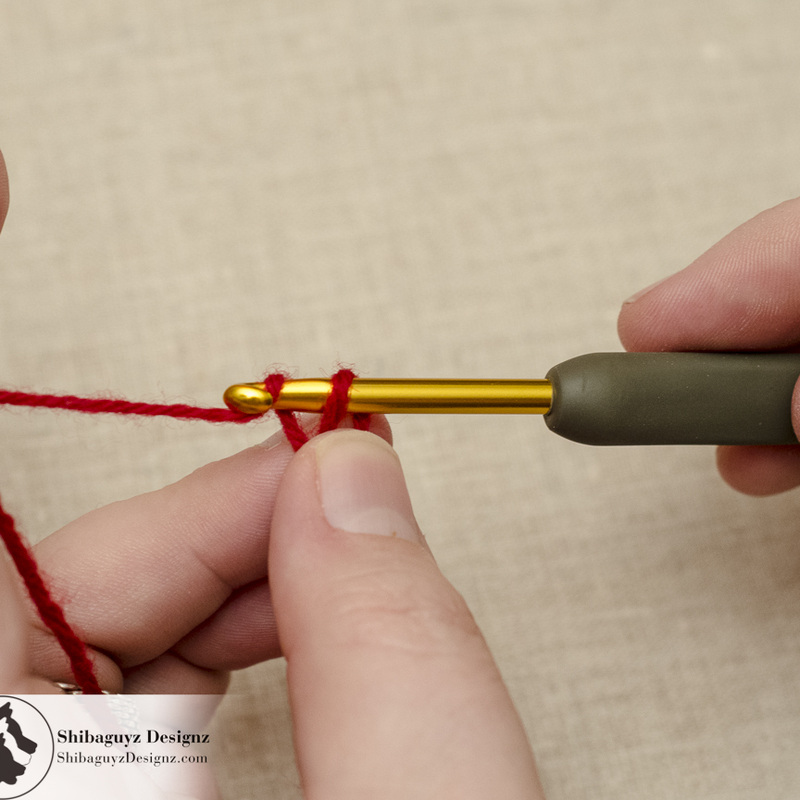
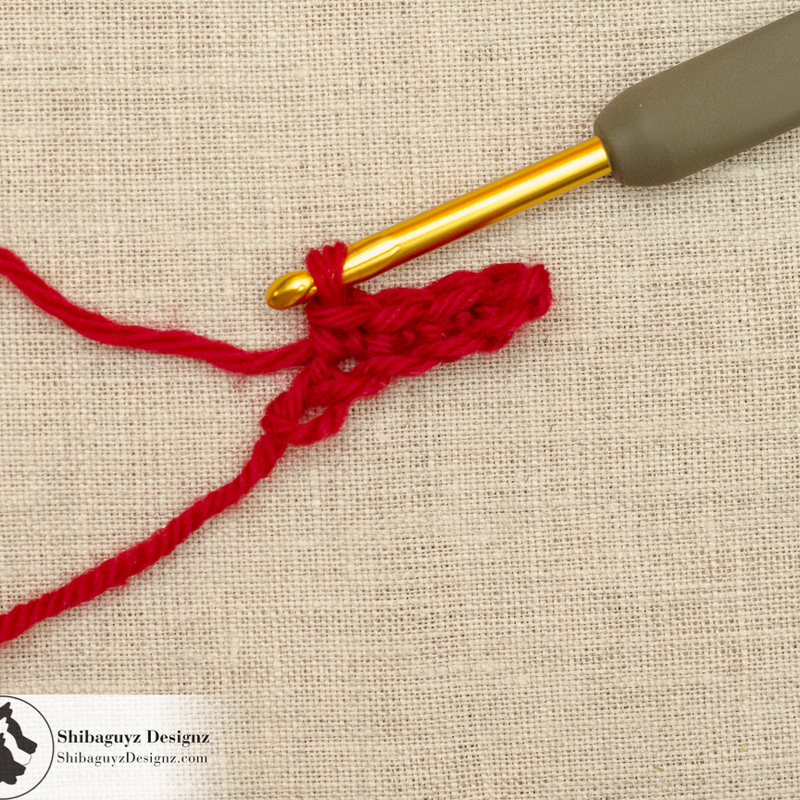
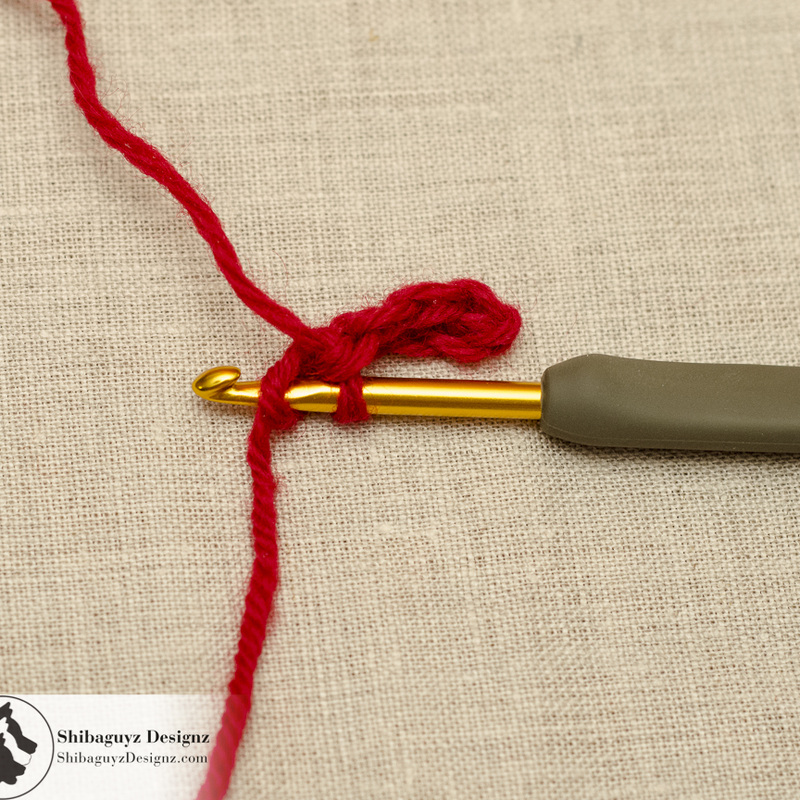
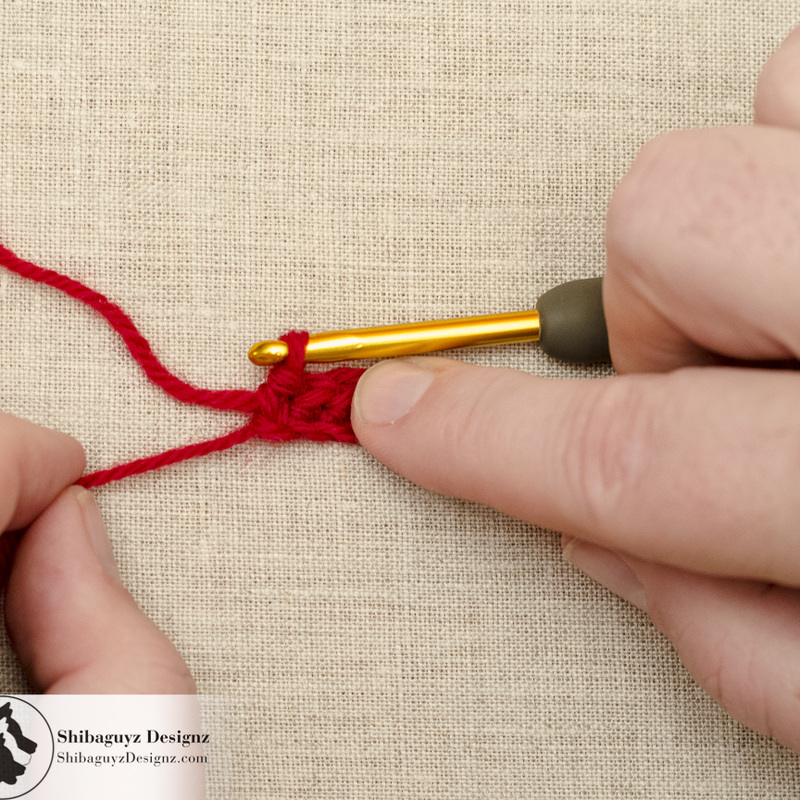
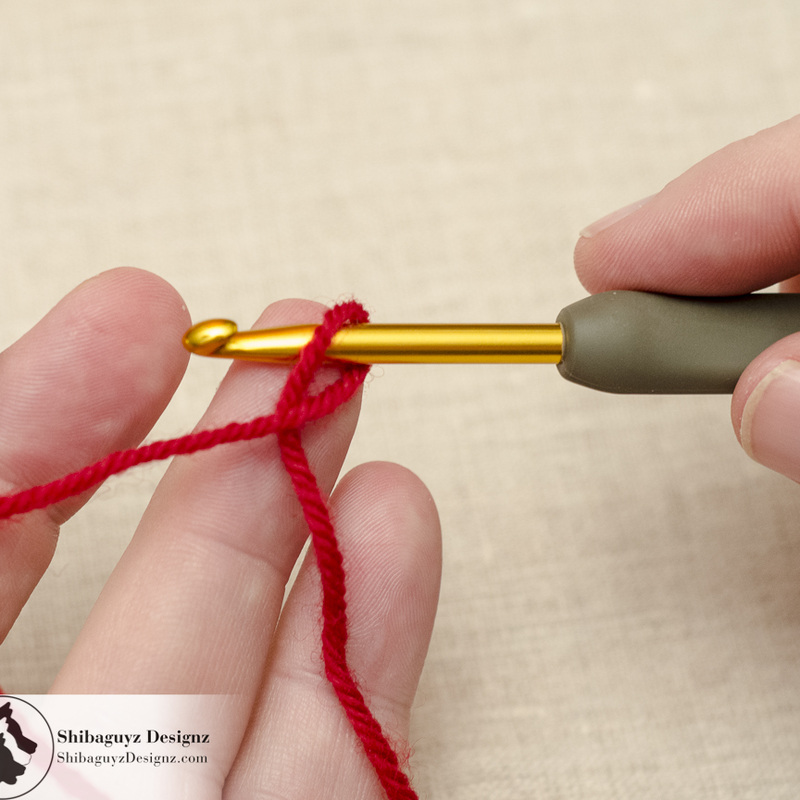
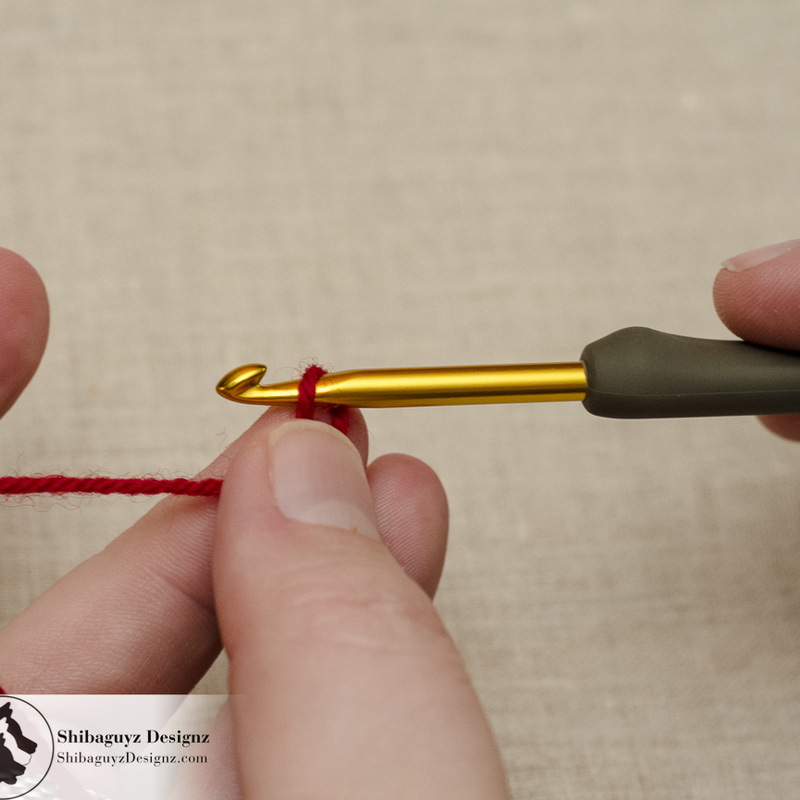
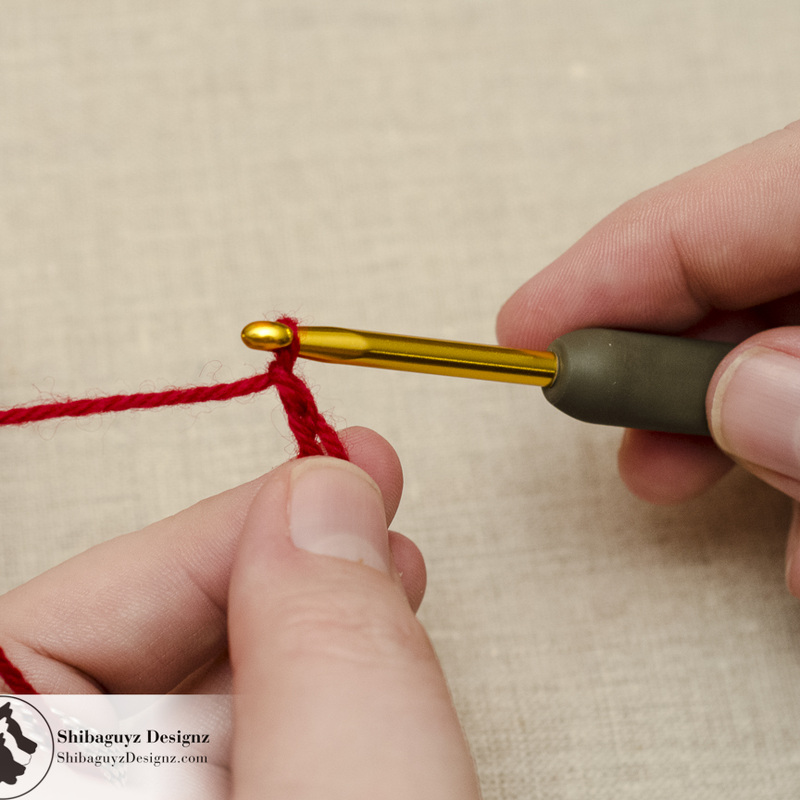
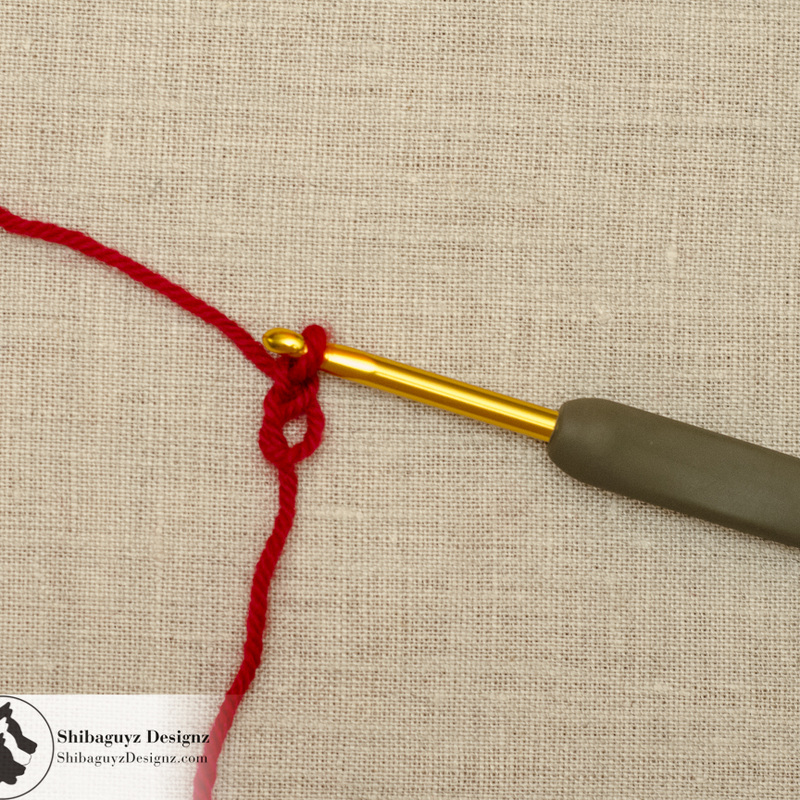
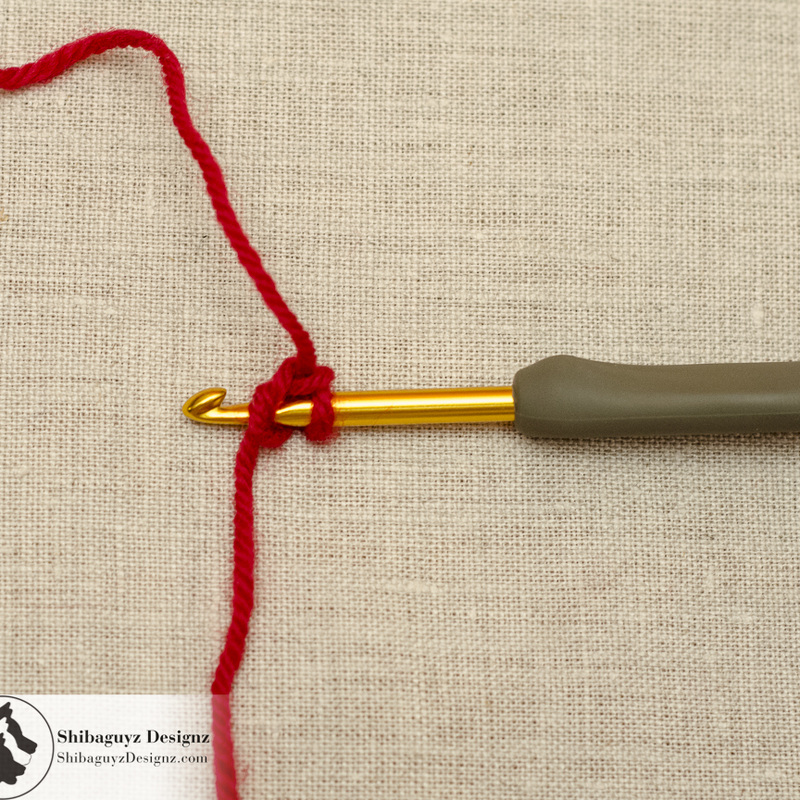
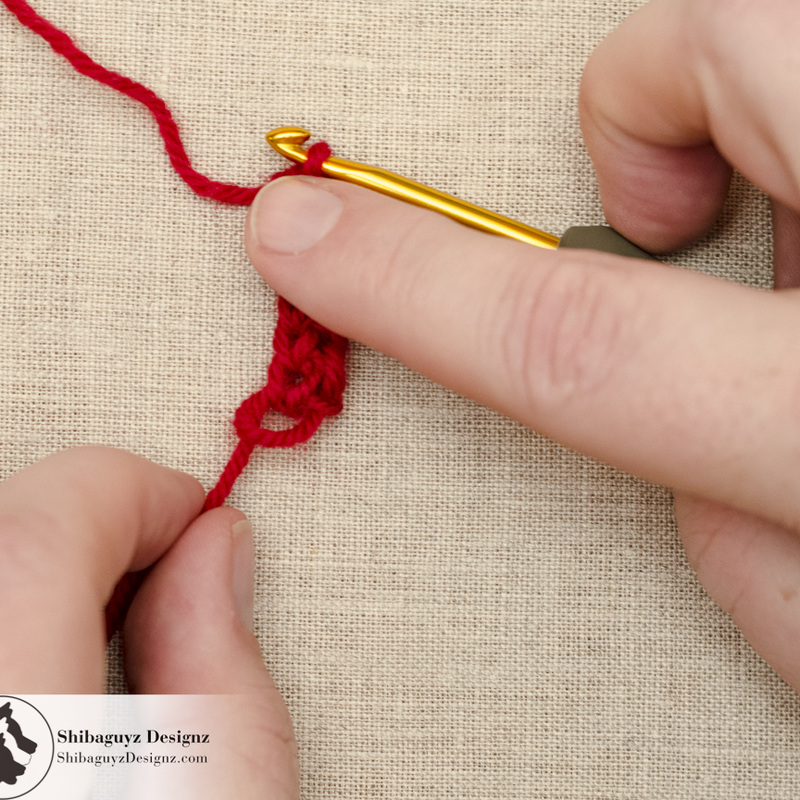
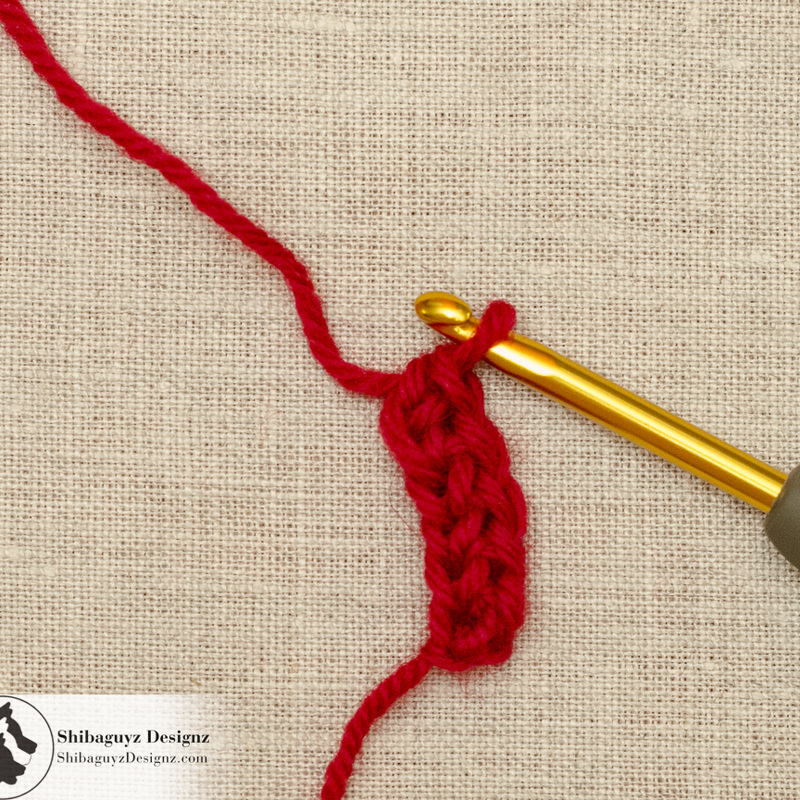
So, in order to banish the bump from the get go, we started playing around with different ways to start that first stitch. Thus was born the Knotless Starting Chain.

The Knotless Starting Chain is offered as an alternative to the usual slipknot and leaves virtually no trace there was ever anything other than a regular stitch on your hook that magically materialized there when you began stitching.

Why use it? Because you can.


To Work Today's Tutorial

Here's a list of materials we used to make today's Knotless Starting Chain tutorial. While you can, of course, use any materials you have on hand, these materials listed are what we recommend you use while you are learning.

Yarn Used
CYCA 4
Worsted Weight, 100% Pure Wool

Hook Used
H-8/5.00mm Crochet Hook

Skillz Used
Foundation Single Crochet (Fsc) – See our crochet tutorial here: How To Make The Foundation Single Crochet Stitch


Break It Down

Here we demonstrate the Knotless Starting Chain with a traditional crochet starting chain. 

1. To begin, pass the tail of the yarn from back to front over your hook.

How To Make the Knotless Starting Chain - A free step-by-step crochet tutorial by Shibaguyz Designz

How To Make the Knotless Starting Chain - A free step-by-step crochet tutorial by Shibaguyz Designz

2. Now cross the tail behind your working yarn (the yarn coming from your ball of yarn).

3. Firmly hold the crossing point where the tail and working yarn cross.


I tension my yarn with my index finger so I am holding the yarn here between my thumb and my middle finger.

How To Make the Knotless Starting Chain - A free step-by-step crochet tutorial by Shibaguyz Designz

How To Make the Knotless Starting Chain - A free step-by-step crochet tutorial by Shibaguyz Designz

4. Still holding firmly to the crossing point, yarn over…

5. …and draw up a loop for your first chain.

How To Make the Knotless Starting Chain - A free step-by-step crochet tutorial by Shibaguyz Designz

How To Make the Knotless Starting Chain - A free step-by-step crochet tutorial by Shibaguyz Designz

6. Here, I have worked a starting chain of 6 chains then worked 4 Single Crochet stitches back into those starting chain stitches. I am ready to make the fifth Single Crochet in the Knotless Starting Chain. 

7. Insert your hook into the Knotless Starting Chain so the crossing point we were holding securely before is on the top of the hook as pictured here.

How To Make the Knotless Starting Chain - A free step-by-step crochet tutorial by Shibaguyz Designz

How To Make the Knotless Starting Chain - A free step-by-step crochet tutorial by Shibaguyz Designz

8. And make the Single Crochet stitch into the Knotless Starting Chain.

NOTE: The loop of the Knotless Starting Chain is still pretty loose and is very obvious here in this photo. That's okay… we're going to make it disappear!

9. Firmly grasp the starting tail with one hand while holding your work with the other hand.

How To Make the Knotless Starting Chain - A free step-by-step crochet tutorial by Shibaguyz Designz

How To Make the Knotless Starting Chain - A free step-by-step crochet tutorial by Shibaguyz Designz

10. Gently pull the tail until the loop from the Knotless Starting Chain just melts away into the rest of the row.

Be sure to do this gently so as to not make this first loop too tight. You just want it to be tight enough to look like the rest of the chain stitches in the starting chain row.

11. And there you have it! Look carefully… blow up the photo if you like! There is NO KNOT SHOWING!

Yes, we were probably a little unreasonably happy about this little technique. But, hey, it's just one more way to make our stitches flawless. So… yeah… happy dance!

How To Make the Knotless Starting Chain - A free step-by-step crochet tutorial by Shibaguyz Designz

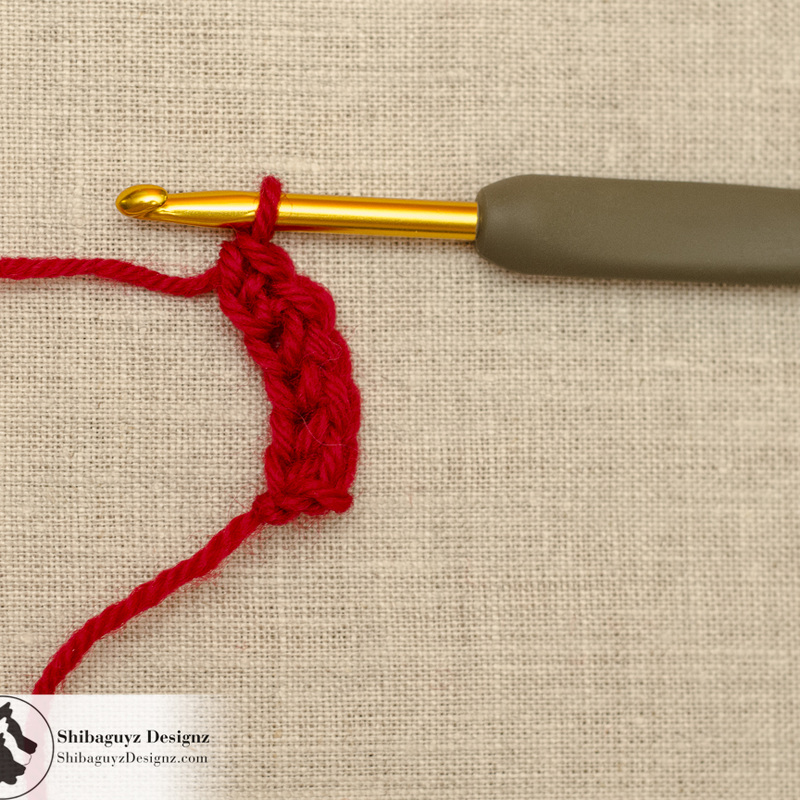
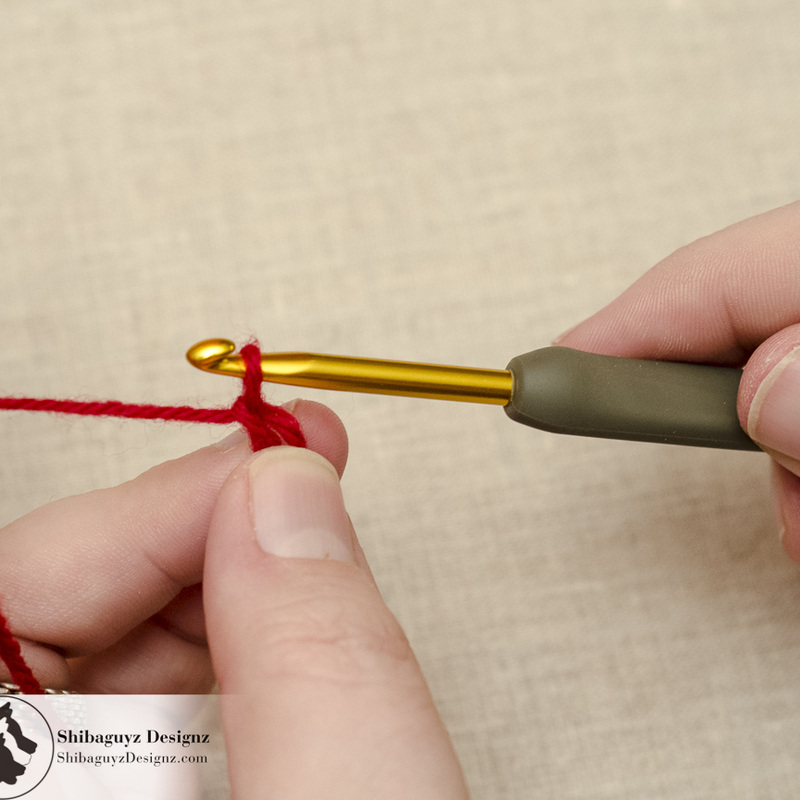
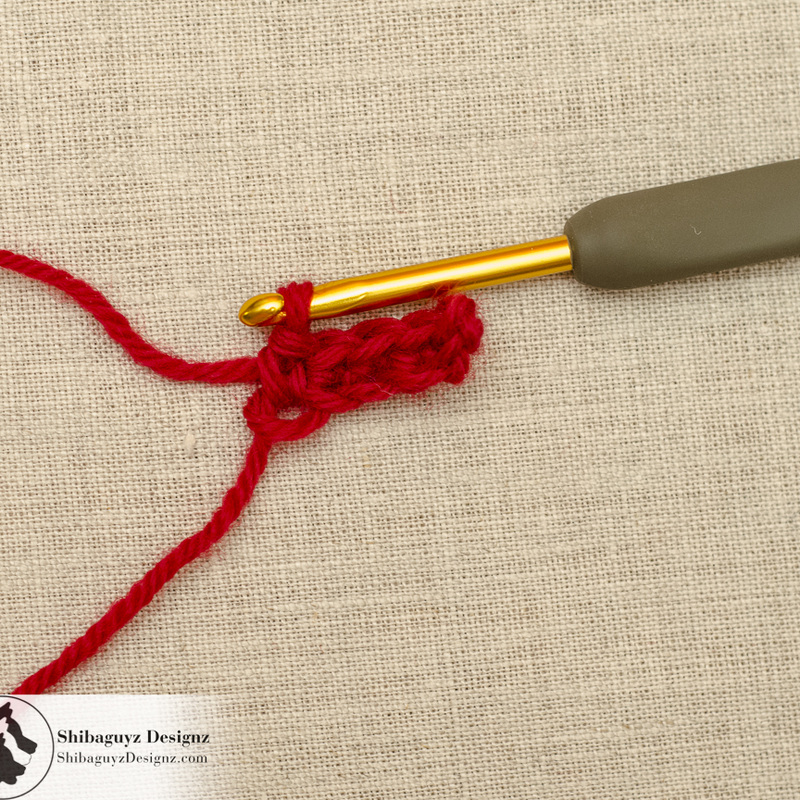
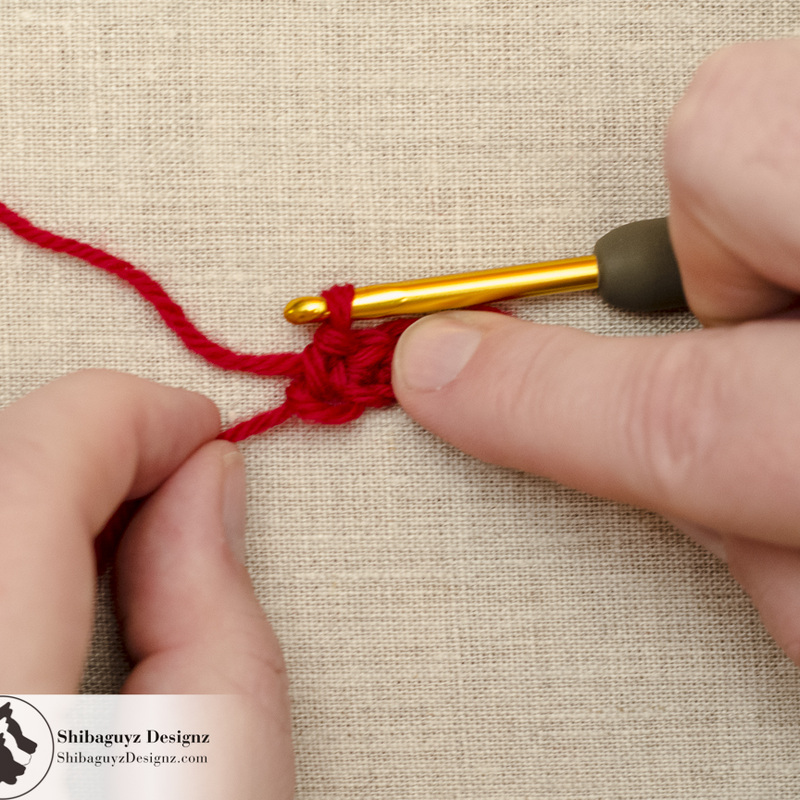
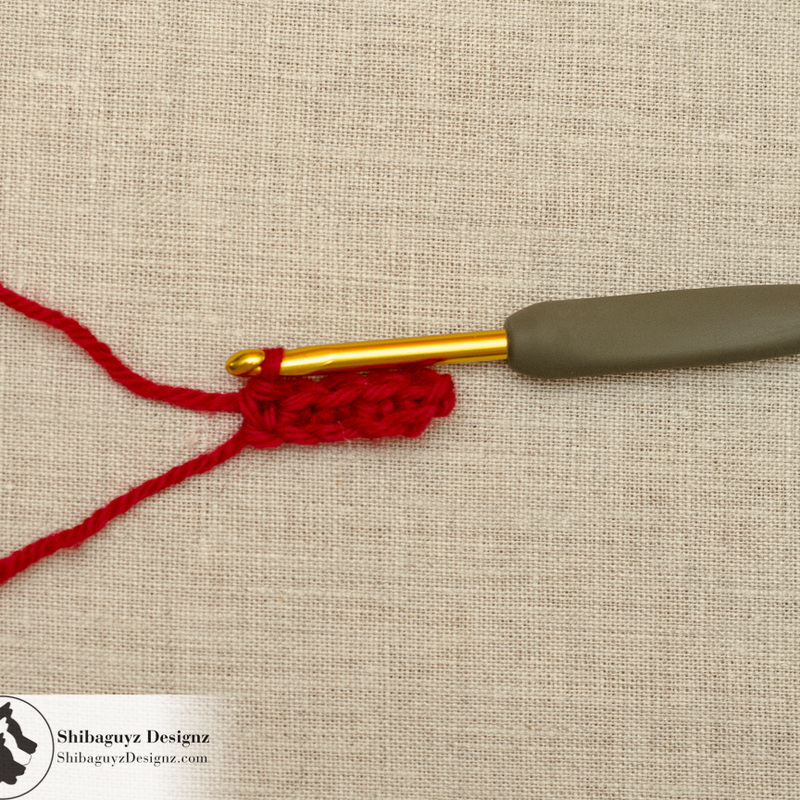
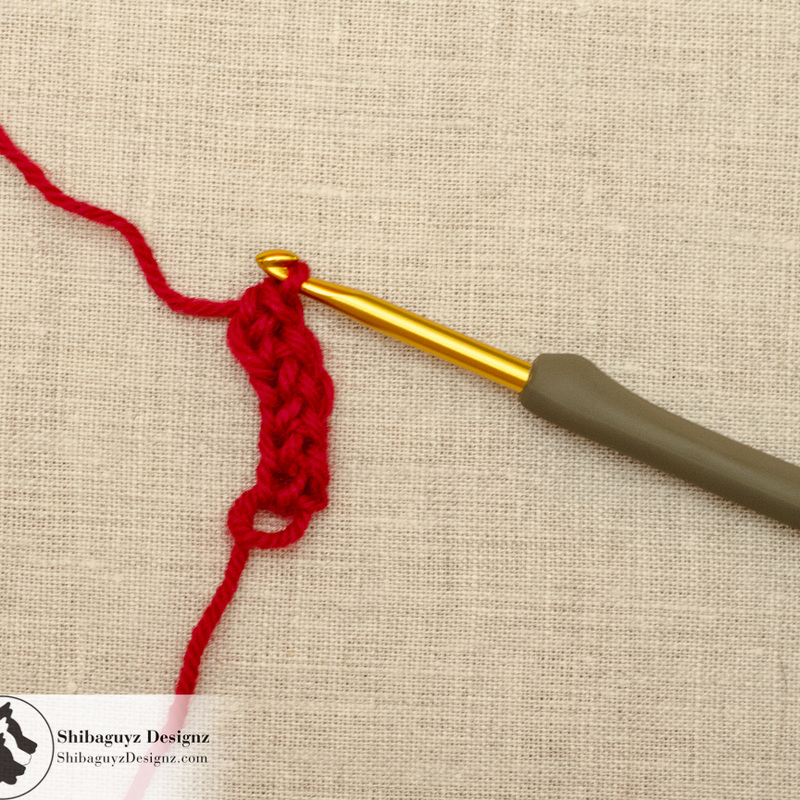
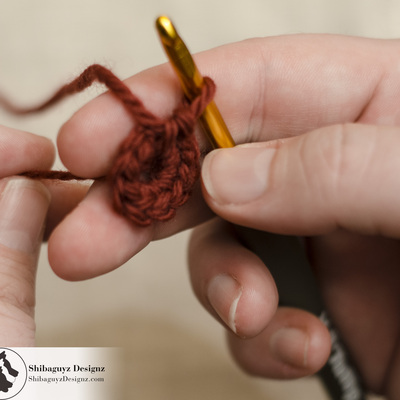
Now we will apply the Knotless Starting Chain technique to a row of Foundation Single Crochet stitches. Again, if you aren't up on your Crochet Foundation Stitches, check out our tutorial here: How To Make the Foundation Single Crochet Stitch

1. To begin, pass the tail of the yarn from back to front over your hook.

How To Make the Knotless Starting Chain - A free step-by-step crochet tutorial by Shibaguyz Designz

How To Make the Knotless Starting Chain - A free step-by-step crochet tutorial by Shibaguyz Designz

2. Now cross the tail behind your working yarn (the yarn coming from your ball of yarn).

3. Firmly hold the crossing point where the tail and working yarn cross.

Again, I tension my yarn with my index finger so I am holding the yarn here between my thumb and my middle finger.

How To Make the Knotless Starting Chain - A free step-by-step crochet tutorial by Shibaguyz Designz

How To Make the Knotless Starting Chain - A free step-by-step crochet tutorial by Shibaguyz Designz

4. Chain 2 being careful to hold that crossing point securely.

5. I wouldn't normally do this but I let go of the crossing point so you can see more clearly. Yes, it looks a little gnarly when you see it laid out like this but that's okay.

You can clearly see the crossing point and the opening made by the loop of the Knotless Starting Chain. That opening you see there is where we are going to insert our hook next for starting our first Foundation Single Crochet stitch.

How To Make the Knotless Starting Chain - A free step-by-step crochet tutorial by Shibaguyz Designz

How To Make the Knotless Starting Chain - A free step-by-step crochet tutorial by Shibaguyz Designz

6. And here we've inserted the hook into the loop with the crossing point on top of the hook. This is important in order to secure that tail.

7. This is the completed row of five Foundation Single Crochet stitches.

You can clearly see the loop of the Knotless Starting Chain at the beginning of the row.

How To Make the Knotless Starting Chain - A free step-by-step crochet tutorial by Shibaguyz Designz

How To Make the Knotless Starting Chain - A free step-by-step crochet tutorial by Shibaguyz Designz

8. Just like with our other demo, firmly grasp the starting tail with one hand while holding your work with the other hand.

9. Gently pull the tail until the loop from the Knotless Starting Chain just melts away into the rest of the row.

Again, it is important that you pull the tail gently to snug the loop of the Knotless Starting Chain closed. You just want the Knotless Starting Chain to be just tight enough to look like the rest of the base loops in the bottom of the Foundation Single Crochet row.

How To Make the Knotless Starting Chain - A free step-by-step crochet tutorial by Shibaguyz Designz


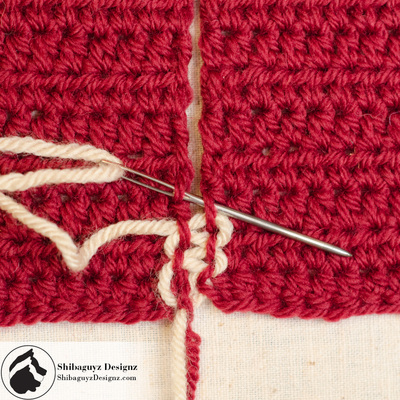
TAADAA!!


A Final Word… or two…

Now those are some pretty stitches! Y'all know we love clean lines and beautiful finishes. And, if we can accomplish that with a technique that is as quick and easy as the Knotless Starting Chain, we are happy designers.

As with any new technique, it takes a few times to get the muscles to coordinate so the result is flawless. That's okay… As always… experment! Play! SWATCH! That's how we get better at what we do and how we make our already good crochet skills FAB!

And… hey… if you aren't happy with your experiment rip it out and go again! You'll get it!
 

Thanks for dropping by for another Technique Tuesday! Our aim is to build the skillz of our FAB fiber community here on the web and it's always FAB to hear from you all that what we are doing is helping you and your fiber friends.

Check back weekly for our Technique Tuesday features and make sure you check us out on Facebook, Twitter, Pinterest. Those links are down there at the bottom of the post. We'd love to hear from you!

Stitch On!
S&J

Oh hey… before you go… Here are a few more pages we thought you might be interested in. Click on any of the photos below… enjoy!
Learn To Make FLAWLESS Crochet Seams
No Ends To Weave In With This Easy Technique
The PERFECT Crochet Project For Spring
You'll Enjoy Making It And He Will Look GREAT In It
Come look us up on Facebook, Twitter, and Pinterest by clicking on one of these icons.
Quick and Easy Crochet Cables - Craftsy Crochet Class by Shannon Mullett-Bowlsby
2 Comments
Laurie
6/26/2017 09:28:00 am

Does this change the way you count your starting chain row? Typically, you have your slip stitch knot and then start counting your chains... Does the beginning of your knotless chain count as my first chain?

Reply
Betty
3/16/2018 10:15:13 am

Thanks!!!

Reply

Your comment will be posted after it is approved.


Leave a Reply.

    Author

    Shannon and Jason

    RSS Feed

    Sign Up For Our Newsletter

    Leave us a tip to help us do what we do!

    BERNINA Ambassador Badge
    Daylight Company Lamps
    Shibaguyz Aurifil Thread Collection

    Archives

    September 2022
    June 2022
    February 2022
    June 2021
    November 2020
    September 2020
    June 2020
    May 2020
    April 2020
    March 2020
    January 2020
    February 2019
    December 2018
    November 2018
    August 2018
    July 2018
    May 2018
    April 2018
    March 2018
    February 2018
    January 2018
    December 2017
    November 2017
    October 2017
    September 2017
    August 2017
    July 2017
    March 2017
    February 2017
    January 2017
    November 2016
    October 2016
    September 2016
    July 2016
    June 2016
    May 2016
    April 2016
    March 2016
    February 2016
    November 2015
    August 2015
    July 2015
    June 2015
    May 2015
    April 2015
    March 2015
    February 2015
    January 2015
    December 2014
    November 2014
    October 2014
    September 2014
    August 2014
    July 2014
    April 2014
    March 2014
    January 2014

    www.dickblick.com
    Picture
    Picture

    RSS Feed

    Categories

    All
    Afghan
    Aurifil
    Books
    Boro
    Camp STITCHES
    Classes
    Cleaning
    Clip On
    Clover
    Cowl
    Craft
    Craftsy
    CraftU Classes
    Crochet
    Crochet Geometry
    Daylight
    Daylight Company
    Design
    Designer Crochet
    Digital Download
    Donate
    Download
    English Paper Piecing
    Event
    Free
    Giveaway
    Hand Cream
    Hooks
    Inspirations
    International Crochet Month
    Interview
    Interweave
    Knit
    Knitting
    Lamp
    Marcus
    Marcus Fabrics
    Men
    Menswear
    National Craft Month
    National Crochet Month
    Needles
    Online Classes
    Ottlite
    Pattern
    Patterns
    Paypal
    Photography
    Podcast
    Prize
    Product Review
    Project
    Quilt
    Quilting
    Recipe
    Rotary Cutter
    Sashiko
    Season Of Giving Away
    Sew Expo
    Sewing
    Shibaguyz
    Shibaguyz Designz
    Shibaguyz Designz Indie Maker Pattern
    Shibaguyz LIVE
    Shibaguyz Photography
    Shop
    Soak
    STITCHES Events
    Sweater
    Thread
    Tool School
    Tools Of The Trade
    Travel Lamp
    Tutorials
    Vogue Knitting LIVE
    Walkthrough
    Warm Up America
    Wash
    Weaving
    Women
    Yarn
    Zoom Loom

    www.dickblick.com

Stay current on the news and events from Shannon and Jason as well as exclusive offers and tutorials available only for our newsletter subscribers.

* indicates required
Email Format

  • Home
  • Blog
    • Tips
    • tutorials
  • Our Books
    • Contemporary Kogin-zashi
    • Boro & Sashiko, Harmonious Imperfection: The Art of Japanese Mending & Stitching
    • Complete Crochet Course
    • Designer Crochet
    • Crochet Geometry
  • All Shopping
    • Books and Digital Patterns
    • Sashiko Shop
    • Thread
    • Fabric
    • Stitchips
  • Classes
  • Sashiko
  • About
  • Contact and Subscribe
  • Sponsors