

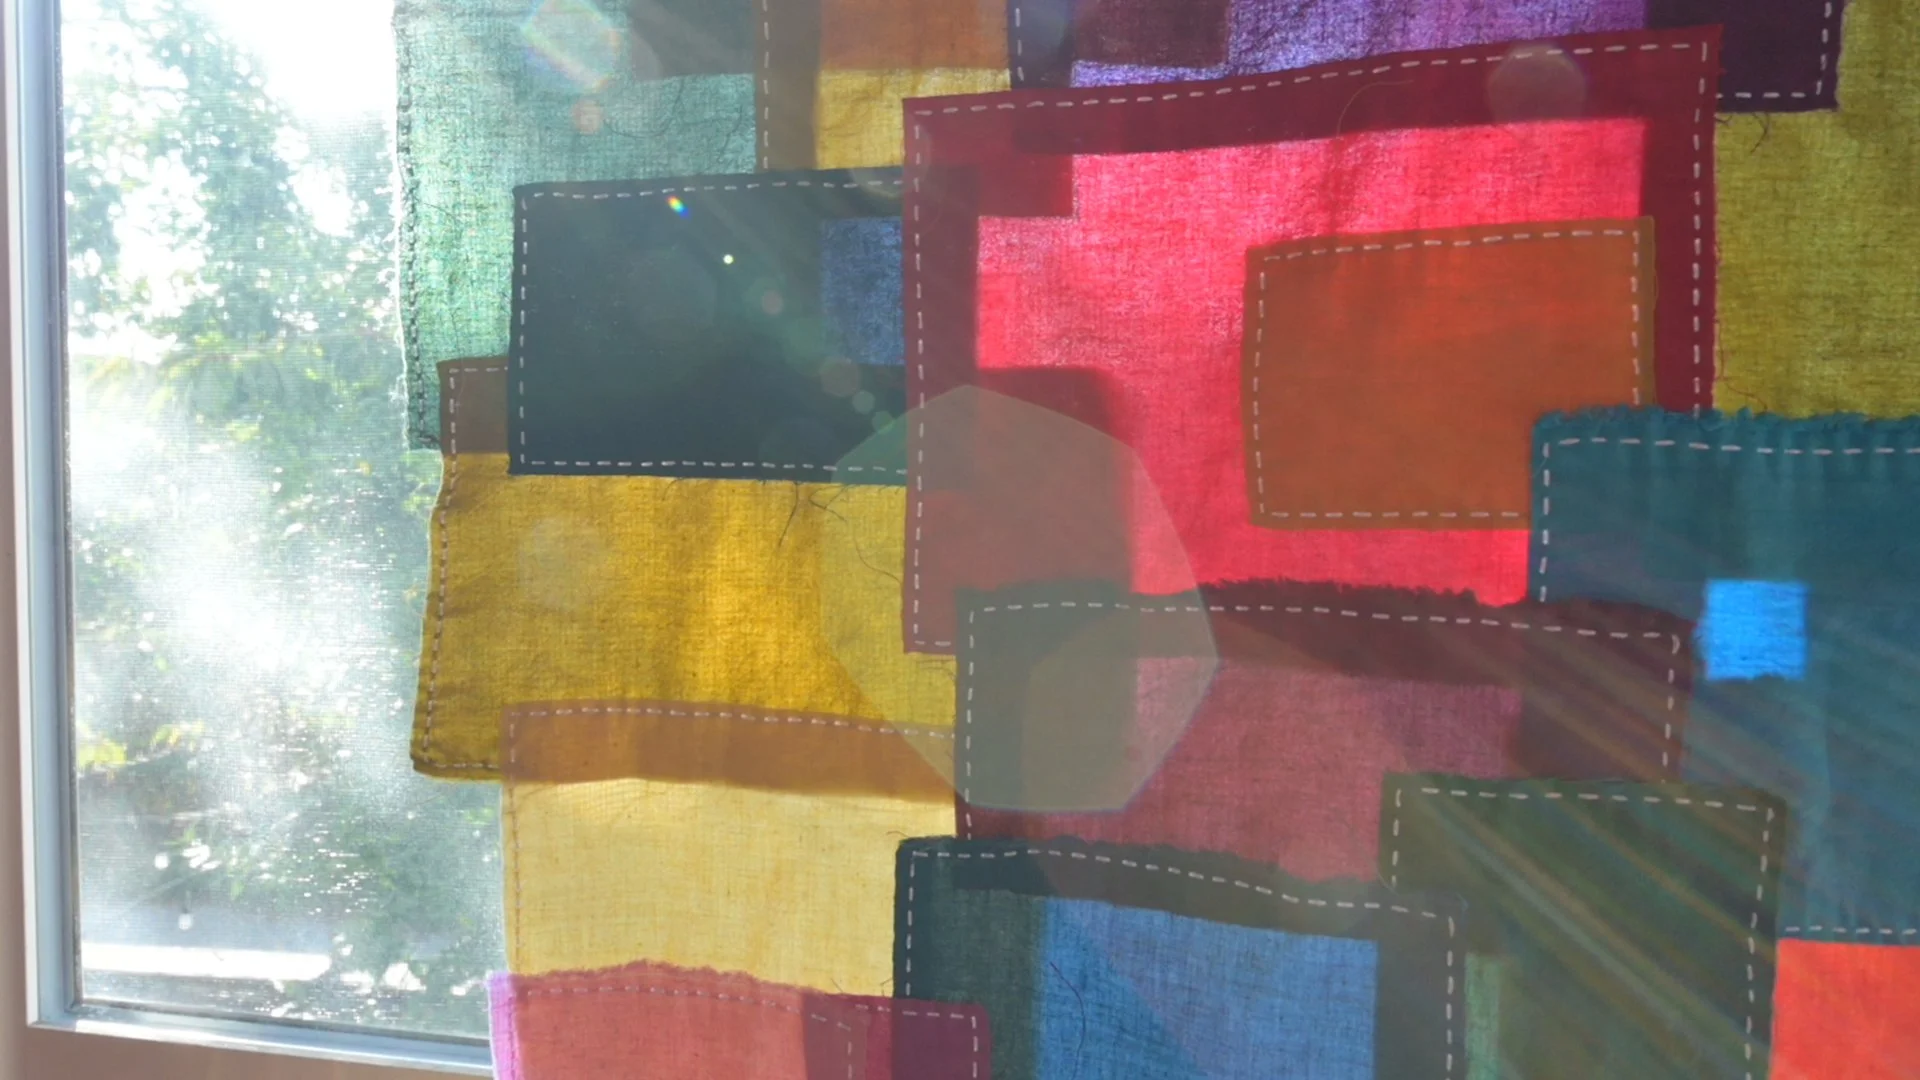
Freeform Boro Fabric
Build a brand new textile from your scraps. No backing. No rules. Just overlapping patches, glue, and sashiko stitching.
About twelve years ago, a patched and repatched boro jacket at the Amuse Museum in Tokyo rocked our world. So many repairs had been layered onto it that the original cloth had disappeared. We have been chasing that texture ever since.
Freeform Boro Fabric is our boro-inspired answer to that jacket, with a twist: there's nothing underneath. Every patch overlaps and locks in its neighbors, and simple sashiko running stitches hold it all together. Give it a tug and it behaves like woven cloth. Hold it up to a window and the overlapping layers glow like stained glass.
This is Textile Architecture at its purest. The scraps and offcuts most folx throw away become the structure itself. Nothing wasted. Everything transformed.
What you'll learn
How to build fabric with no backing, using a simple leader strip as your anchor
The overlap rule that makes this textile strong (and why it's not a seam allowance)
How to audition patches with your eye, not a color wheel
Our favorite glue sticks for basting, and which glues to avoid
How to glue baste in layers so nothing shifts while you stitch
Loop threading, quilter's knots, and our tidy backstitch loop knot
Exactly which edges to stitch, and which to leave open so your panel can keep growing
Ways to finish, hang, and care for your piece
Who it's for
Anyone with a scrap bin. If you own a piece of fabric, you are qualified to work with it. New to sashiko? We walk you through every stitch. Stitching for years? You'll find a whole new way to think about fabric.
What you'll make
A lightweight, double-sided panel that's ready to hang in a window or doorway, use as a room divider, or mount as original textile art.
What's included: five streaming video sessions (about 1 hour 48 minutes total) and a downloadable PDF handout with step-by-step instructions, diagrams, tips, troubleshooting, and care.
-
-
Introduction to Freeform Boro
In this opening session, we share the boro garment that changed everything for us, and why the fabric you'll make here is boro-inspired rather than boro. Then we walk you through three finished pieces: a panel that glows like stained glass in a window, a completely freeform piece grown outward from a single scrap, and the structured panel you'll learn to build in this workshop.
In this opening session, we share the boro garment that changed everything for us, and why the fabric you'll make here is boro-inspired rather than boro. Then we walk you through three finished pieces: a panel that glows like stained glass in a window, a completely freeform piece grown outward from a single scrap, and the structured panel you'll learn to build in this workshop.
-
-
-
Part 1 Laying Out The Initial Patches (16 min)
Grab your scrap bin. This is where the fun starts. We introduce the humble leader strip that anchors your panel, and the one rule that makes this whole textile work. Then we play. You'll watch us audition patches, flip them, tuck them, change our minds, and walk away when a layout just won't settle. No color wheel required. Just your eye, your hands, and a healthy case of brain itch.
Grab your scrap bin. This is where the fun starts. We introduce the humble leader strip that anchors your panel, and the one rule that makes this whole textile work. Then we play. You'll watch us audition patches, flip them, tuck them, change our minds, and walk away when a layout just won't settle. No color wheel required. Just your eye, your hands, and a healthy case of brain itch.
-
Part 2: Glue Basting (16 min)
Before a single stitch goes in, everything gets basted. We compare the glue sticks we reach for most, share the ones we steer clear of (and why), and show you how to baste patches in the right order so nothing shifts while you stitch. Plus, a bonus tip using the phone in your pocket that will change how you look at every project you make.
Before a single stitch goes in, everything gets basted. We compare the glue sticks we reach for most, share the ones we steer clear of (and why), and show you how to baste patches in the right order so nothing shifts while you stitch. Plus, a bonus tip using the phone in your pocket that will change how you look at every project you make.
-
Part 3: Stitching The Patches In Place (30min)
Learn the method of sashiko stitching that we use most often for boro textile work and the tools needed to make it an easy and enjoyable process.
Learn the method of sashiko stitching that we use most often for boro textile work and the tools needed to make it an easy and enjoyable process.
-
Part 4: Growing the Panel and Finishing (26 min)
Your panel is ready to grow. We show you how to add new rows above and below your stitched edges, how to edit your composition with fresh eyes, and how to keep everything flat as it gets bigger. Then we explore what's next: finishing your edges, hanging your piece, a freeform version that grows from the center, and ideas for taking this textile into garments, bags, and beyond
Your panel is ready to grow. We show you how to add new rows above and below your stitched edges, how to edit your composition with fresh eyes, and how to keep everything flat as it gets bigger. Then we explore what's next: finishing your edges, hanging your piece, a freeform version that grows from the center, and ideas for taking this textile into garments, bags, and beyond
-