

Beginning Crochet: Digital Workshop
Begin your crochet journey with us
Beginning Crochet Workshop - Learn to Crochet from Scratch
Ready to learn crochet from the very beginning? This comprehensive workshop takes you from never-having-held-a-hook to confidently working through your first projects with clear, detailed instruction on every fundamental technique. We're covering everything: how to hold your hook and tension your yarn (including Shannon's unique modified overhand grip that's worked for 50+ years… oof writing that number really hurts!), mastering chain stitches with and without knots, reading crochet patterns like a pro, and perfecting single crochet, double crochet, slip stitch, linen stitch, and block stitch. You'll learn professional finishing techniques like weaving in ends with the end cap method, changing yarn colors seamlessly, and blocking your finished pieces for that polished look. Whether you're here to make garments, accessories, or home décor, this course gives you the solid foundation you need with lifetime access to all videos and handouts.
No gatekeeping, no assumptions; just straightforward instruction that respects your intelligence and gets you crocheting with confidence.
Beginning Crochet
Write an introduction that summarizes the expected outcomes of this course.
-
-
Lesson 1: Tools and Essentials
Master the fundamentals: hook anatomy (throat vs. shaft), yarn weights, reading yarn labels, and essential tools. Learn the Craft Yarn Council's standardized system, understand hook-to-yarn relationships, and gather the right supplies. Solid foundation before your first stitch.
Master the fundamentals: hook anatomy (throat vs. shaft), yarn weights, reading yarn labels, and essential tools. Learn the Craft Yarn Council's standardized system, understand hook-to-yarn relationships, and gather the right supplies. Solid foundation before your first stitch.
-
Lesson 2: Hand Holds and Tensioning
Explore three hook grips: knife hold, pencil grip, and Shannon's modified overhand. Learn yarn tensioning techniques—wrapping once or twice, using two contact points, adjusting for yarn type. Find sustainable comfort for your hands. No single "right" way—discover what works for you for pain-free crocheting.
Explore three hook grips: knife hold, pencil grip, and Shannon's modified overhand. Learn yarn tensioning techniques—wrapping once or twice, using two contact points, adjusting for yarn type. Find sustainable comfort for your hands. No single "right" way—discover what works for you for pain-free crocheting.
-
-
-
Lesson 1: Chain Stitch Two Ways
Learn chain stitch with knot and without (our preferred knotless method). Master using the hook shaft for proper tension. Practice consistent chains that aren't too tight. Knotless method creates adjustable, seamless starts with no bulky knot to weave in. Foundation for all crochet projects.
Learn chain stitch with knot and without (our preferred knotless method). Master using the hook shaft for proper tension. Practice consistent chains that aren't too tight. Knotless method creates adjustable, seamless starts with no bulky knot to weave in. Foundation for all crochet projects.
-
Lesson 2: Working Into a Chain
Work into chain bumps for flat, beautiful foundation rows. Master "chaining up" to reach row height. Learn proper counting. Practice complete single crochet motion. Troubleshoot tight chains. See how knotless starts create seamless edges.
Work into chain bumps for flat, beautiful foundation rows. Master "chaining up" to reach row height. Learn proper counting. Practice complete single crochet motion. Troubleshoot tight chains. See how knotless starts create seamless edges.
-
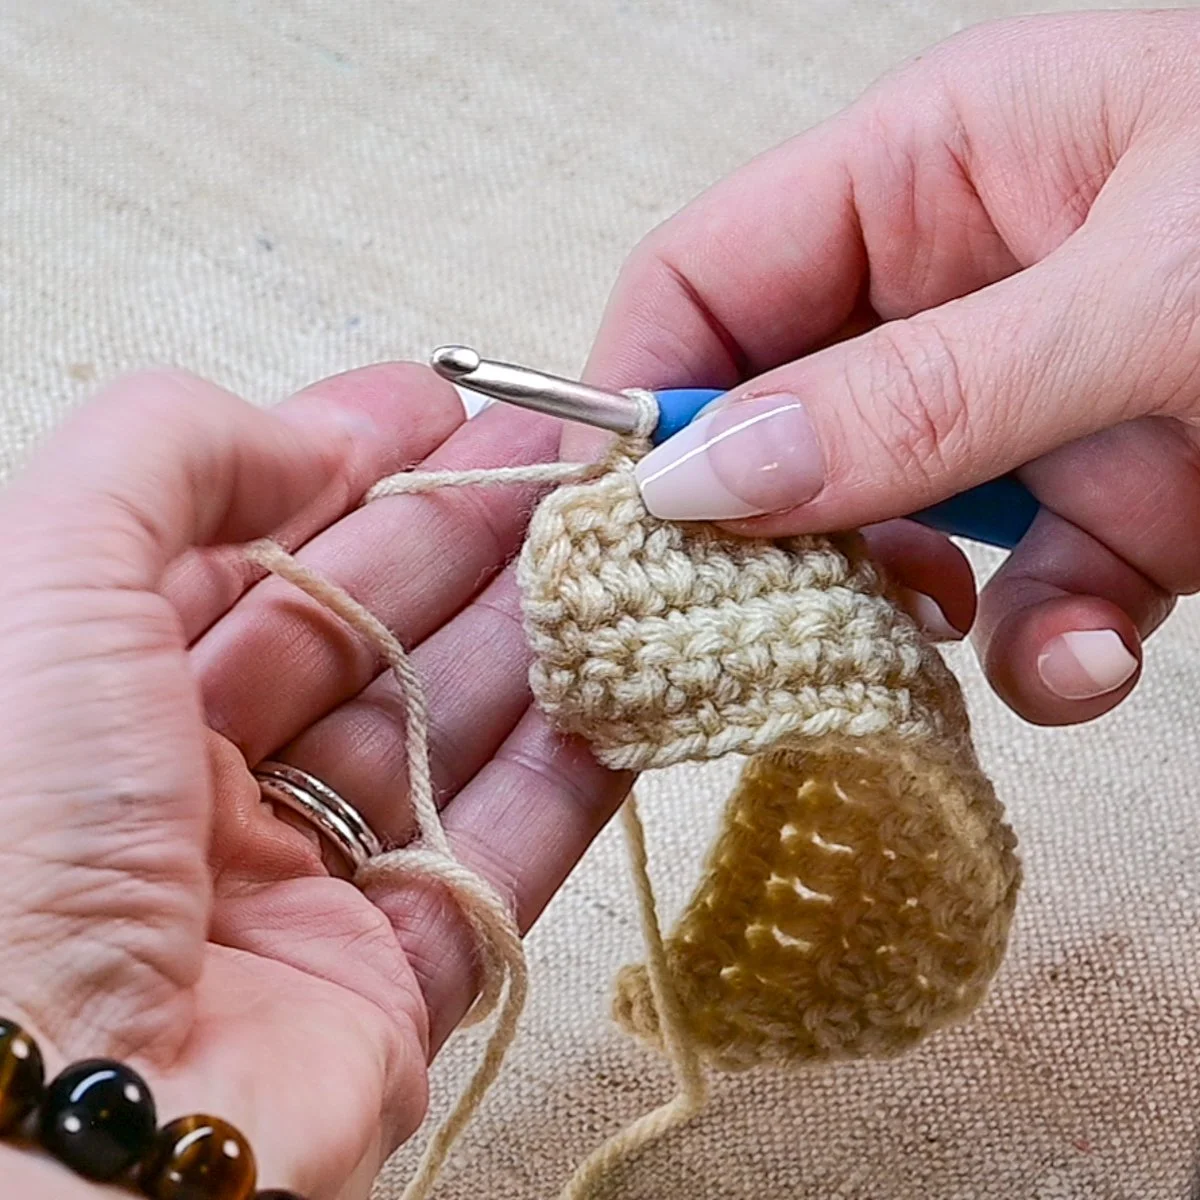
Lesson 3: Single Crochet (US) / Double Crochet (UK)
Master single crochet (US)/double crochet (UK): chain one to step up, insert under both loops, yarn over and draw up loop, yarn over and draw through two. Use hook shaft for proper gauge—avoid working on throat. Recognize when tension is too tight. Creates dense, sturdy fabric.
Master single crochet (US)/double crochet (UK): chain one to step up, insert under both loops, yarn over and draw up loop, yarn over and draw through two. Use hook shaft for proper gauge—avoid working on throat. Recognize when tension is too tight. Creates dense, sturdy fabric.
-
Lesson 4: Double Crochet (US) / Treble Crochet (UK)
Master double crochet (US)/treble (UK). Learn proper first stitch technique that eliminates edge holes—forget the old "chain and skip, ” to create neat, professional edges with drape.
Master double crochet (US)/treble (UK). Learn proper first stitch technique that eliminates edge holes—forget the old "chain and skip, ” to create neat, professional edges with drape.
-
Lesson 5: Slip Stitch and Slip Stitch Joins
Master slip stitch, the shortest stitch with almost no height. Essential for invisible joins, joining rounds, surface decoration, and repositioning yarn. Creates very dense fabric if used for rows. Perfect for seaming and shaping.
Master slip stitch, the shortest stitch with almost no height. Essential for invisible joins, joining rounds, surface decoration, and repositioning yarn. Creates very dense fabric if used for rows. Perfect for seaming and shaping.
-
-
-
Lesson 1: Weaving In Ends and End Cap Finishing Stitch
Master end cap finishing: crochet over tails as you work, eliminating weaving later. Learn traditional weaving in of your ends. How to split tails in opposite directions to distribute bulk. Professional finishing to prevents loose ends.
Master end cap finishing: crochet over tails as you work, eliminating weaving later. Learn traditional weaving in of your ends. How to split tails in opposite directions to distribute bulk. Professional finishing to prevents loose ends.
-
Lesson 2: Changing Yarn
How to change yarn in crochet at row ends or mid-row. Works for running out of yarn or adding colors. Weave matching colors together.
How to change yarn in crochet at row ends or mid-row. Works for running out of yarn or adding colors. Weave matching colors together.
-
Lesson 3: Blocking and Final Thoughts
Transform finished projects with blocking: wet blocking for natural fibers, steam blocking for acrylics. Pin to measurements, let dry completely. Blocking isn't optional for garments. It creates professional drape and finish, evens stitches, opens lace patterns, prevents rolling edges. Celebrate your journey from first chain to polished project
Transform finished projects with blocking: wet blocking for natural fibers, steam blocking for acrylics. Pin to measurements, let dry completely. Blocking isn't optional for garments. It creates professional drape and finish, evens stitches, opens lace patterns, prevents rolling edges. Celebrate your journey from first chain to polished project
-
-
-
Lesson 1: Crochet Pattern Reading 101
Decode crochet patterns: US vs UK terminology, common abbreviations (ch, sc, dc, sl st, yo), pattern anatomy, stitch counts, increases/decreases. Learn to read charts and written instructions. Understand gauge importance and why swatching matters. Translate pattern language into confident stitching.
Decode crochet patterns: US vs UK terminology, common abbreviations (ch, sc, dc, sl st, yo), pattern anatomy, stitch counts, increases/decreases. Learn to read charts and written instructions. Understand gauge importance and why swatching matters. Translate pattern language into confident stitching.
-
Lesson 2: Linen Stitch Walkthrough
Master linen stitch for woven-looking fabric with exceptional drape. Technique: insert, pull up loop, chain one, complete stitch. Creates flexible fabric with tiny chain spaces. Perfect for garments and lightweight projects. Slower than single crochet but creates sophisticated, textured results.
Master linen stitch for woven-looking fabric with exceptional drape. Technique: insert, pull up loop, chain one, complete stitch. Creates flexible fabric with tiny chain spaces. Perfect for garments and lightweight projects. Slower than single crochet but creates sophisticated, textured results.
-
Lesson 3: Block Stitch Walkthrough
Master block stitch for chunky texture: work multiple incomplete stitches in same spot, complete together. Creates raised dimensional blocks. Varies from subtle (3-dc) to dramatic (5-dc). Uses more yarn but creates impressive reversible texture. Perfect for cozy projects with visual interest.
Master block stitch for chunky texture: work multiple incomplete stitches in same spot, complete together. Creates raised dimensional blocks. Varies from subtle (3-dc) to dramatic (5-dc). Uses more yarn but creates impressive reversible texture. Perfect for cozy projects with visual interest.
-
FAQs
-
Yes! We start from the very beginning, assuming you've never held a hook. Shannon walks you through every single step, from how to hold your tools to finishing professional-looking projects. There's no assumption of prior knowledge.
-
Not at all. You'll need a hook (we recommend starting with a size H/5mm), some worsted weight yarn, scissors, and a yarn needle. These basics cost under $15 total. We'll guide you on what to buy and where to find quality supplies affordably.
-
The same physical stitches have different names in US versus UK patterns. We teach both terminologies throughout the course so you can follow any pattern confidently. For example, US "single crochet" is UK "double crochet."
-
The techniques work the same way—just mirror what you see. Shannon demonstrates how to adapt instructions, and crochet is actually quite ambidextrous once you learn the basics.