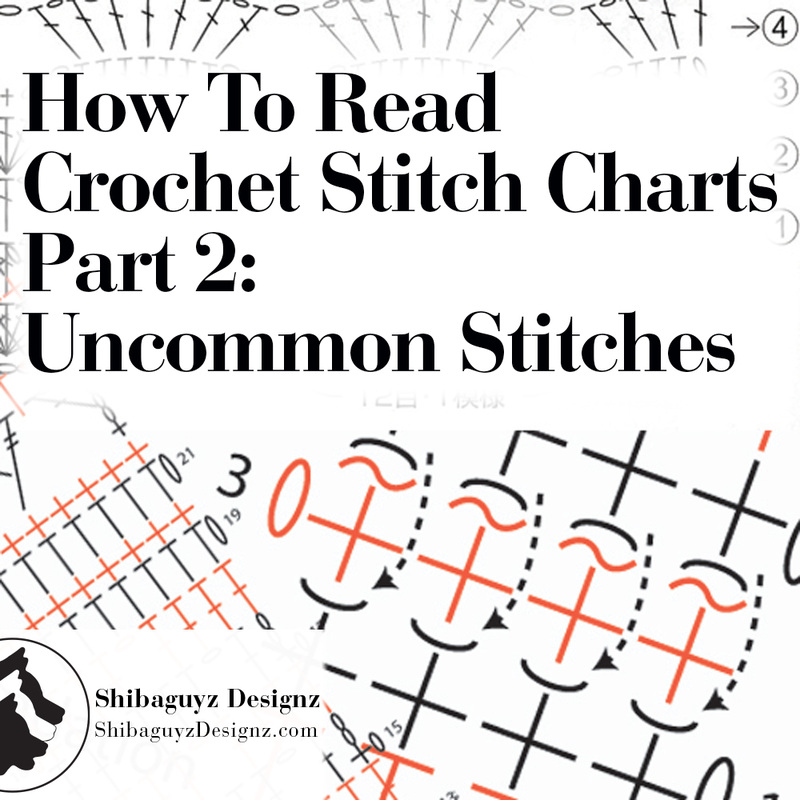
Technique Tuesday Crochet Tutorial – Introduction to Crochet Charts, Part 2: Uncommon Stitches3/3/2015 
Introduction to Crochet Charts, Part 2: Uncommon StitchesTechnique How To Read Crochet Charts – Uncommon Stitches
NOTE: This week's tutorial builds on our tutorial from last week. Do yourself a favor and go back to last week (OH! Time travel!!) and read that tutorial. Here's the link: Introduction to Crochet Stitch Charts Click the "Read More" link below for the full tutorial.
0 Comments
 Introduction to |
| What is it? Crochet Stitch Charts are a visual representation of the physical stitches you make with your hook and yarn. Think of the Written Crochet Pattern and the Crochet Stitch Chart as two complimentary pieces to your work. The Written Crochet Pattern describes the stitches and the Crochet Stitch Chart shows you the stitches. Each physical and written stitch has a corresponding symbol that represents that stitch. To read a Crochet Stitch Chart, all you have to remember is: See a symbol, make a stitch! | 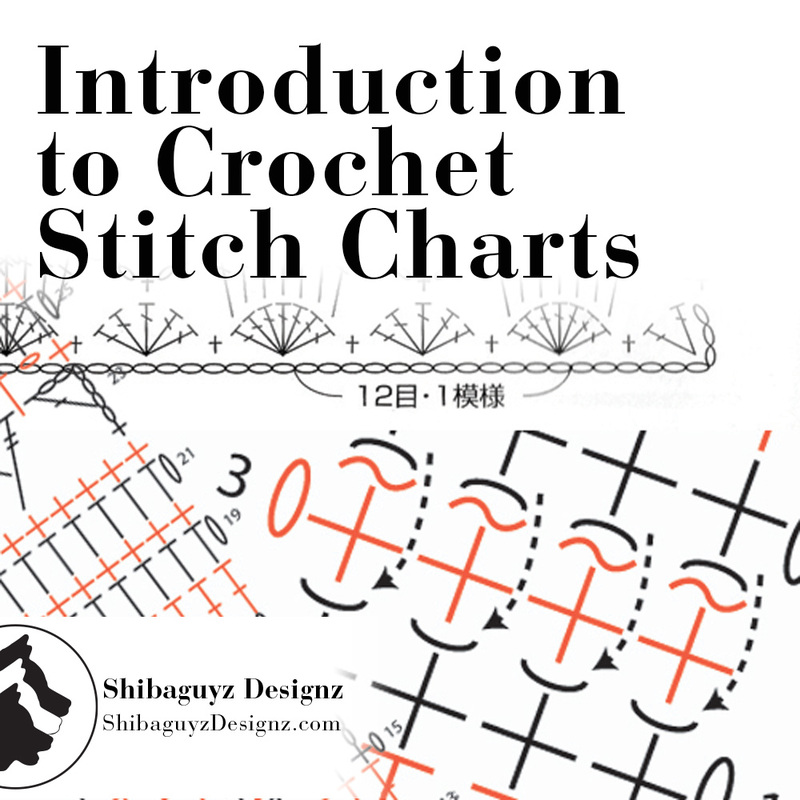 |

How To Make the End Cap Finishing Stitch
End Cap Finishing Stitch
The End Cap Finishing Stitch is a technique for weaving in that last stitch in a row of crochet.
| Why Use It? The End Cap Finishing Stitch creates a tidy corner on the end of a row of crochet. This weaves in the yarn tail at the end of the row but does it with style! In our never-ending quest to fine tune our stitching and finishing techniques, we wanted a way to both weave in the tail from that last stitch but do it in a way that didn't look all wonky. |  |
Why use it? Because you are proud of your work and want every stitch to look as good as it possibly can. And, when a technique is this easy, who NOT use it?
NOTE: The End Cap Finishing Stitch works equally well on the last stitch of a knitting row. The technique for knitting will be similar to the single crochet example we show below.

How To Make the Crochet Knotless Starting Chain
The Knotless Starting Chain
| What is it? The Knotless Starting Chain is an alternate technique for starting that first stitch off your crochet hook. As the name indicates, the Knotless Starting Chain eliminates the slipknot usually made around the crochet hook before pulling through the first loop. | 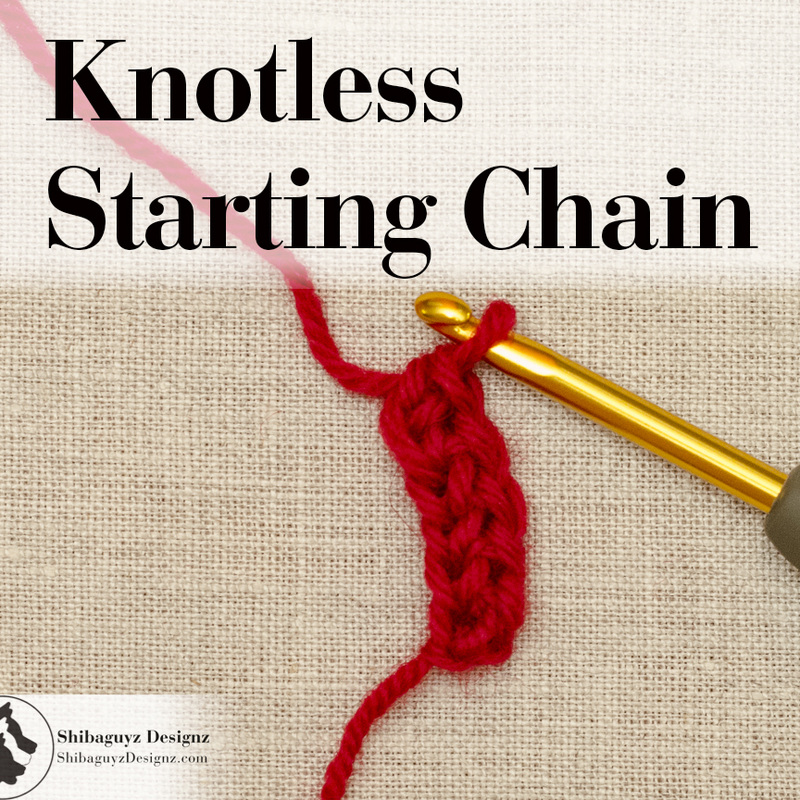 |
In our quest to create perfect finishes on our crochet designs, that little bump at the beginning of every project has been a nuisance that just won't go away. Sure, we could hide it when we woven in the starting tail, but it was still there… taunting us… the evil little bump.

There's a lot of good things happening at Shibaguyz Designz and we're looking for folks to partner with to build our community and share in the fun!
There's a LOT going on at Shibaguyz Designz and we are looking for good folks to partner up with for book tours, product reviews, events, promotions, and general FAB happenings. We love the community we have become a part of over the past five years and we can't think of better people to work with to get the word out.
 | Right now we are working on events for the release of our NEW book, Designer Crochet, coming out in April from Sterling Publishing. WOOHOO!! For our book release, we're going to be looking for book reviewers (bloggers, podcasters, makers… that's YOU!) and folks to work on a FAB sponsored giveaway we are doing around the pre-release of the book. We are also setting up workshops based on Designer Crochet, as well as book signings, and trunk shows. |
| Want to review one of our online classes or webinars? We have those opportunities as well related to our Craftsy and Interweave classes. We also have a few events where we are conducting workshops that offer some unique sponsorship opportunities and we would love to chat with your company about getting involved. | 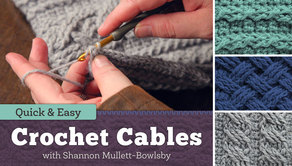  |
Have some ideas we haven't thought of before? We LOVE creative thinkers! Don't be shy about creative ideas for promotions and events.
So… wanna come along for the fun? We'd love to have you with us!
Just go to the Contact Us form and let us know how we can get in touch with you. We'll be planning and scheming the fun times right away!
Looking forward to a FAB 2015 (and beyond!) working with you all!
Stitch On!
S&J

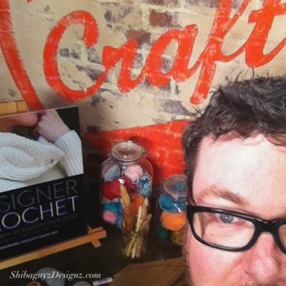 | Folks who follow our escapades on Twitter, Facebook, and Instagram know I took a little trip to Denver, Colorado back in December. If you were watching closely, you even noticed me posting a photo like this. Yup… that's me on set in front of THE Craftsy logo! (Note the inclusion of the cover of our new book Designer Crochet in the set dressing… hehehe…) |
As you can see, this class is a FAB fav topic of ours: Crochet Cables. We LOVE crochet cables and in this class I take you step-by-step through the process of how to make basic crossed stitches all the way through those glorious sweeping, turning, dramatic cables we all love. Along the way, I share all of my tips and tricks to make crochet cables fun and easy!
The exciting part is I teach you all of this using a FAB project! You get to apply what you are learning right away without wondering how you are going to use these stitches in real life.
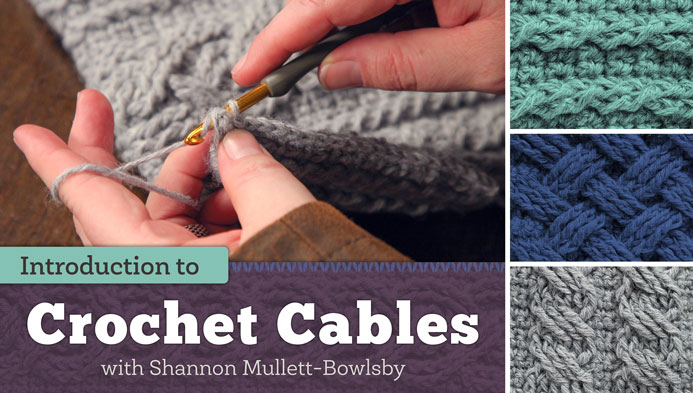
| The class project includes a written pattern, a chart, and finishing instructions. But ya know what? Because this is a Craftsy class, I'll be right there with you to walk you through how to make the cable stitches AND how to easily read a cable chart AND how to finish the project. You have me personally taking you through step-by-step from the very first stitch through weaving in that last end (there's a special trick I share there too). | 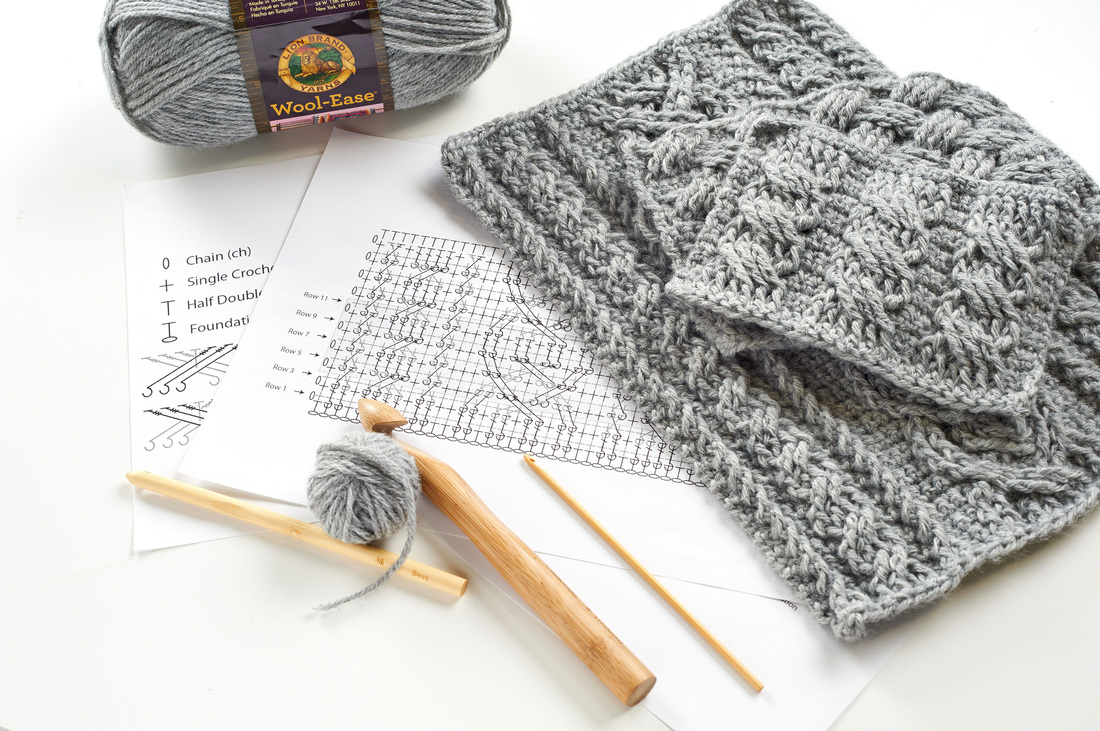 |
Oh yeah… if you've been around here very much, you've probably noticed one of the small photos is of our WILDLY popular Woven Cables crochet pattern stitch. Yes, there's even a segment of this class where we walk you through the Woven Cables pattern stitch step-by-step!
We designed this class with so much FAB information… when you are finished, you'll be shocked by how nimble your crochet hook is around cables!
| The BEST part of these Craftsy classes is you can watch them whenever, and wherever you like and you can watch them as often as you like since your purchase never expires! AND you have exclusive access to me personally! No kidding! I'll be following along with you and answering your questions in the Craftsy forum JUST for this class. I have been a big fan and have taken many Craftsy courses myself in the past to build my skillz. Now… I'm a Craftsy instructor too!! I can't tell you what a thrill it is to be able to teach you all on this amazing world-class platform. And the good news… |  |
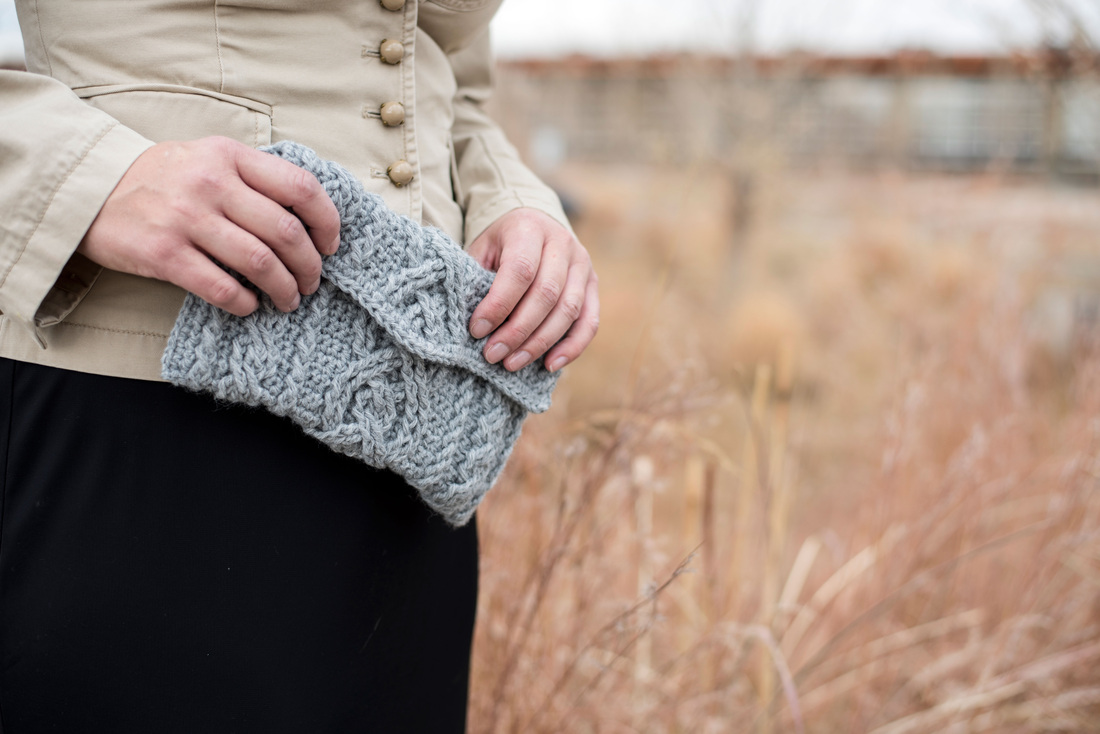 | By the time we are finished, you'll have a FAB finished project. Here's a sneak peek at the class project pattern. In class we turn your cables it into a FAB envelope clutch! Even if a clutch isn't your thing, I'll be sharing in the class forums how I used this exact pattern to make a special project just for myself! You'll have to wait till class starts to see that one… |
My class Introduction to Crochet Cables is coming out REALLY soon! WOOHOO!! To celebrate, the folks at Craftsy are letting us give away FREE access to my class to one of our fans. That's YOU!
All you have to do is follow this link to enter:
Update 01/27/15:
This giveaway has ended! Congratulations to Peta P for winning!
Didn't win? That's okay! Our Craftsy Crochet Class is now LIVE and you can join us in class by going to:
www.craftsy.com/ext/ShannonMullett-Bowlsby_4975_F
Can't wait to work with all of you to make you masters of crochet cables!!
Stitch On!!
S&J

This is no GAME! Don't let your spring be STARK because you were DRAGON and didn't start your crochet and knitting project early enough!
| | (Here's some mood music to listen to while you read on. Peter Hollens is an AMAZING talent. Worth checking out.) |

Six Ways To Make the Double Crochet 2 Together Decrease – Part 2: Three MORE Compound Stitch Techniques
Double Crochet 2 Together Decreases
| What is it? The instruction for Double Crochet 2 Together, also written as (dc2tog), is used to decrease the number of stitches made in a row by one stitch. One stitch is made in place of two stitches and is generally for the purpose of shaping but can also be used to make different lace patterns. | 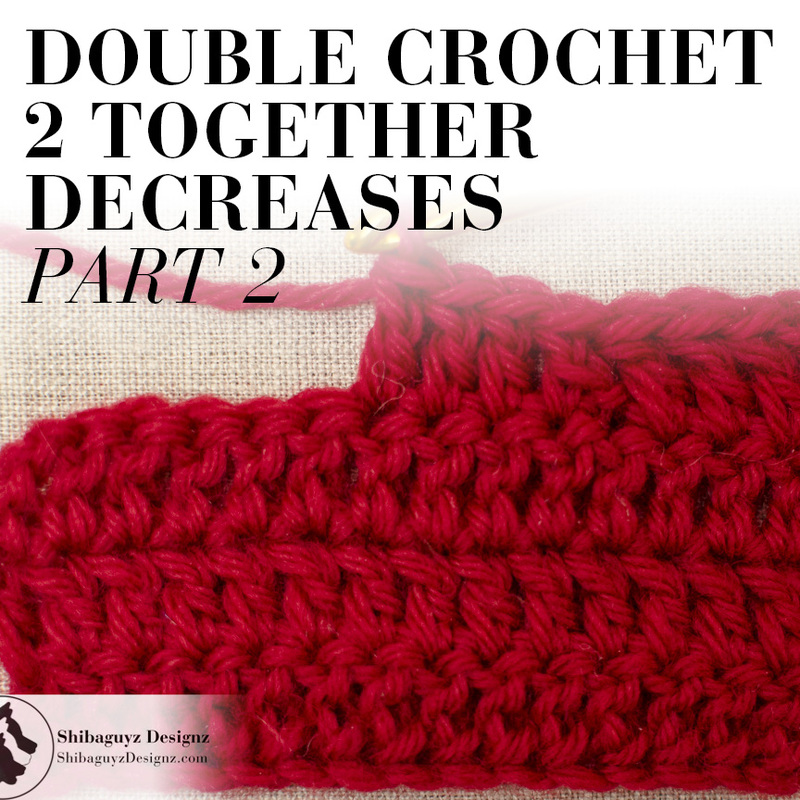 |
More accurately, one Compound Double Crochet Stitch is made in place of two Double Crochet stitches. Compound Crochet Stitches are those stitches that are made up of two or more elements of other crochet stitches. When making a Compound Crochet Stitch, we combine the elements of two or more crochet stitches to make one NEW crochet stitch. In this tutorial and in Part 1, we explore the use of these Compound Crochet Stitches to combine the elements of two Double Crochet stitches to create one Double Crochet 2 Together (dc2tog) stitch.
As we said in the title of this tutorial, this is the second of a two part tutorial and contains techniques 4–6 of the SIX techniques we use for making the Double Crochet 2 Together (dc2tog) decrease. Yup… six…
To catch up on the techniques 1–3, go to our post from a couple of weeks ago at the link below:
Six Ways To Make the Double Crochet 2 Together Decrease – Part 1: The First Three Techniques
Don't worry… we'll wait for you to go and come back…
Oh good! You're back…
Now on with today's tutorial!

How to Wet Block Crochet and Knit Fabrics by Soaking
| What is it? Generally, blocking is the method for shaping and setting the stitches of crochet and knit fabrics. During blocking, the fibers of the fabric are relaxed and allowed to bloom through the introduction of water in the form of steam, spritzing, washing, or soaking. | 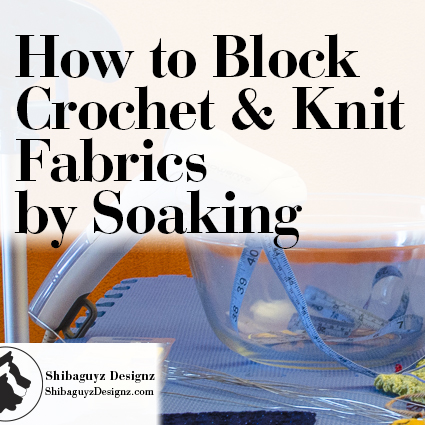 |
Specifically, for today's tutorial, we are going to be covering the steps for soaking your fabrics for blocking.

Six Ways To Make the Double Crochet 2 Together Decrease – Part 1: The First Three Techniques
Double Crochet 2 Together Decreases
| What is it? The instruction for Double Crochet 2 Together, also written as (dc2tog), is used to decrease the number of stitches made in a row by one stitch. One stitch is made in place of two stitches and is generally for the purpose of shaping but can also be used to make different lace patterns. | 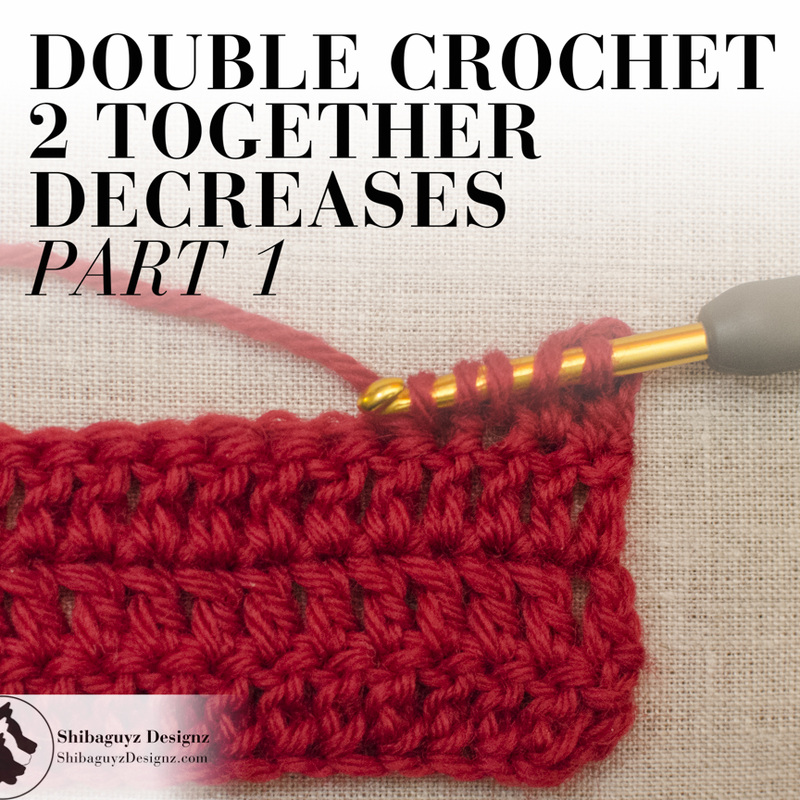 |
More accurately, one Compound Double Crochet Stitch is made in place of two Double Crochet stitches. That is, the elements of two Double Crochet stitches are combined to create one compound stitch. Therefore, we are using Compound Crochet Stitches to decrease in Double Crochet stitches.
As we said in the title of this tutorial, this is Part 1 of 2 and contains the first three of SIX techniques we use for making the Double Crochet 2 Together (dc2tog) decrease. Yup… six…

Technique Tuesday – How To Make the Foundation Double Crochet Stitch
| Technique Foundation Double Crochet (Fdc) Stitch | 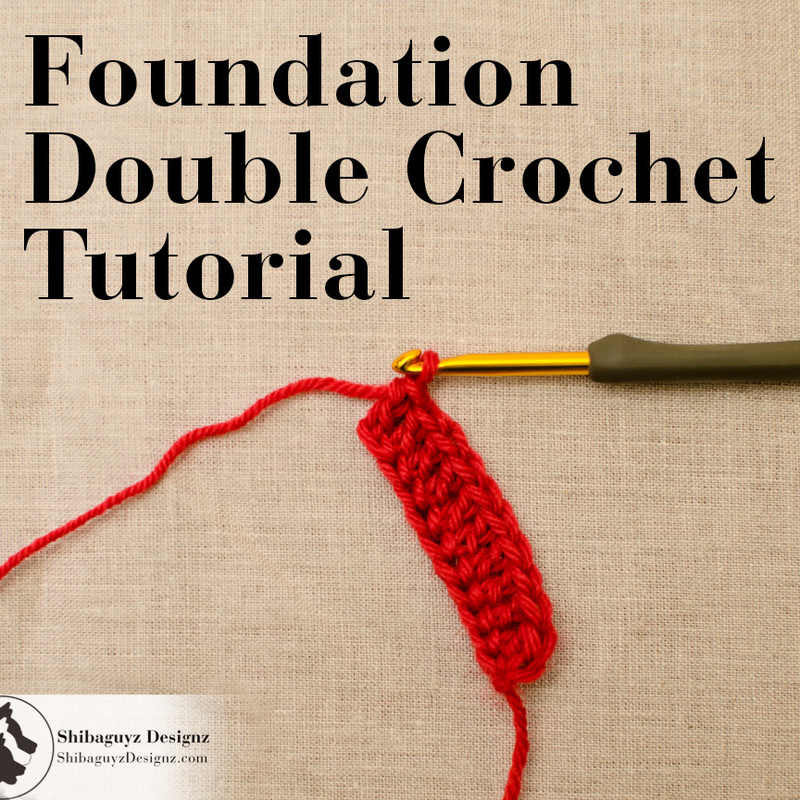 |
The Foundation Double Crochet stitch technique (abbreviated Fdc) is an alternative to the instructions at the beginning of a crochet pattern that tell you to chain a certain number of stitches.
This technique simultaneously creates a row of "chain" stitches AND a row of Double Crochet stitches (abbreviated dc) without making two passes. Basically, it takes the place of two rows of stitches: the "chain" row that makes up the beginning base and the next row of Double Crochet stitches worked into that row of chains.
As with our Foundation Single Crochet and Foundation Half Double Crochet tutorials, we are using " " around the word chain because this isn't REALLY a chain stitch but it LOOKS like a chain stitch when the stitch is completed.
Be sure to go check out our other foundation stitch tutorials:
How To Make the Foundation Single Crochet Stitch
How To Make the Foundation Half Double Crochet Stitch
The primary reason we use foundation stitches like the Foundation Double Crochet stitch in our work is the elasticity or, more accurately, the consistent stitch tension, it provides at a hem, cuff, neckline or any beginning section of crochet stitches.
A crochet chain row tightens up significantly once the next row of stitches is worked into it because the loops of a crochet chain are made by pulling new loops through previously made loops. Since the chain loops are connected to one another this way, pulling on one of the loops by inserting a hook into the chain and making a stitch there tightens the neighboring loops. The result is a chain that is significantly shorter than we probably need and a fabric edge with little or no elasticity at all. And, unfortunately, even the almighty fix-all techniques in blocking will only get you so far… fibers only stretch so much before they are ruined or "killed" zapping them of all bounce and elasticity.
This unfortunate tightening of stitches doesn't happen when using the Foundation Stitch technique since the "chains" we make are connected to the stitch (Single Crochet, Half Double Crochet, Double Crochet, etc…) we create simultaneously on top of the "chain". The next "chain" we make is created by coming through the side of the previous stitch and does not affect the tension of the preceding or following "chains."

How To Weave In the Ends Of Yarn Tails On Your Crochet Projects
Weaving In the Ends On Your Crochet Projects
| What is it? At the end of projects and anywhere a new length of yarn is joined, there is a tail of yarn remaining that must woven in. This instruction is often at the end of a pattern written as: Weave in ends. Weaving in the end of a tail of yarn secures the yarn tail so it does not come unraveled and hides the tail so it can not be seen. | 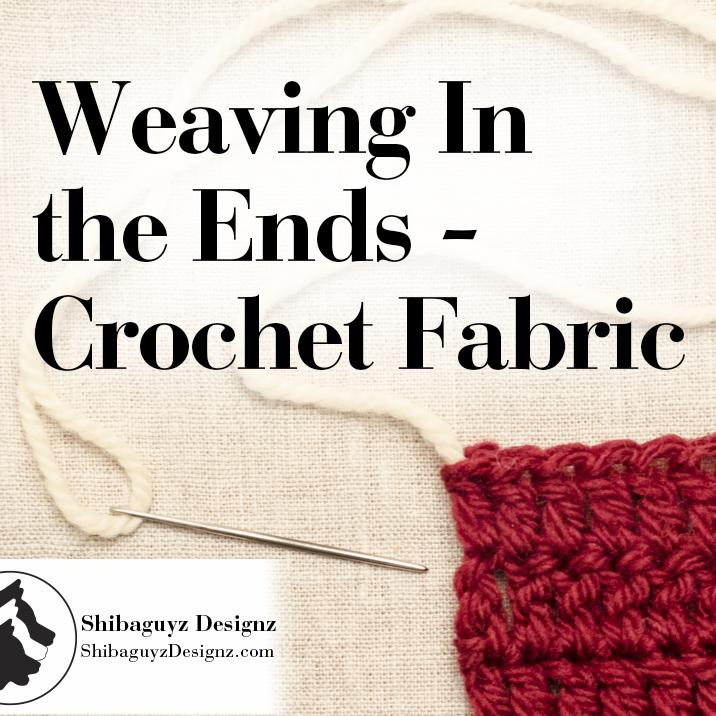 |

Four Techniques for How To Block Your Crochet and Knit Fabrics
Four Ways to Block Crochet and Knit Fabrics
| What is it? Blocking is the process of introducing moisture into a fabric in order to finish that fabric. Blocking allow fabric fibers to bloom and wake up lending their true nature to the finished fabric. Blocking also allows the finished fabric to be shaped and sized according the finished dimensions of a pattern or in order to open up and set a stitch pattern. | 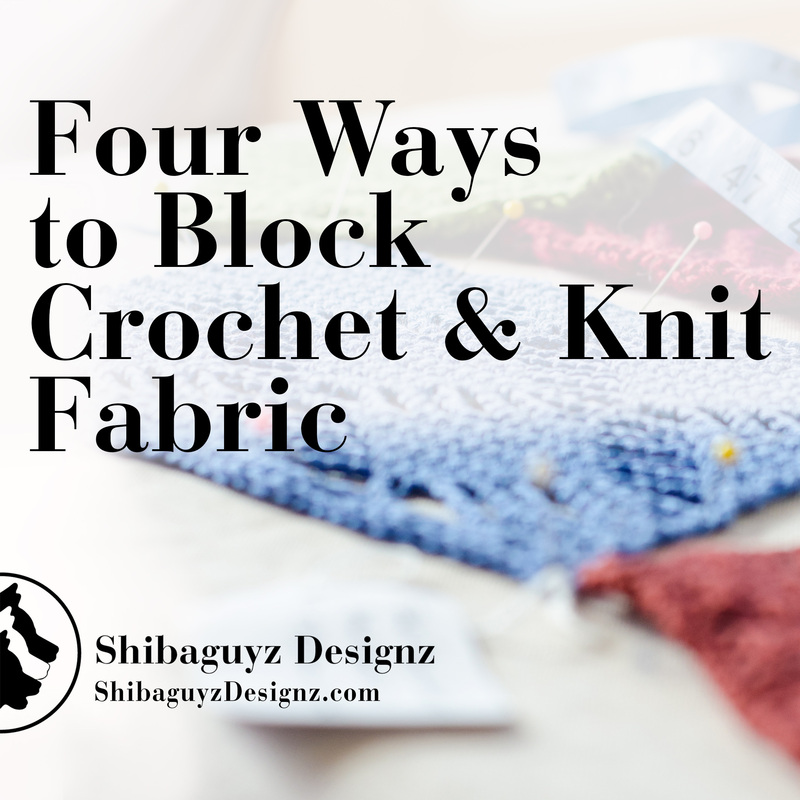 |
Introducing the first pattern in the Shibaguyz Designz Indie Maker pattern line.
Ever since we have started creating crochet and knit patterns, folks have been asking us:
"Can I sell the finished item from your patterns?"
| Generally, the answer is pretty simple. Since most of our published patterns have been sold to other publishers, we don't own the rights to those patterns and it is up to the individual publisher. In most cases, publishers indicate that patterns printed in their publications or online sites are for personal use only and not for manufacture or production of the finished product. |  |

Three Ways To Make the Single Crochet 2 Together Decrease (sc2tog)
Single Crochet 2 Together (sc2tog) Decrease
| What is it? The instruction for Single Crochet 2 Together, also written as (sc2tog), is used to decrease the number of stitches made in a row by one stitch. One stitch is made in place of two stitches and is generally for the purpose of shaping but can also be used to make different lace paterns. | 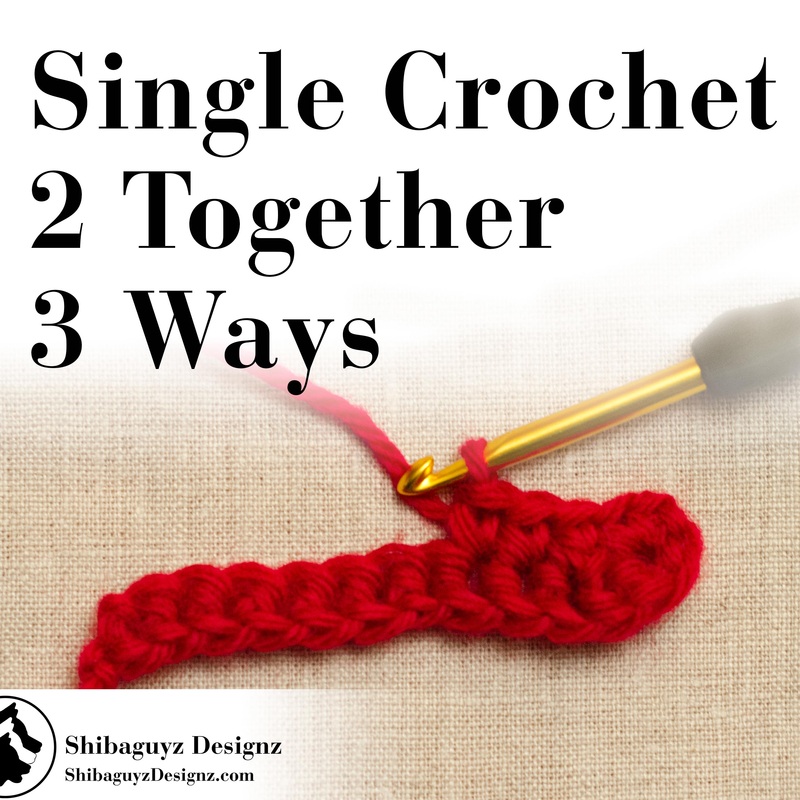 |
Trying to think of something special to make for THAT guy? We have a few suggestions for you.
| If you maintain a website of any sort and have analytics software hooked up to it, you know there is a section in that analysis that tells you what words someone put into a search engine that lead them to your site. We see the usual search terms like… | 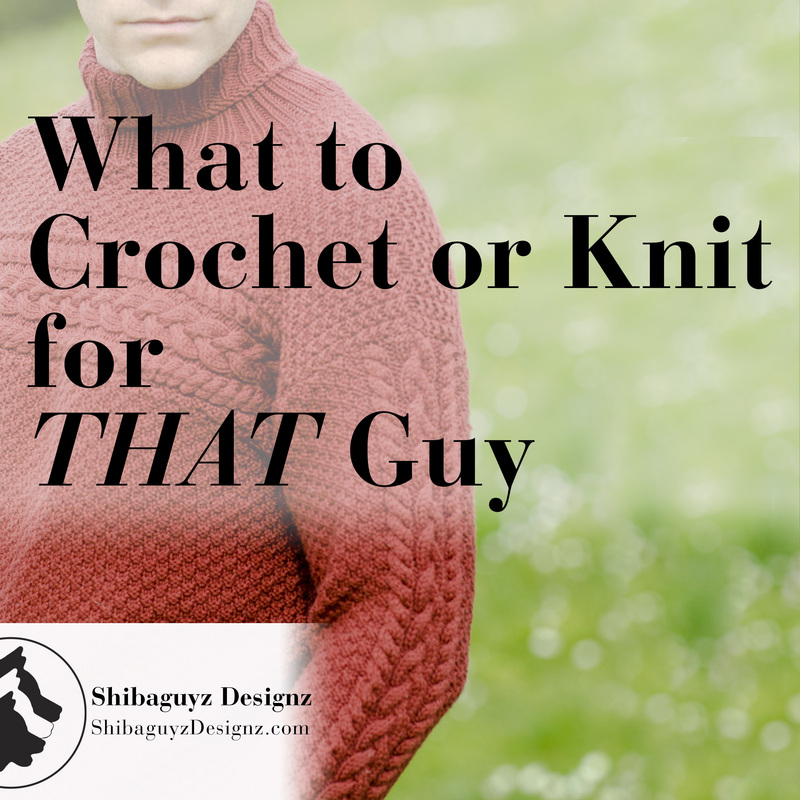 |

Answers To Your Top 3 Questions About the Technique Tuesday Crochet & Knitting Tutorials
| We've been going strong for a few months now with our Technique Tuesday crochet and knitting tutorials and, naturally, y'all have had some questions. Most of the questions have been answerable via a quick email but a few others have stood out as needing a little more attention. In the interest of helping Build Your Skillz, we've picked the three questions asked most often or that provided the best opportunity for teaching a more specific detail of our tutorials. Here is our first ever, Knit & Crochet Q&A! | 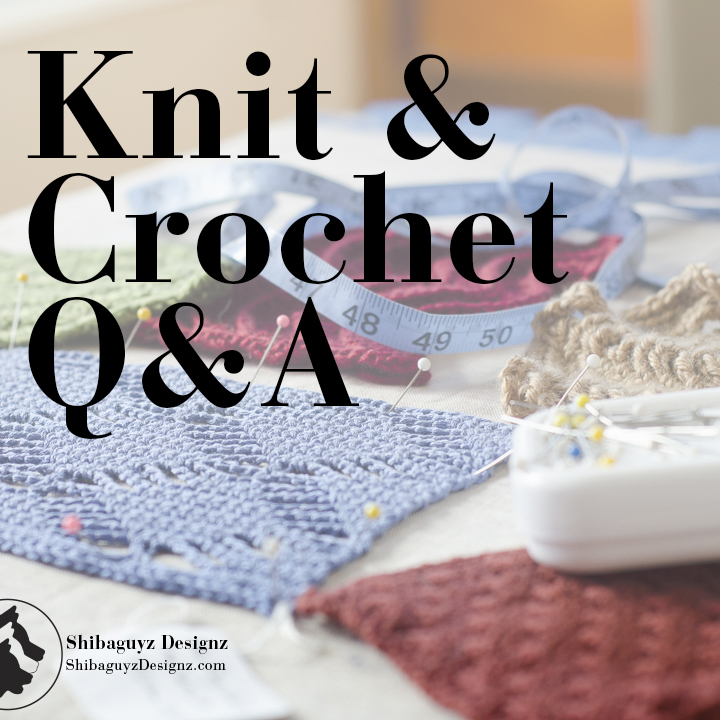 |

An Introduction to How To Work the Intarsia Crochet Colorwork Technique
Intarsia Crochet
| What is it? Here's the definition you'll find via the folks at Merriam-Webster.com: Intarsia in•tar•sia \in-ˈtär-sē-ə\ Definition 1 : a mosaic usually of wood fitted into a support; also : the art or process of making such a mosaic 2 : a colored design knitted on both sides of a fabric Origin German, modification of Italian intarsio First Known Use: 1867 "Intarsia." Merriam-Webster.com. Merriam-Webster, n.d. Web. 11 Nov. 2014. <http://www.merriam-webster.com/dictionary/intarsia>. | 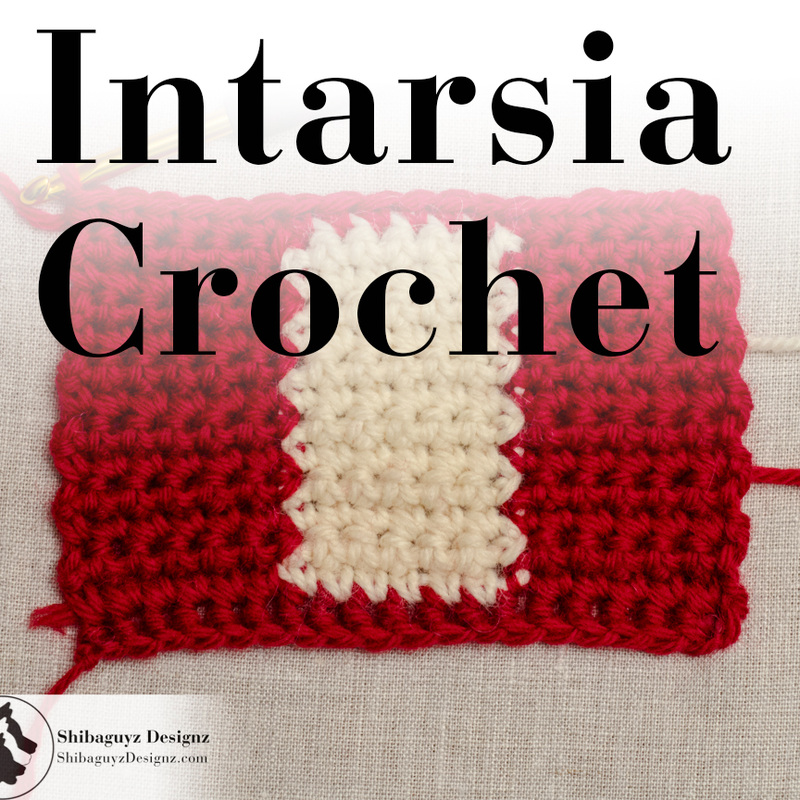 |
How To Make the Adjustable Ring for Working Crochet In the Round
Adjustable Ring for Working Crochet In the Round
| What is it? The Adjustable Ring is a technique for starting any project where you will be working crochet in the round. This same technique has also been called Adjustable Loop, Magic Loop, Magic Ring, and probably has several other monikers that we just haven't run across yet. Regardless of the name, the technique is the same in that it provides a Ring or Loop as a base that you then work your first round of stitches into so you can then proceed to crochet in the round. Please note that at this point we have shown great restraint by not making even one reference to one ring ruling them all. Not one… just wanted to point that out… | 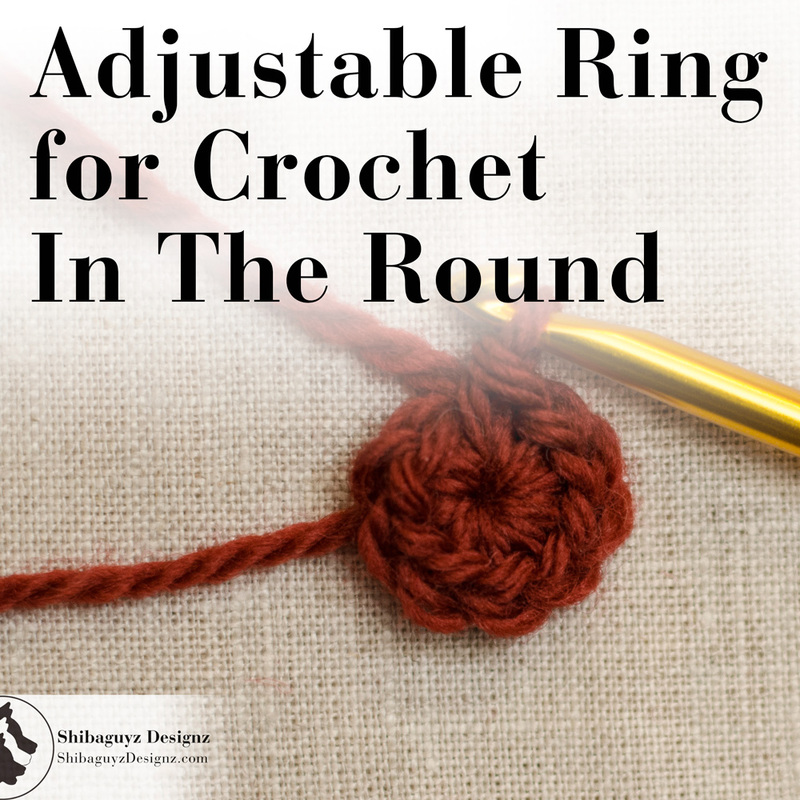 |
How To Make Reversible Horizontal Back Loop Crochet Ribbing

| Technique Reversible Horizontal Back Loop Crochet Ribbing | 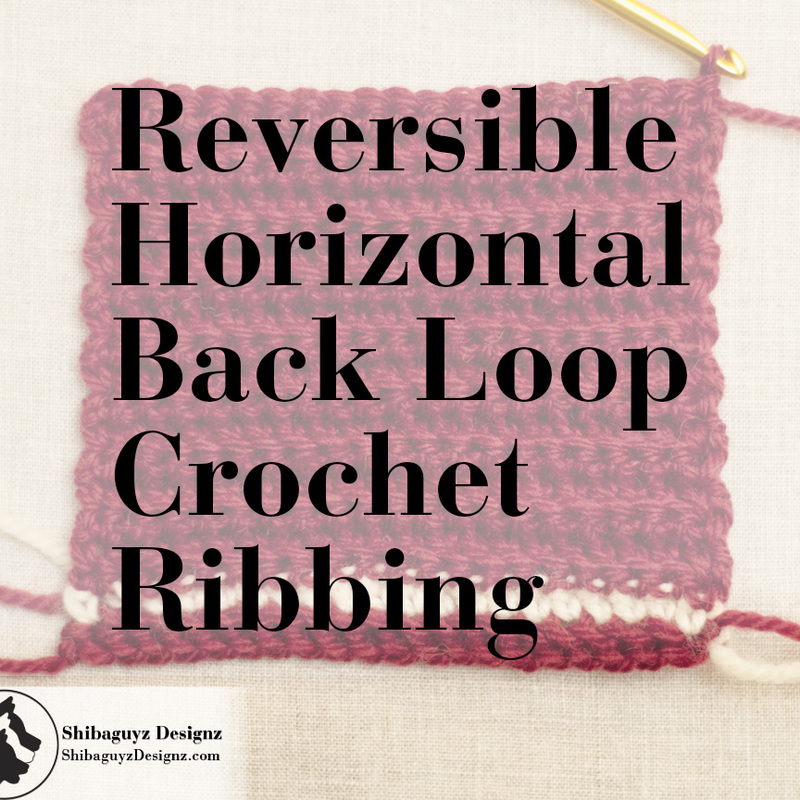 |
Reversible Horizontal Back Loop Crochet Ribbing is the only non-post stitch technique for making Crochet Ribbing.
Reversible Horizontal Back Loop Crochet Ribbing looks the same from both sides and is constructed horizontally by working ONLY in the Back Loops of the crochet stitches of each row.
As the name indicates, Reversible Horizontal Back Loop Crochet Ribbing is made horizontally which means the wales (the raised ridges) and the troughs (the contrasting lower lines) are created by working from side to side in relation to the way we normally see ribbing – in vertical lines.
The Reversible Horizontal Back Loop Crochet Ribbing technique for making crochet ribbing is very different from the previous methods we have covered here for making crochet ribbing. Reversible Horizontal Back Loop Crochet Ribbing is made by working every row of stitches in the Back Loops ONLY of the previous row of crochet stitches. Working in the Back Loop only of the stitches leaves the front loops standing out against the surface of the crochet fabric with makes the lines of wales needed to create ribbing.
While we have used Slip Stitch, Single Crochet, and Half Double Crochet stitches for making Reversible Horizontal Back Loop Crochet Ribbing, today we will be demonstrating with Single Crochet stitches. For your first attempts, Single Crochet Through the Back Loop (sc tbl) will give you the best results. That said… DEFINITELY try Half Double Crochet Through the Back Loop (hdc tbl) then try Slip Stitch Through the Back Loop (sl st tbl). You will love both results although, sl st tbl does take a little practice and some patience to master… maybe we'll cover that one in a post all by itself… later…
Technique Tuesday Moved For This Week Only
Fear not! We're only moving Technique Tuesday this one time this one week. We'll be back on Tuesday next week like usual and all will be right with the world.
As a consolation prize, here is a sneak peak of Designer Crochet (that new book of crochet patterns we have been editing) from our publisher's website. Our editor, Connie Santisteban, gives you a brief description of the crochet patterns in Designer Crochet and shares exclusive sneak peek photos AND there is a preorder link with a FAB preorder price for y'all. WOOHOO!! Click the link below to be whisked away to the Lark Publishing blog and see this FAB sneak peek and preorder link.
Sneak Peek of Designer Crochet by Shannon Mullett-Bowlsby of Shibaguyz Designz
Oh yeah… you can still get your Technique Tuesday fix by clicking on the Tutorials category over there in the right-hand column of our page. To make it even easier, here's a direct link:
Shibaguyz Designz Tutorials Category
Thanks for stopping by! See y'all back here on Thursday for Technique Tuesday… ummm… Technique Thursday? How about Temporary Technique Thursday?? Anyway… see you on Thursday. And enjoy the exclusive sneak peek of Designer Crochet!
Stitch On!
S&J
Come look us up on Facebook, Twitter, and Pinterest by clicking on one of these icons.
How To Make Reversible Horizontal Post Stitch Crochet Ribbing

| Technique Reversible Horizontal Post Stitch Crochet Ribbing So far in our Technique Tuesday journey exploring Crochet Ribbing we have covered two of the four types of Crochet Ribbing: Reversible Vertical Post Stitch Crochet Ribbing and One-Sided Vertical Post Stitch Crochet Ribbing. As the names indicate, both of these methods are made vertically using Post Stitches. Today, we are shifting perspectives a bit and going sideways… (oh… don't worry… the fourth kind of Crochet Ribbing, Horizontal tbl Crochet Ribbing, is coming soon… stay tuned!) | 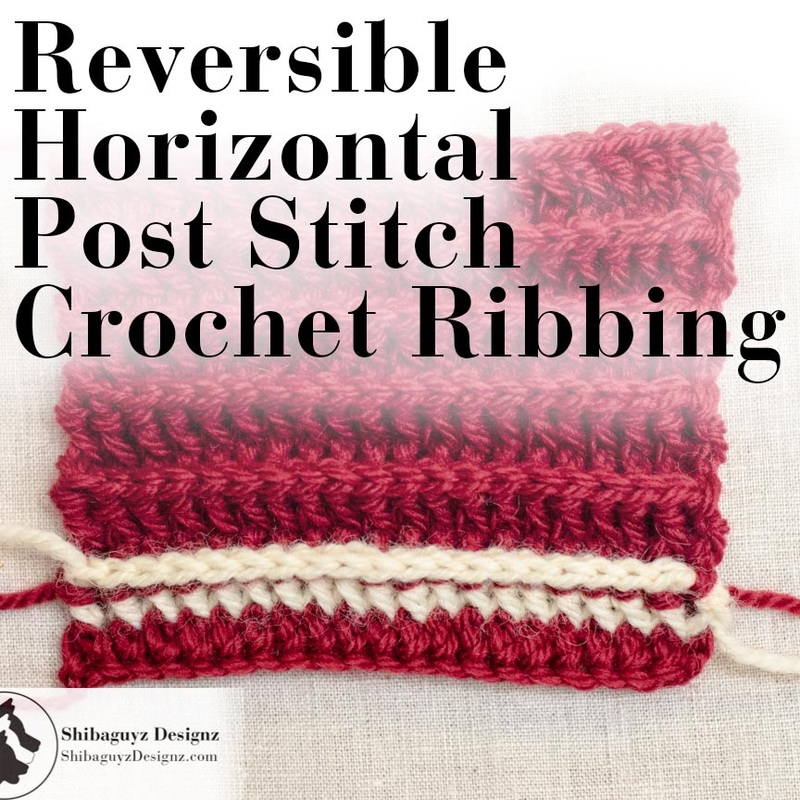 |
How To Make One-Sided Vertical Post Stitch Crochet Ribbing

| Technique One-Sided Vertical Post Stitch Crochet Ribbing | 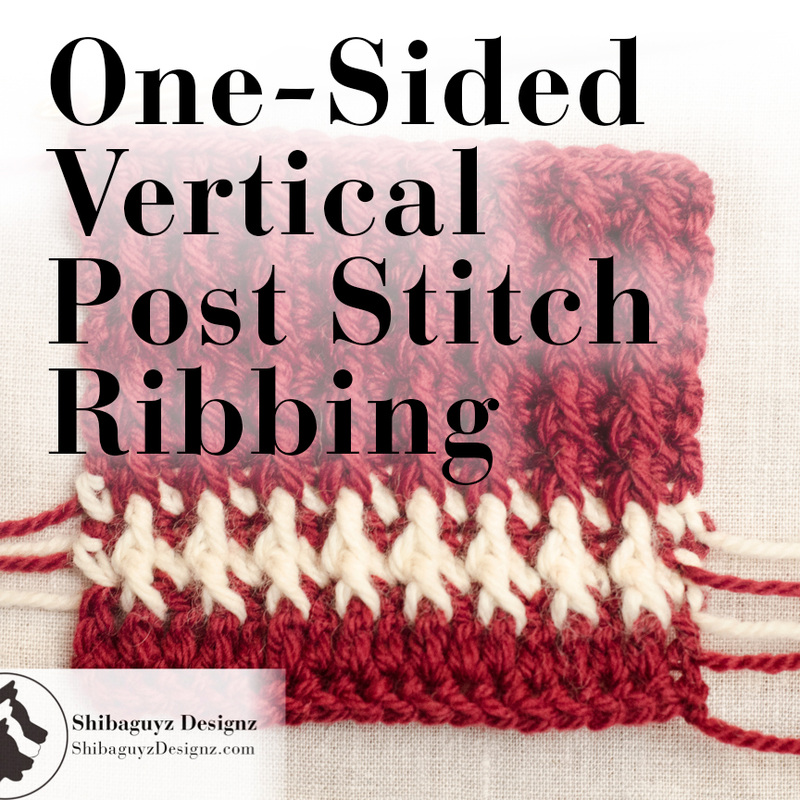 |
We started our discussion of crochet ribbing last week with a quick definition of ribbing. Simply put, Ribbing is a series of raised ridges – called wales – and contrasting low troughs.
While there are a number of ways to create combinations of wales and troughs using crochet stitches, over the course of a few posts, we will be dealing with four main methods of creating crochet ribbing:
Reversible Vertical Post Stitch Ribbing – the technique discussed in last week's post
One-Sided Vertical Post Stitch Ribbing – our topic today!
Horizontal Post Stitch Ribbing – future post
Horizontal tbl Ribbing – future post… stay tuned!
A quick reminder here that post stitches are worked around the post of a crochet stitch resulting in a stitch that is raised to the front or the back of our working row depending on whether we work a Front Post Crochet Stitch or a Back Post Crochet Stitch.
How Our Crochet Community Can Give Back one person at a time
| As the night temperatures dip lower, we find ourselves digging into the cedar chest at the end of the bed for those warm afghans and quilts to cuddle up under. The safety of a roof over our heads, the warmth and protection or our homes and clothing, and the love of friends and family are all things we are thankful for every day. As a matter of fact, the mantra that comes to me throughout the day and that has gotten me through spots when I felt like my world was spinning a little out of control is: I am Safe, Warm, and Loved. | 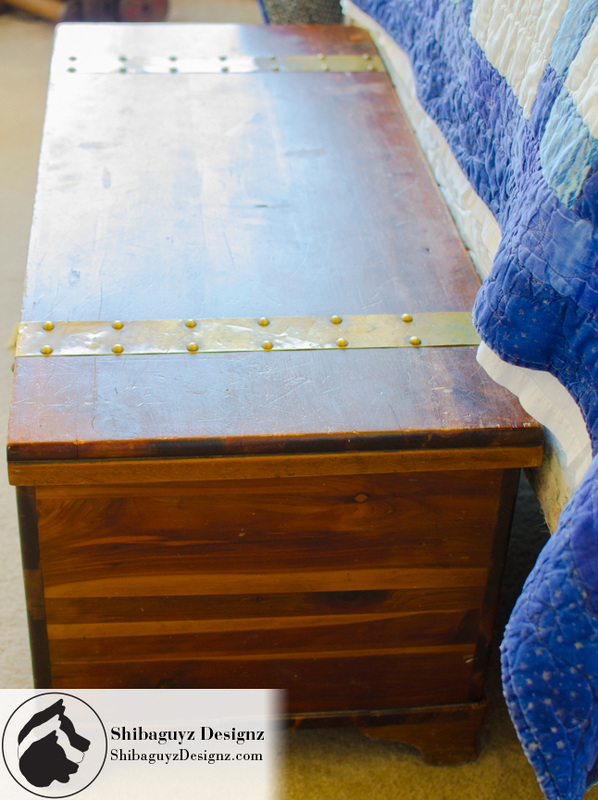 |
How to make Reversible Vertical Post Stitch Crochet Ribbing

| Technique Reversible Vertical Post Stitch Crochet Ribbing | 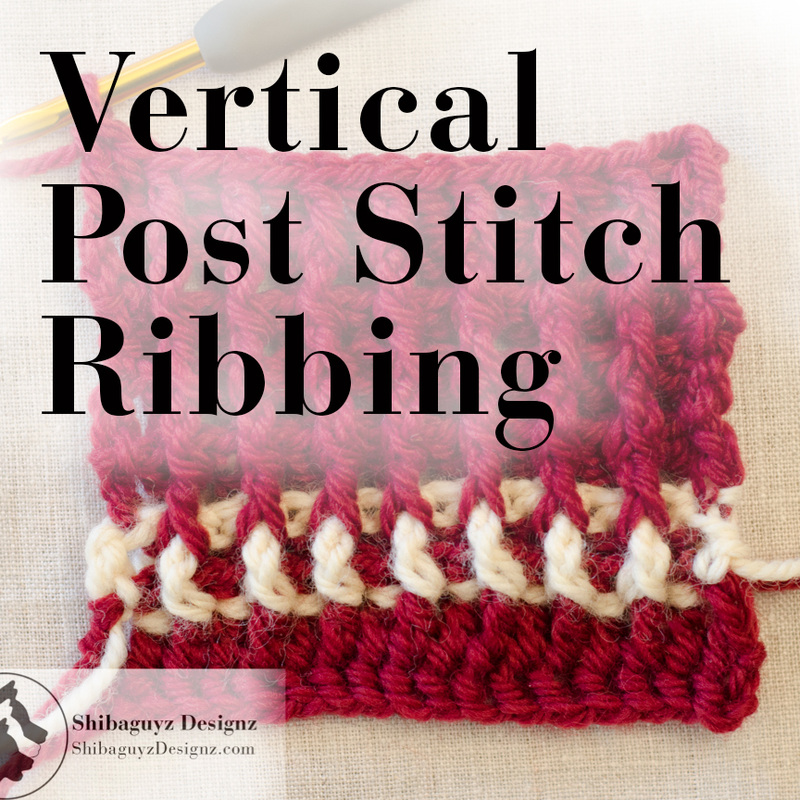 |
First, let's give a quick definition of ribbing. Simply put, Ribbing is a series of raised ridges – called wales – and contrasting low troughs.
That said, there are a number of ways to create combinations of wales and troughs using crochet stitches. In fact, we have:
Reversible Vertical Post Stitch Crochet Ribbing
One-Sided Vertical Post Stitch Crochet Ribbing
Horizontal Post Stitch Crochet Ribbing
Horizontal tbl Crochet Ribbing
We will be covering ALL of these in future Technique Tuesday articles but, for today's Reversible Vertical Post Stitch Crochet Ribbing tutorial, we are creating a reversible vertical post stitch ribbing with wales on both sides of the fabric through the use alternating Front Post Double Crochet Stitches and Back Post Double Crochet Stitches.
Remember: Post stitches are worked around the post of a crochet stitch creating a stitch that is raised to the front or the back of our working row depending on whether we work a Front Post Crochet Stitch or a Back Post Crochet Stitch.
Reversible Vertical Post Stitch Crochet Ribbing creates a series of wales and troughs that are made vertically in relation to the working direction of our crochet fabric. That is, we start at the top or bottom of the fabric and create wales and troughs by working rows of alternating Front and Back Post Stitches. These alternating Front Post Crochet Stitches and Back Post Crochet Stitches build off of one another in successive rows creating the vertical wales and troughs – Ribbing!
For a quick review of crochet post stitches check out these tutorials:
Front Post Double Crochet Stitch Tutorial
Back Post Double Crochet Stitch Tutorial
then come right back! We'll wait…
Okay… back now? Good… let's carry on…
Author
Shannon and Jason
 RSS Feed


Archives
September 2022
June 2022
February 2022
June 2021
November 2020
September 2020
June 2020
May 2020
April 2020
March 2020
January 2020
February 2019
December 2018
November 2018
August 2018
July 2018
May 2018
April 2018
March 2018
February 2018
January 2018
December 2017
November 2017
October 2017
September 2017
August 2017
July 2017
March 2017
February 2017
January 2017
November 2016
October 2016
September 2016
July 2016
June 2016
May 2016
April 2016
March 2016
February 2016
November 2015
August 2015
July 2015
June 2015
May 2015
April 2015
March 2015
February 2015
January 2015
December 2014
November 2014
October 2014
September 2014
August 2014
July 2014
April 2014
March 2014
January 2014


Categories
All
Afghan
Aurifil
Books
Boro
Camp STITCHES
Classes
Cleaning
Clip On
Clover
Cowl
Craft
Craftsy
CraftU Classes
Crochet
Crochet Geometry
Daylight
Daylight Company
Design
Designer Crochet
Digital Download
Donate
Download
English Paper Piecing
Event
Free
Giveaway
Hand Cream
Hooks
Inspirations
International Crochet Month
Interview
Interweave
Knit
Knitting
Lamp
Marcus
Marcus Fabrics
Men
Menswear
National Craft Month
National Crochet Month
Needles
Online Classes
Ottlite
Pattern
Patterns
Paypal
Photography
Podcast
Prize
Product Review
Project
Quilt
Quilting
Recipe
Rotary Cutter
Sashiko
Season Of Giving Away
Sew Expo
Sewing
Shibaguyz
Shibaguyz Designz
Shibaguyz Designz Indie Maker Pattern
Shibaguyz LIVE
Shibaguyz Photography
Shop
Soak
STITCHES Events
Sweater
Thread
Tool School
Tools Of The Trade
Travel Lamp
Tutorials
Vogue Knitting LIVE
Walkthrough
Warm Up America
Wash
Weaving
Women
Yarn
Zoom Loom


